Adobe After Effects 113
『After Effects』では直接GIFを書き出すことができません…
標準機能だけで書き出すには『Photoshop』や『Adobe Media Encoder』を経由する必要があるのでかなりめんどくさいです。
かといって『Gif Gun』などの有料ツールを買うお金もない…
そんな悩みをもってる方にピッタリなスクリプトが『AEJuice Export GIF』になります。
『AEJuice Export GIF』を使えば
『After Effects』で作った映像から簡単にGIFを書き出すことが出来ます。
![AEJuice Export GIF 書き出し 使い方 方法](https://nextist.net/wp-content/uploads/ae-juice-gif-usage.gif)
今回はそんな便利な無料スクリプト『AEJuice Export GIF』について徹底解説していきます。
最近はTikTokやTwitterなどでGIFを使った広告案件も増えてきてるので
これから使うGIFを機会も増えるかもしれませんね。
それではいってみましょう!!
*ワンクリックでGIFを書き出せる無料スクリプト『AEJuice Export GIF』の機能や使い方を徹底解説した動画はこちら⬇︎⬇︎
目次
『AEJuice Export GIF』とはどんなスクリプトなのか!?
『AEJuice Export GIF』は『After Effects』で制作した映像をGIF形式(.gif)で書き出すことができるスクリプトになります。
GIFとはJPEGやPNGみたいな画像形式の一種で
簡単なアニメーションを表示することができる画像ファイルのフォーマットになります。
簡単にいうと 動く画像 みたいなもんです。
![After Effects 無料 スクリプト RanAni 使い方 設定 Effets Control Opacity Random Late](https://nextist.net/wp-content/uploads/adobe-after-effects-free-script-ranani-effects-control-opacity-random-late.gif)
![NEXTist](https://nextist.net/wp-content/uploads/2021/08/nextist-icon.png)
最近はどのSNSも『TikTok』に影響されてショート動画を押してきてるので、手軽にアップできるGIFの需要はかなり伸びてきてますd(゚∀゚)
『AEJuice Export GIF』は『AEJuice』が無料で提供しているスクリプトの1つで
『After Effects』に無料で追加できるエクステンション『AEJuice Pack Manager』をインストールすると
複数のプラグインと同時に自動でインストールされます。
![AEJuice Export GIF AEJuice Pack Manager インストール 方法](https://nextist.net/wp-content/uploads/ae-juice-export-gif-after-effects-install.jpg)
『After Effects』で編集した動画はGIF形式で書き出すことができないので…
書き出したい場合には何か別の外部ツールを使う必要があります。
『After Effects』でGIFが書き出せる『GifGun』という人気のスクリプトがありますが、価格が4,000円くらいします…
『AEJuice Export GIF』は無料で使えますし、必要な機能も無料とは思えないくらい揃っているので
『GifGun』みたいな有料ツールを買う必要は一切ありません。
『AEJuice』では以前同等の機能を持った『AEJuice GIF』というスクリプトを無料で提供していましたが
古いコードで作られたスクリプトなので何かと問題があったらしく…
新しく一からコードを書き直して『AEJuice Export GIF』 ができたそうです。
前モデルの『AEJuice GIF』と『AEJuice Export GIF』を比較するとこんな感じ⬇︎⬇︎
![AEJuice GIF 操作パネル](https://nextist.net/wp-content/uploads/ae-juice-gif-tool-panel.png)
![AEJuice Export GIF 操作パネル](https://nextist.net/wp-content/uploads/ae-juice-export-gif-tool-panel.png)
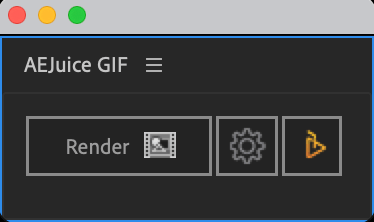
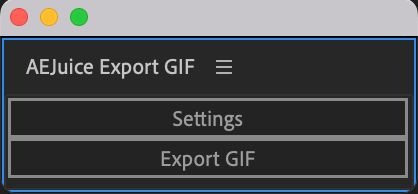
設定画面は『AEJuice Export GIF』の方が余計な機能が削ぎ落とされて、かなり使いやすくなってます。
![AEJuice GIF 設定 機能](https://nextist.net/wp-content/uploads/ae-juice-gif-setting.png)
![AEJuice Export GIF 設定 機能](https://nextist.net/wp-content/uploads/ae-juice-export-gif-setting.png)
設定画面は一見難しそうに見えますが
一度設定してしまえばあとはワンボタンで書き出すだけなので簡単です。
![AE Juice Export GIF 書き出し 使い方 方法](https://nextist.net/wp-content/uploads/ae-juice-gif-usage.gif)
以前無料で使うことでできた『AEJuice GIF』は
5,000円ほどで販売されていたスクリプトを『AEJuice』が買収して無料提供していたので
『AEJuice GIF』を改善して作られた『AEJuice Export GIF』には、それ相応の価値があります。
無料で使えますし、ぜひインストールして使ってみてください。
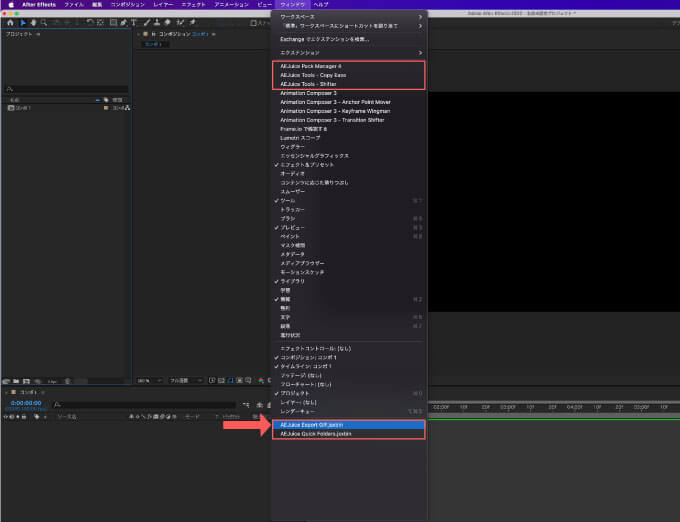
『AEJuice Export GIF』のインストール方法
『AEJuice Export GIF』は『AEJuice Pack Manager(無料)』をインストールすれば使うことができます。
『AEJuice Pack Manager(無料)』をインストールすれば
『AEJuice Export GIF』以外にも930種類以上のプリセットと複数のプラグインを無料で使うことができます⬇︎⬇︎
![After Effects AEJuice 無料 ツール スクリプト プラグイン](https://nextist.net/wp-content/uploads/ae-juice-free-tool.png)
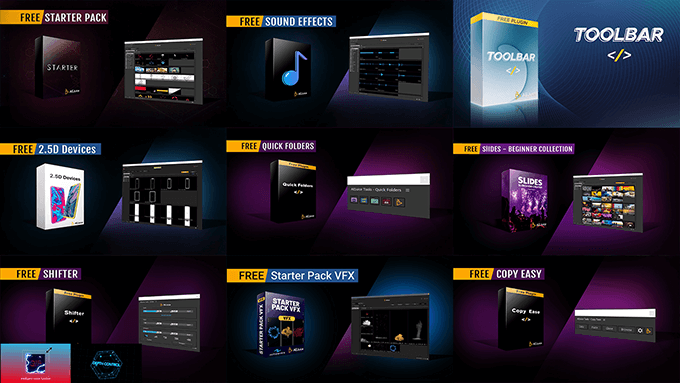
- Starter Pack ▶︎ 100種類以上のアニメーションプリセットパック
- Sound Effects Free ▶︎ モーショングラフィックスに使える267種類の効果音
- Motion Cafe UI HUD Package ▶︎ 高品質なHUDアニメーションプリセットパック
- 2.5D Devices Collection ▶︎ 2.5D(疑似 3D)モバイルデバイスのプリセットパック
- Quick Folders ▶︎ プロジェクト、スクリプト、プラグイン、フォルダーなどワンクリックでアクセスできる
- Copy Ease ▶︎ イージング(カーブ)情報をコピー&ペースト、12種類のイージングプリセット
- Slides – Beginner Collection ▶︎ 2 分以内にスライドショーを作成できる
- Shifter ▶︎ 複数のレイヤーをまとめて自動再配置することができる
- 【NEW!!】 AEJuice Toolbar ▶︎ ボタンに機能を割り当ててツールバーを作成することができる
- 【NEW!!】Star Pack VFX ▶︎ 10種類のVFXプリセット
『AEJuice Pack Manager』のインストール手順は以下の記事で解説してます。
『AEJuice Pack Manager』で使える無料プラグインのインストール方法を解説した記事はこちら⬇︎⬇︎
『AEJuice Export GIF』の機能や使い方
『AEJuice Export GIF』の機能や使い方を解説していきます。
GIFを書き出す方法は『Export GIF』ボタンを押すだけなので簡単ですが
![AE Juice Export GIF 書き出し 使い方 方法](https://nextist.net/wp-content/uploads/ae-juice-gif-usage.gif)
最初に書き出し設定を行なっておく必要があります。
設定画面はツールパネルの『Setting』を押して開いてください。
![AEJuice Export GIF Setting 設定 機能](https://nextist.net/wp-content/uploads/ae-juice-export-gif-setting-button.jpg)
![AEJuice Export GIF 設定 機能](https://nextist.net/wp-content/uploads/ae-juice-export-gif-setting.png)
![NEXTist](https://nextist.net/wp-content/uploads/2021/08/nextist-icon.png)
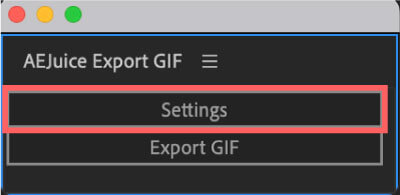
最初に書き出し設定さえしてしまえば、あとは書き出しボタンを押すだけですd(゚∀゚)
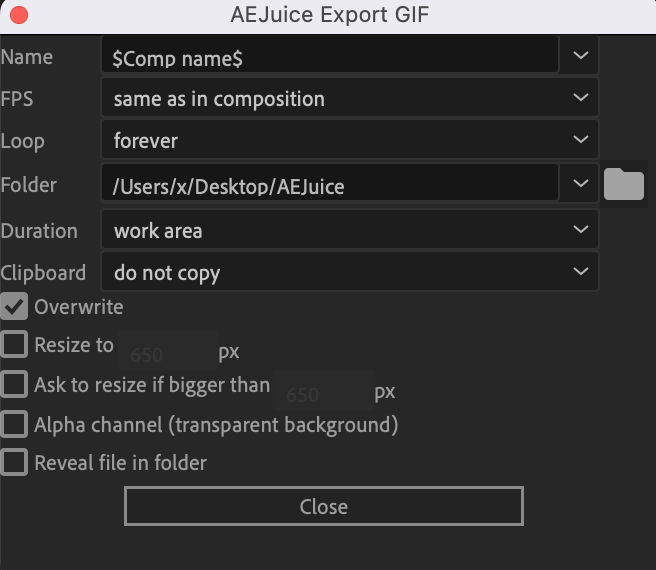
『AEJuice Export GIF』で設定できる項目は以下の11項目になります⬇︎⬇︎
- Name ▶︎ 書き出すファイル(.gif)の名前
- FPS ▶︎ フレームレート(fps)の設定
- Loop ▶︎ 繰り返し再生するか否かの設定
- Folder ▶︎ 保存場所の設定
- Duration ▶︎ GIFとして書き出す範囲を設定
- Clipboard ▶︎ クリップボードに書き出したGIFのコピーを残すか否かの設定
- Overwrite ▶︎ 同じファイル名は上書きするか否かの設定
- Resize to ▶︎ 毎回指定したサイズ(横幅 px)にリサイズする設定
- Ask to resize if bigger than ▶︎ エクスポートする際に毎回リサイズするか尋ねる設定
- Alpha channel(transparent background)▶︎ 背景を透明=アルファチャンネルをつけるか否かの設定
- Reveal file in folder ▶︎ 書き出し後にファイルを表示するか否かの設定
![NEXTist](https://nextist.net/wp-content/uploads/2021/08/nextist-icon.png)
今から1つずつ画像付きで解説していきます(゚∀゚)
Name
![AEJuice Export GIF Setting Name](https://nextist.net/wp-content/uploads/ae-juice-export-gif-setting-name.jpg)
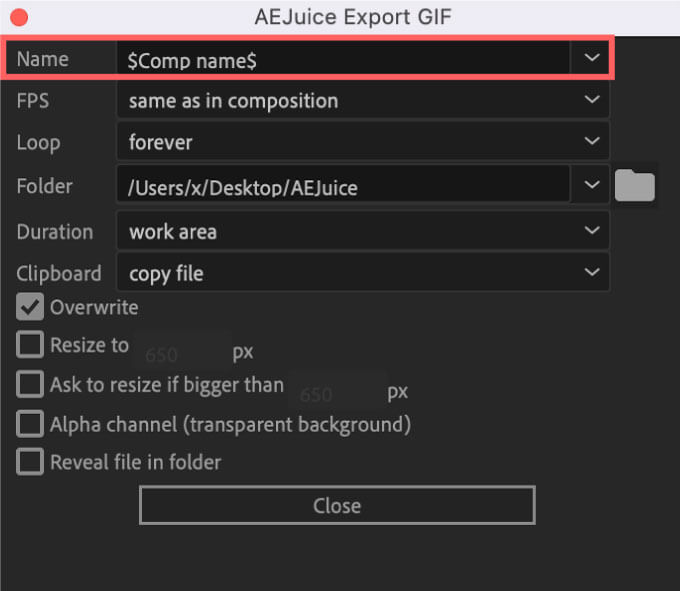
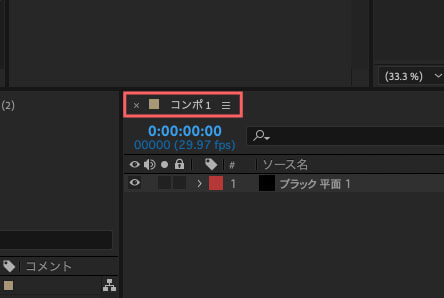
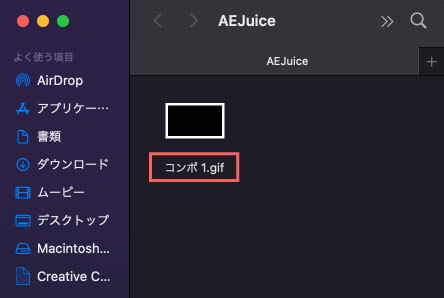
『Name』では書き出すGIFファイルの名前を指定することができます。
デフォルトは『$Comp name$』 で
![AEJuice Export GIF Setting Name](https://nextist.net/wp-content/uploads/ae-juice-export-gif-setting-name.jpg)
コンポジションの名前がそのまま書き出したGIFファイルの名前になるように設定されています。
![AEJuice Export GIF Setting Name 設定 書き出し](https://nextist.net/wp-content/uploads/ae-juice-export-gif-setting-name-composition-1.jpg)
![AEJuice Export GIF Setting Name 設定 書き出し](https://nextist.net/wp-content/uploads/ae-juice-export-gif-setting-composition-name.jpg)
FPS
![AEJuice Export GIF Setting FPS](https://nextist.net/wp-content/uploads/ae-juice-export-gif-setting-fps.jpg)
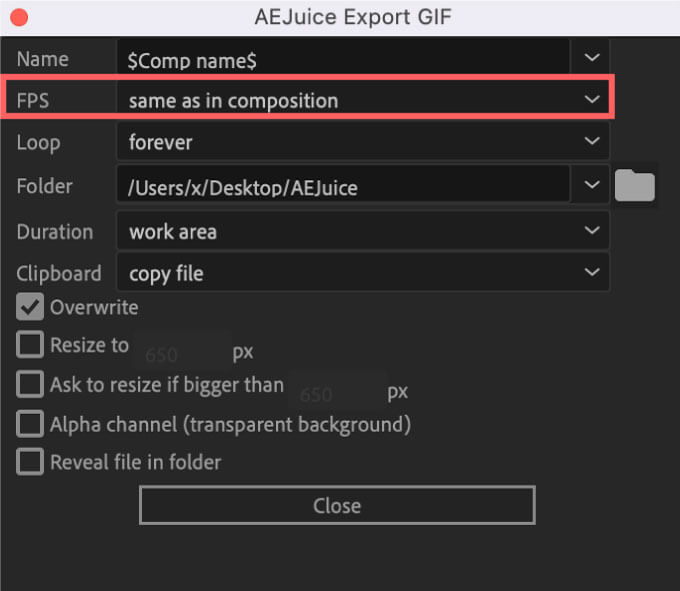
『FPS』設定は書き出すGIFファイルのフレームレート数(.fps)を設定することができます。
デフォルトでは【『same as in composition』=コンポジション設定と同じフレームレート数】に設定されています。
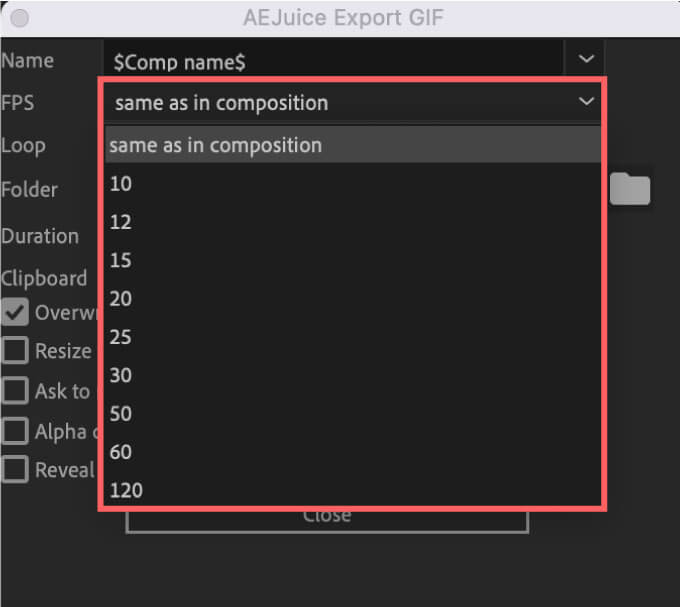
10〜120fpsまで設定することができます。
![AEJuice Export GIF Setting FPS フレームレート fps 設定](https://nextist.net/wp-content/uploads/ae-juice-export-gif-setting-frame-late-fps.jpg)
Loop
![AEJuice Export GIF Setting Loop](https://nextist.net/wp-content/uploads/ae-juice-export-gif-setting-loop.jpg)
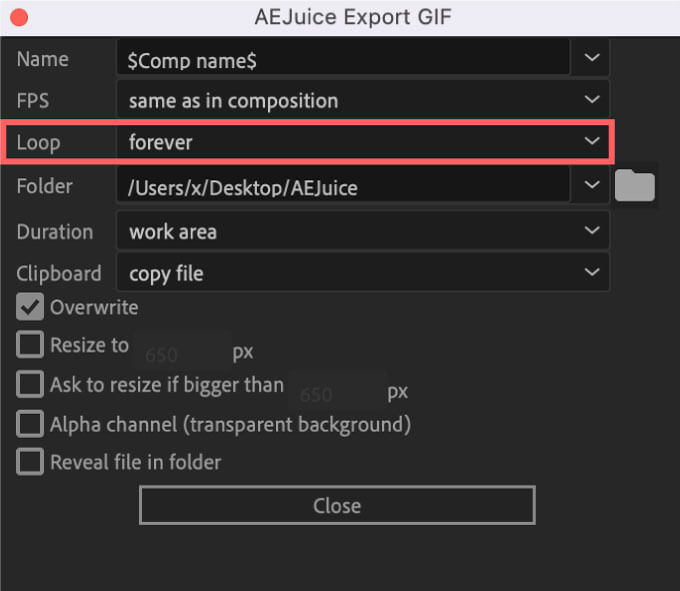
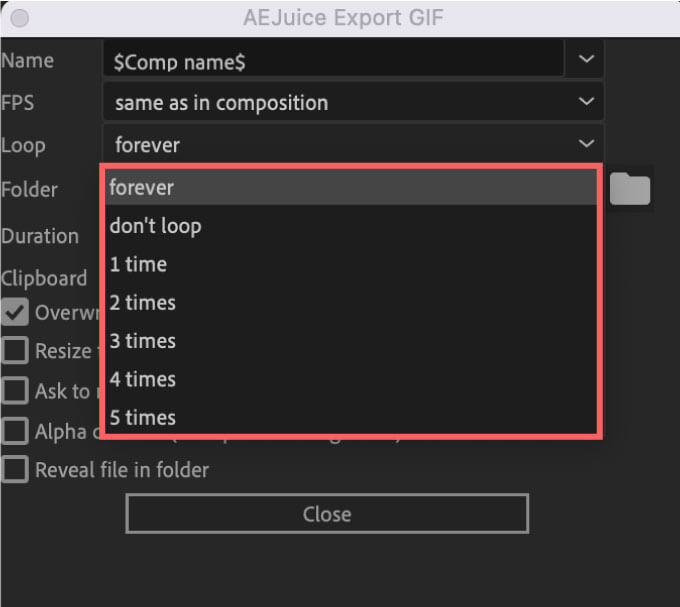
『Loop』では書き出したGIFファイルが繰り返し再生されるか否かを設定することができます。
デフォルトでは繰り返し再生され続ける『forever』になってます。
『don’t loop』▶︎ 繰り返さない
『1 time』▶︎ 一度繰り返す
『2 time』▶︎ 二度繰り返す
『3 time』▶︎ 三度繰り返す
『4 time』▶︎ 四度繰り返す
『5 time』▶︎ 五度繰り返す
![AEJuice Export GIF Setting Loop number of times](https://nextist.net/wp-content/uploads/ae-juice-export-gif-setting-loop-number-of-times.jpg)
Folder
![AEJuice Export GIF Setting Folder](https://nextist.net/wp-content/uploads/ae-juice-export-gif-setting-folder.jpg)
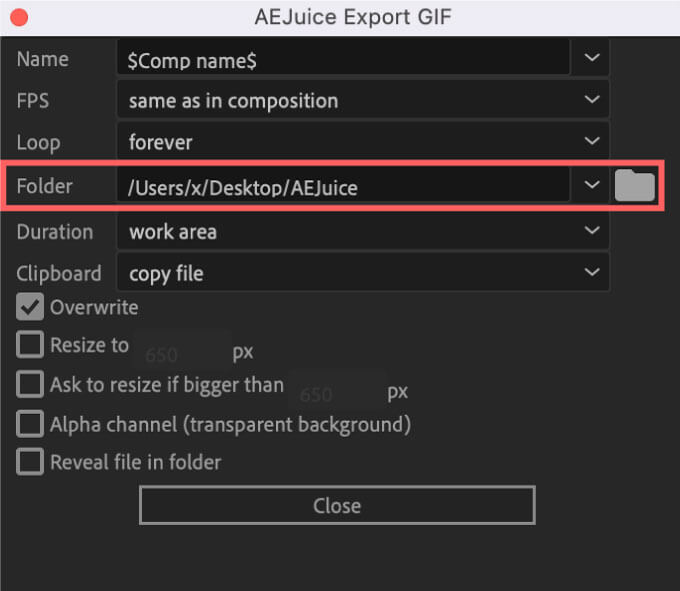
『Folder』は書き出したGIFファイルが入ったフォルダをどこに保存するか設定する項目になります。
![NEXTist](https://nextist.net/wp-content/uploads/2021/08/nextist-icon.png)
書き出したGIFファイルは必ずフォルダに格納された状態でエクスポートされますd( ̄  ̄;)
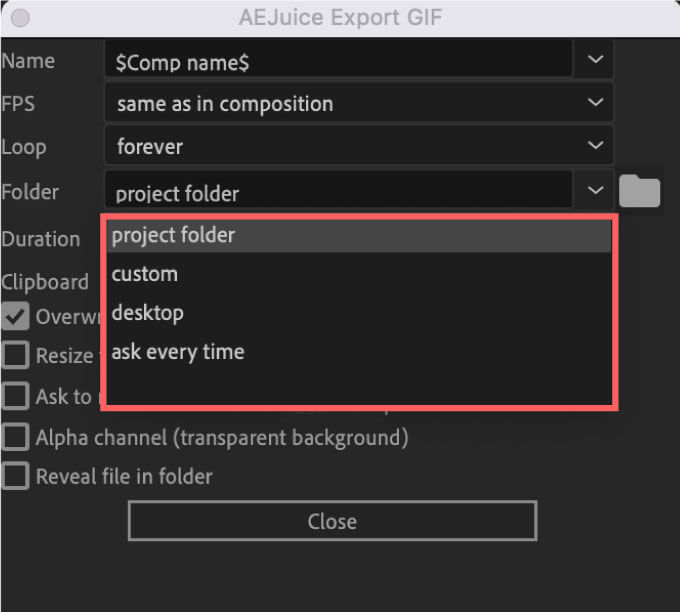
保存先は4つから選択することができます。
project folder ▶︎ AEJuiceのプロジェクトファイルへ保存
custom ▶︎ 任意の場所を設定して保存
desktop ▶︎ デスクトップへ保存
ask every time ▶︎ 書き出す度にどこに保存するか尋ねる
![AEJuice Export GIF Setting folder 設定項目](https://nextist.net/wp-content/uploads/ae-juice-export-gif-setting-folder-tool-panel.jpg)
デフォルトでは『project folder』に設定されていて
上部メニューの移動を開いてoptionを押すと表示されるライブラリから、かなり深いところに『Export』フォルダとして保存されます…
![AEJuice Export GIF Setting フォルダ 保存先 ライブラリ](https://nextist.net/wp-content/uploads/ae-juice-export-gif-setting-folder-save-project-folder.gif)
![AEJuice Export GIF Setting フォルダ 保存先 ライブラリ](https://nextist.net/wp-content/uploads/ae-juice-export-gif-setting-folder-project-folder.jpg)
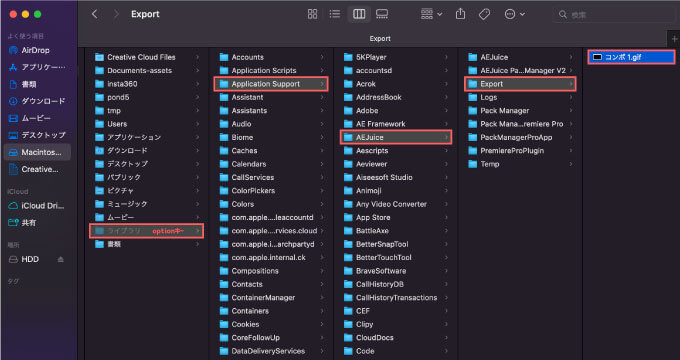
ただし、設定パネルにあるフォルダボタンを押すと、設定している保存先のフォルダを開くことができるで探す必要はありません。
![AEJuice Export GIF Setting folder アイコン 保存先を開く](https://nextist.net/wp-content/uploads/ae-juice-export-gif-setting-folder-icon.jpg)
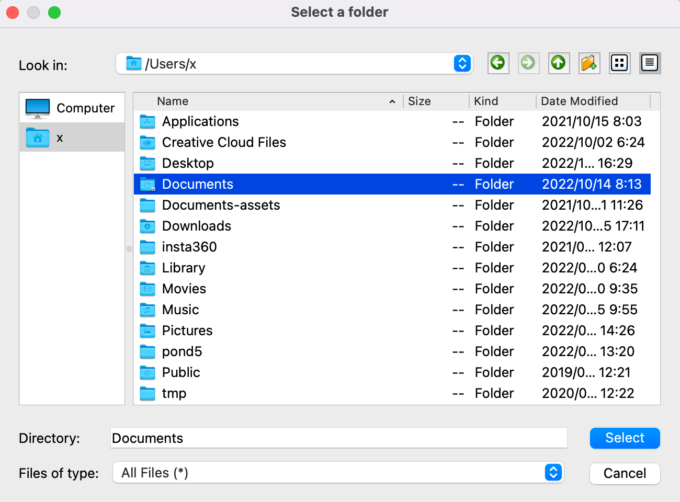
『custom』へ設定すると保存先を任意の場所へ設定できるウィンドウが開きます。
![AEJuice Export GIF Setting folder custom](https://nextist.net/wp-content/uploads/ae-juice-export-gif-setting-folder-custom-e1667288035690.png)
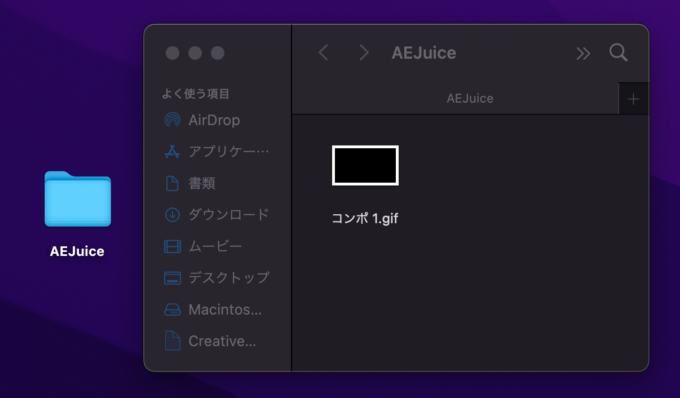
『desktop』設定はデスクトップへ『AEJuice』フォルダが作成され保存されます。
![AEJuice Export GIF Setting フォルダ 保存先](https://nextist.net/wp-content/uploads/ae-juice-export-gif-setting-folder-destination-e1667284814752.png)
『ask every time』設定は書き出す度に保存先をしてするウィンドウが開きます。
![AEJuice Export GIF Setting folder custom](https://nextist.net/wp-content/uploads/ae-juice-export-gif-setting-folder-custom-e1667288035690.png)
Duration
![AEJuice Export GIF Setting Duration](https://nextist.net/wp-content/uploads/ae-juice-export-gif-setting-duration.jpg)
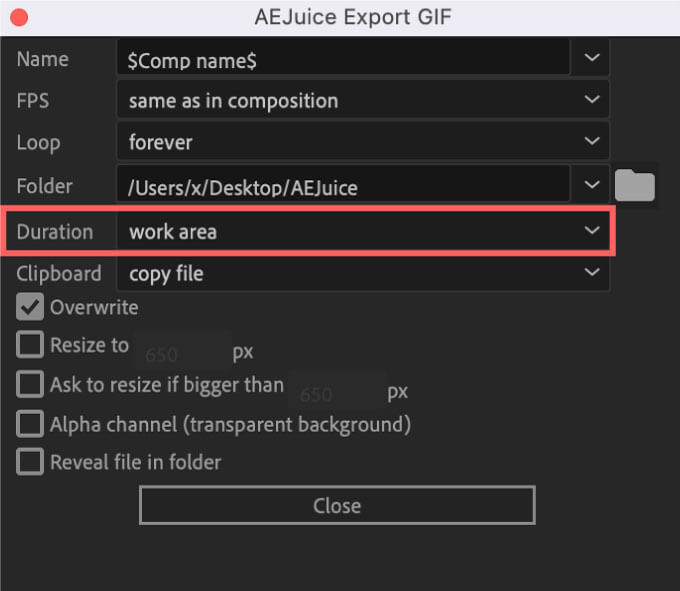
『Duration』ではGIFとして書き出す範囲を設定することができます。
『Duration』は以下の4つの範囲を設定することができます⬇︎⬇︎
work area ▶︎ ワークエリアの範囲を書き出す
composition ▶︎ コンポジションの範囲を書き出す
current time indicator-work area end ▶︎ シークバー(時間インジケーター)からワークエリアのエンドポイントまでを書き出す
current time indicator-composition end ▶︎ シークバー(時間インジケーター)からコンポジションのエンドポイントまでを書き出す
![AEJuice Export GIF Setting Duration 設定項目](https://nextist.net/wp-content/uploads/ae-juice-export-gif-setting-duration-menu.jpg)
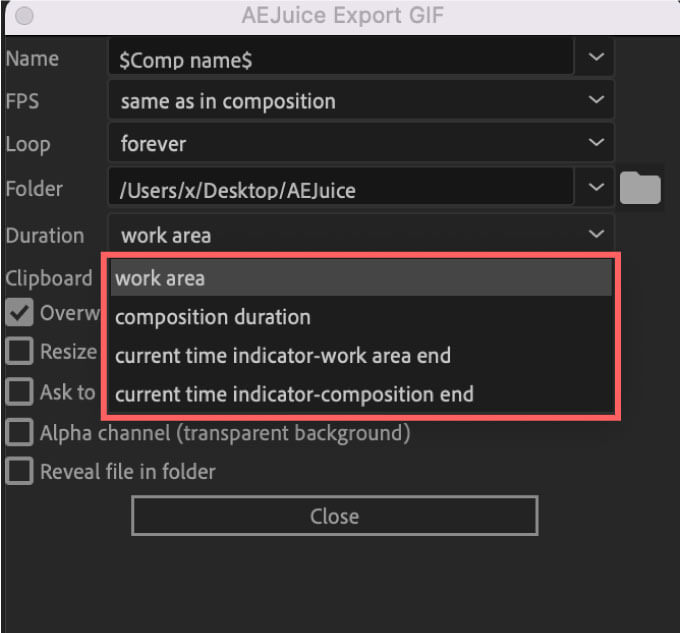
『work area』設定はワークエリアの範囲を書き出すことができます。
![AEJuice Export GIF Setting Duration work area](https://nextist.net/wp-content/uploads/ae-juice-export-gif-setting-duration-work-area.jpg)
『composition duration』設定はコンポジションの範囲を書き出すことができます。
![AEJuice Export GIF Setting Duration Composition](https://nextist.net/wp-content/uploads/ae-juice-export-gif-setting-duration-composition.jpg)
『current time indicator-work area end』設定はシークバー(時間インジケーター)からワークエリアのエンドポイントまでの範囲を書き出すとができます。
![AEJuice Export GIF Setting Duration current time indicator-work area end](https://nextist.net/wp-content/uploads/ae-juice-export-gif-setting-duration-current-time-indicator-work-area-end.jpg)
『current time indicator-composition end』設定はシークバー(時間インジケーター)からコンポジションのエンドポイントまでの範囲を書き出すとができます。
![AEJuice Export GIF Setting Duration current time indicator-composition end](https://nextist.net/wp-content/uploads/ae-juice-export-gif-setting-duration-current-time-indicator-composition-end.jpg)
Clipboard
![AEJuice Export GIF Setting Clipboard](https://nextist.net/wp-content/uploads/ae-juice-export-gif-setting-clipboard.jpg)
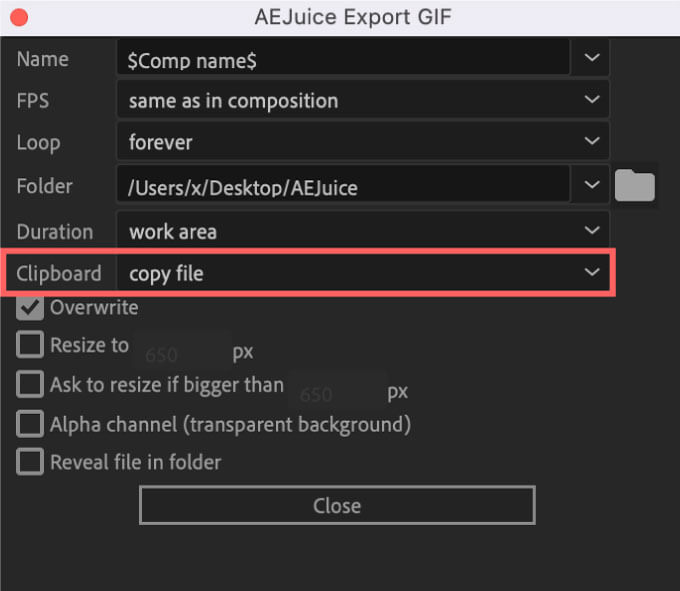
『Clipboard』ではGIFファイルを書き出すと同時にコピーボードに登録することができます。
デフォルトでは『do not copy』に設定されてます。
『do not copy』▶︎ クリップボードに登録しない
『copy file』▶︎ クリップボードに登録する
![AEJuice Export GIF Setting Clipboard](https://nextist.net/wp-content/uploads/ae-juice-export-gif-setting-clipboard-1.jpg)
![NEXTist](https://nextist.net/wp-content/uploads/2021/08/nextist-icon.png)
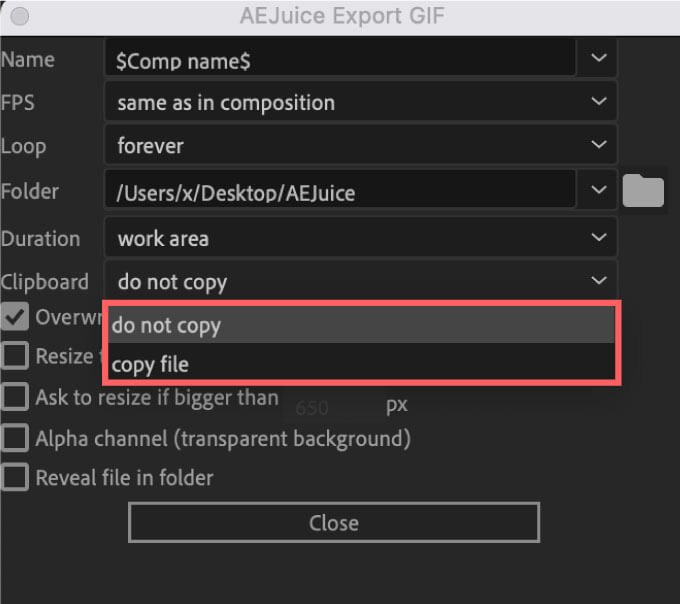
クリップボードに登録されたGIFファイルは Ctrlor Command+ V で貼り付けることができますd(゚∀゚)
Overwrite
![AEJuice Export GIF Setting Overwrite](https://nextist.net/wp-content/uploads/ae-juice-export-gif-setting-overwrite.jpg)
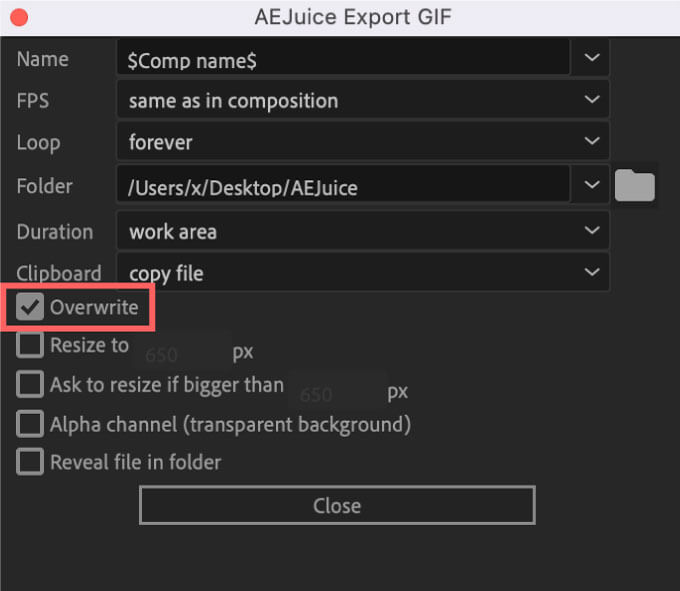
『Overwrite』はチェックを入れると保存フォルダ内に同じ名前のファイルがある場合には上書きされます。
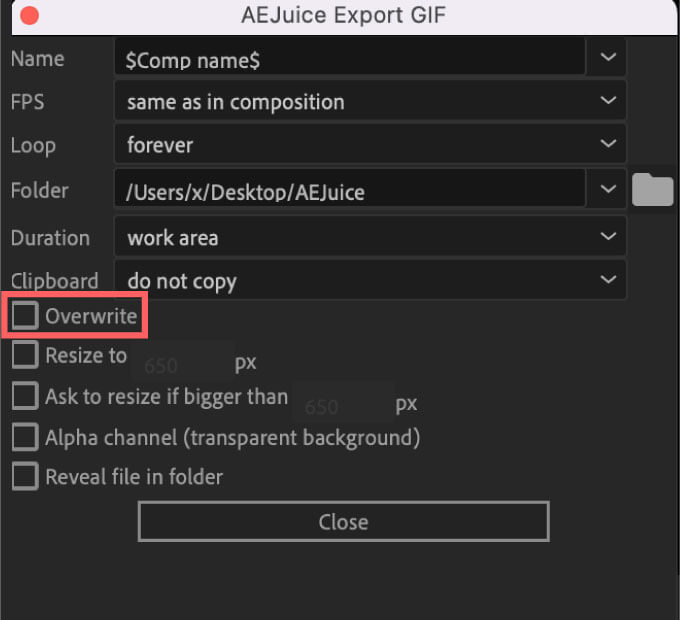
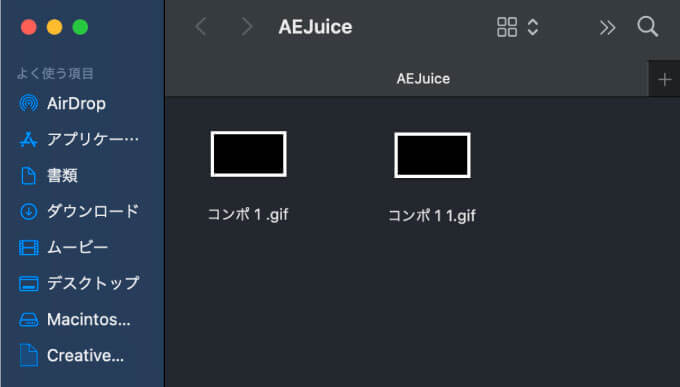
『Overwrite』のチェックを外すと同じ名前でGIFファイルを書き出しても、上書きされずに保存されます。
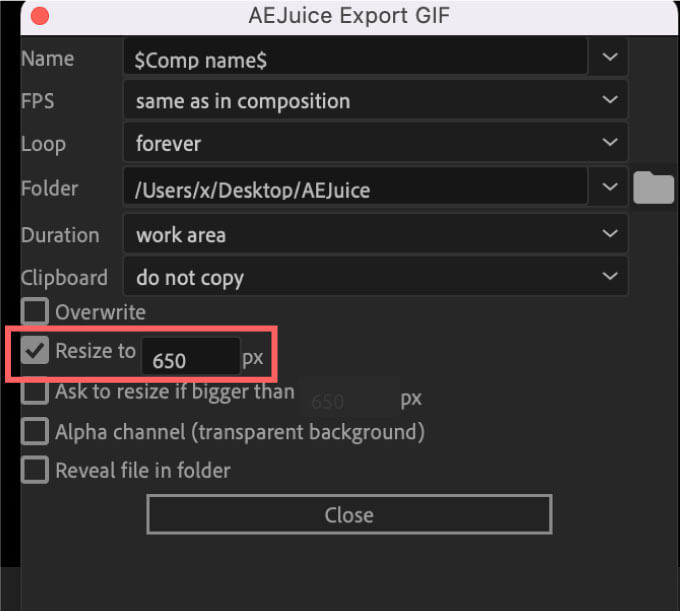
![AEJuice Export GIF Setting Overwrite off](https://nextist.net/wp-content/uploads/ae-juice-export-gif-setting-overwrite-off.jpg)
![AEJuice Export GIF Setting Overwrite off](https://nextist.net/wp-content/uploads/ae-juice-export-gif-setting-overwrite-1.jpg)
Resize to
![AEJuice Export GIF Setting Resize to](https://nextist.net/wp-content/uploads/ae-juice-export-gif-setting-resize-to.jpg)
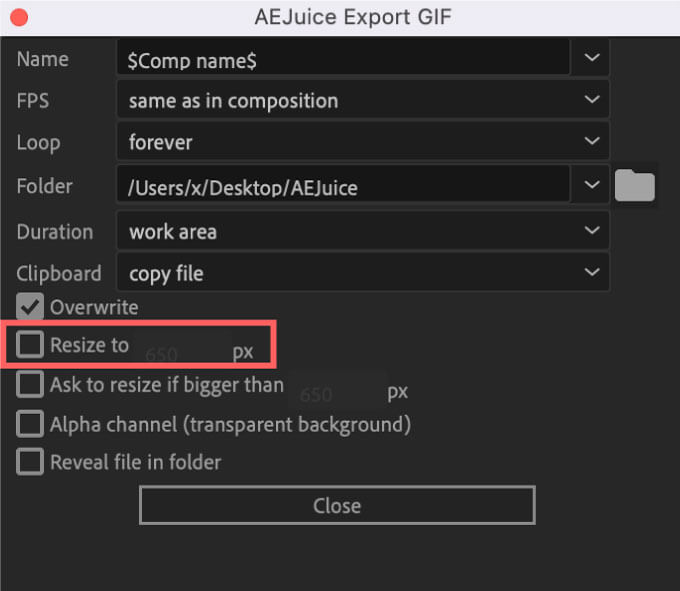
『Resize to』では毎回指定したサイズ(横幅 px)にリサイズすることができる設定になります。
『Resize to』にチェックを入れてサイズを指定すると
毎回指定したサイズ(横幅 px)にリサイズしてGIFファイルを書き出します。
![AEJuice Export GIF Setting Resize to ON](https://nextist.net/wp-content/uploads/ae-juice-export-gif-setting-resize-to-on.jpg)
Ask to resize if bigger than
![AEJuice Export GIF Setting Ask to resize if bigger than](https://nextist.net/wp-content/uploads/ae-juice-export-gif-setting-ask-to-resize-if-bigger-than.jpg)
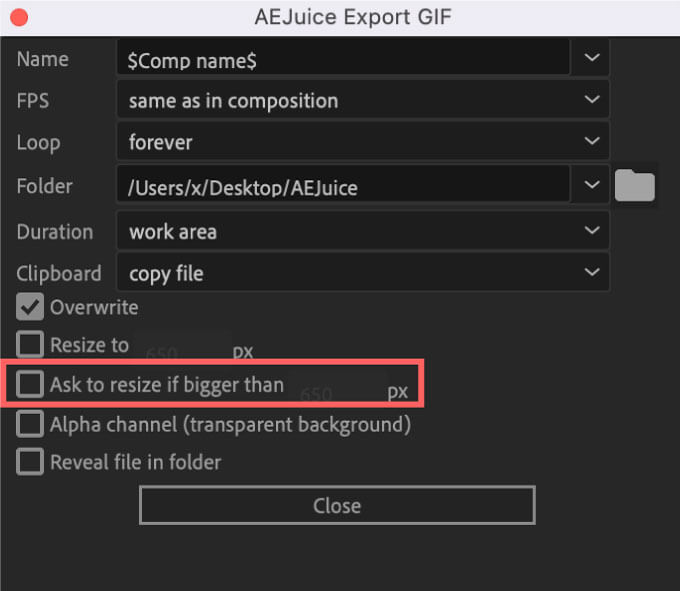
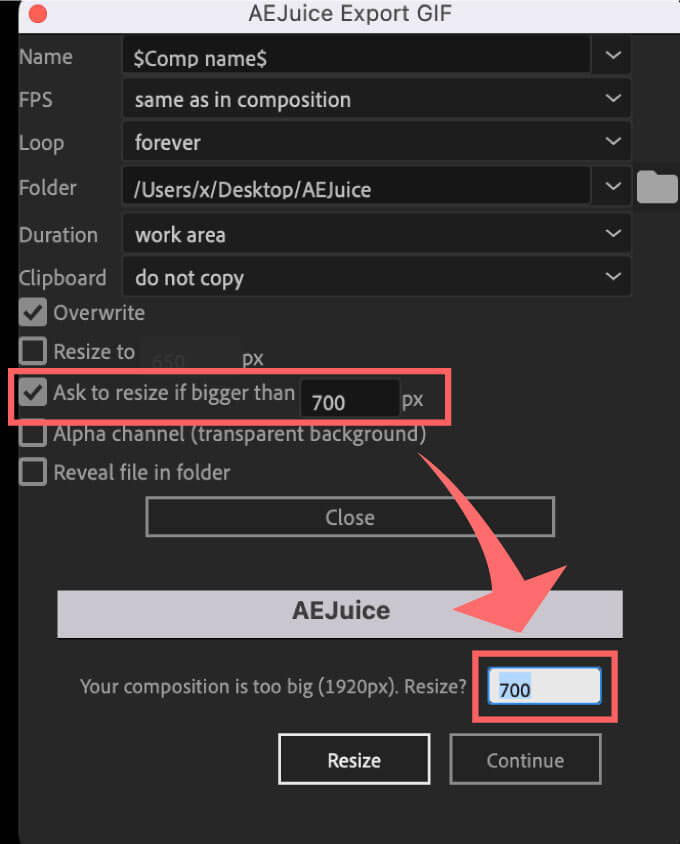
『Ask to resize if bigger than』にチェックを入れると、エクスポートする際に毎回リサイズの設定パネルが表示されます。
サイズを入力しておくとリサイズの設定パネルに入力したサイズが表示されます。
![AEJuice Export GIF Setting Resize to ON](https://nextist.net/wp-content/uploads/ae-juice-export-gif-setting-ask-to-resize-if-bigger-than-1.jpg)
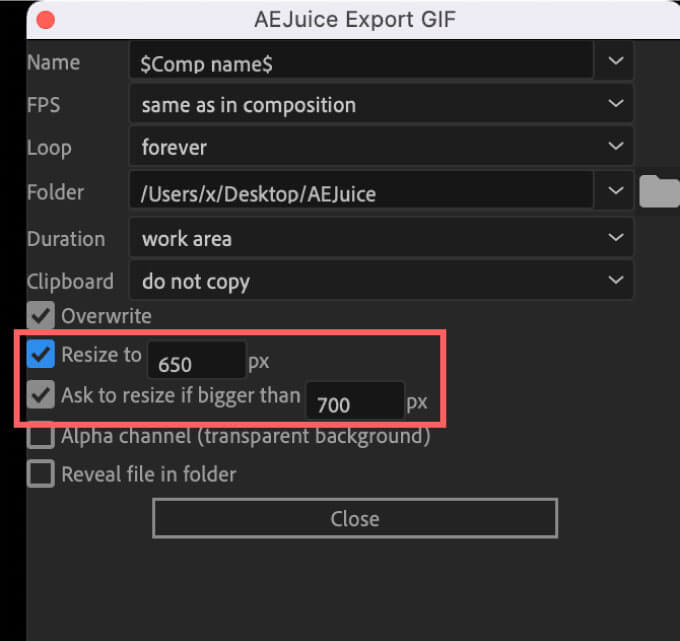
『Resize to』と『Ask to resize if bigger than』の両方を設定していると
『Resize to』の650pxの方が優先されます。
![AEJuice Export GIF Setting Resize to Ask to resize if bigger than](https://nextist.net/wp-content/uploads/ae-juice-export-gif-setting-ask-to-resize-if-bigger-than-resize-to.jpg)
Alpha channel(transparent background)
![AEJuice Export GIF Setting Alpha channel(transparent background)](https://nextist.net/wp-content/uploads/ae-juice-export-gif-setting-alpha-channel.jpg)
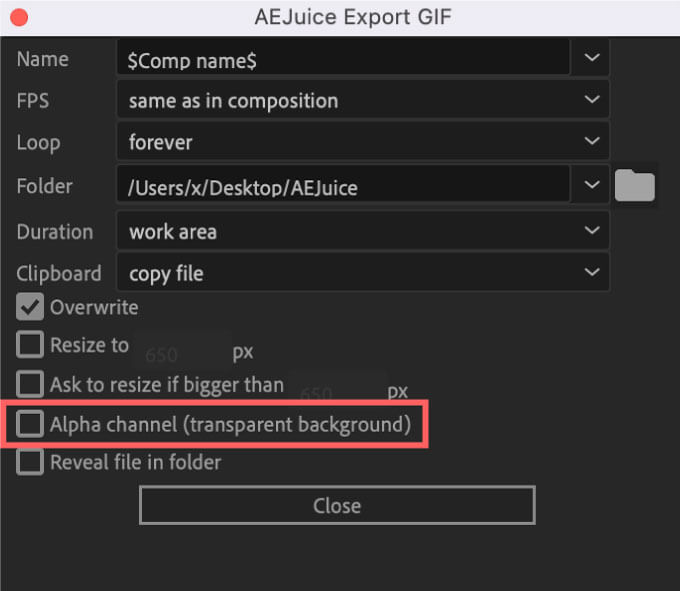
『Alpha channel(transparent background)』では背景を透明にする=アルファチャンネルをつけるか否かの設定をすることができます。
『Alpha channel(transparent background)』をOFFの状態=アルファチャンネルなしで書き出すと、背景が黒く塗り潰されてしまいますが
『Alpha channel(transparent background)』ONの状態=アルファチャンネルありで書き出すと、背景を透明な状態で書き出すことができます。
![AEJuice Export GIF Setting Alpha channel なし](https://nextist.net/wp-content/uploads/ae-juice-export-gif-setting-alpha-channel-off-1024x576.gif)
![AEJuice Export GIF Setting Alpha channel あり](https://nextist.net/wp-content/uploads/ae-juice-export-gif-setting-alpha-channel-on-1024x576.gif)
Reveal file in folder
![AEJuice Export GIF Setting Reveal file in folder](https://nextist.net/wp-content/uploads/ae-juice-export-gif-setting-reveal-file-in-folder.jpg)
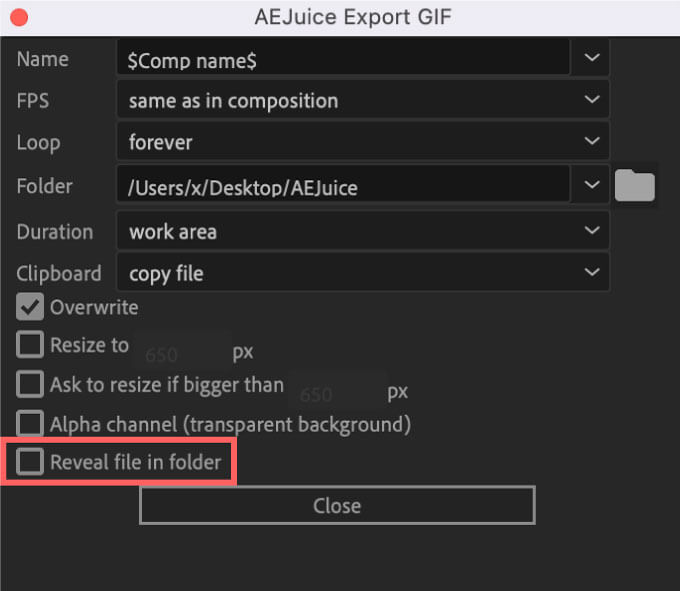
『Reveal file in folder』ではGIFファイルを書き出した直後にフォルダを開いてGIFファイルを表示するかどうかを設定することができます。
![NEXTist](https://nextist.net/wp-content/uploads/2021/08/nextist-icon.png)
デフォルトではONになっていますd( ̄  ̄)
最後に
GIFは短時間で目を引くショート動画を作れる便利なフォーマットです。
絵文字よりもインパクトがあって、動画よりも気軽に使うことができるので、TwitterやTikTokなどのSNSで多く使われるようになってきています。
![NEXTist](https://nextist.net/wp-content/uploads/2021/08/nextist-icon.png)
最近ではGIFを動画広告で使う企業案件も増えてきたので、今後は需要も増えてくるかと思います٩( ᐛ )و
『AEJuice Export GIF』は『After Effects』でGIFを書き出すことができる便利な無料ツールなので
ぜひこの機会にインストールして使ってみてください。
『AEJuice Export GIF』以外にも『AEJuice』が提供している無料ツールはたくさんあります。
![After Effects AEJuice 無料 ツール スクリプト プラグイン](https://nextist.net/wp-content/uploads/ae-juice-free-tool.png)
汎用性の高いプリセットや便利なプラグインもあるのでおすすめです。
『AEJuice』の無料プラグイン、プリセットの紹介やインストール方法を解説した記事はこちら⬇︎⬇︎
以上、最後まで読んでいただきありがとうございました♪( ´θ`)ノ