Adobe After Effects 144
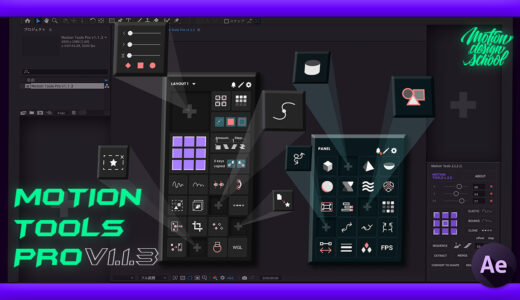
2023年9月28日に『Motion Tools Pro』がアップデートされ『v1.3.0』がリリースされました。
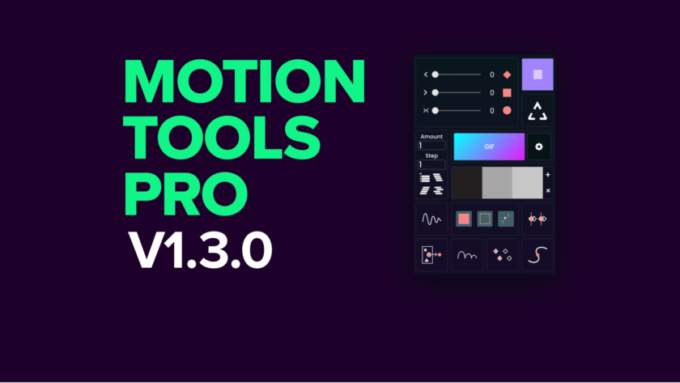
![After Effects Motion Tools 無料 プラグイン スクリプト アップデート 新機能](https://nextist.net/wp-content/uploads/motion-tools-update-v1-3-0-e1695939764566.png)
今回のアップデートでは新しく3つのスクリプトが追記され
カスタマイズ関連の新機能や既存ツールのマイナーチェンジも行われてます。
![NEXTist](https://nextist.net/wp-content/uploads/2021/08/nextist-icon.png)
アップデート方法がわからない方はこちら▶️ジャンプ
今回のアップデートでさらに使いやすくなった『Motion Tools Pro v1.3.0』の魅力をまとめて紹介していきますね。
それではいってみましょう!!
*『Motion Tools Pro』の既存ツールやカスタマイズ方法をまとめて解説した記事はこちら⬇︎⬇︎
![NEXTist](https://nextist.net/wp-content/uploads/2021/08/nextist-icon.png)
『Motion Tools Pro』を初めて利用される方はこちらから見てくださいd(゚∀゚)
*『Motion Tools Pro』の既存ツールやカスタマイズ方法をまとめて解説した動画はこちら⬇︎⬇︎
目次
『Motion Tools Pro(v1.3.0)』に追加された新しいスクリプト
まずは新たに追加された3つのスクリプトから紹介していきます⬇︎⬇︎
- Super Gif ▶︎ GIFの書き出し
✔︎ GIFの書き出し手順
✔︎ 書き出し設定 - Collect Colors Palette ▶︎ カラーパレット
- Toggle Stroke Style ▶︎ 線端と線の結合を変更
*『Motion Tools Pro(v1.3)』の新機能やマイナーチェンジされた機能をまとめて紹介した動画はこちら⬇︎⬇︎
Super GIF
![Adobe After Effects Motion Tools Super GIF 新機能](https://nextist.net/wp-content/uploads/adobe-after-effects-motion-tools-pro-super-gif-tool.png)
『Super GIF』はその名の通り動く画像『GIF』ファイルを書き出すことができるスクリプトです。
『After Effects』では『Adobe Media Encoder』を経由しないと『GIF』を直接書き出すことができませんが
『Super GIF』を使えば『After Effects』から簡単に『GIF』を書き出すことができます。
![Adobe After Effects Motion Tools Super GIF 機能 使い方](https://nextist.net/wp-content/uploads/adobe-after-effects-motion-tools-pro-super-gif-encode.gif)
![NEXTist](https://nextist.net/wp-content/uploads/2021/08/nextist-icon.png)
TikTokやTwitterでGIFを使った広告動画もかなり増えてきてますよねd(゚∀゚)
まず『GIF』を書き出す前にプロジェクトを保存していないと
『Save project before use this script(このスクリプトを使用する前にプロジェクトを保存してください)』と警告が表示され書き出せないので保存しておいてください。
![Adobe After Effects Motion Tools Super GIF Save project before use this script](https://nextist.net/wp-content/uploads/motion-tools-pro-super-gif-save-project-e1695944117646.png)
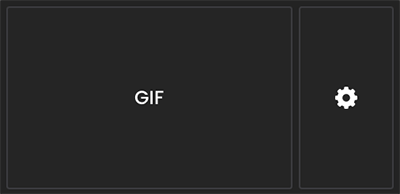
『GIF』として書き出したいファイルを用意して『GIF』の部分をクリックすると
![Adobe After Effects Motion Tools Super GIF 機能 使い方](https://nextist.net/wp-content/uploads/adobe-after-effects-motion-tools-pro-super-gif-usage.png)
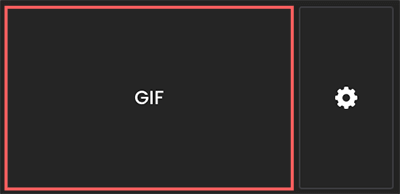
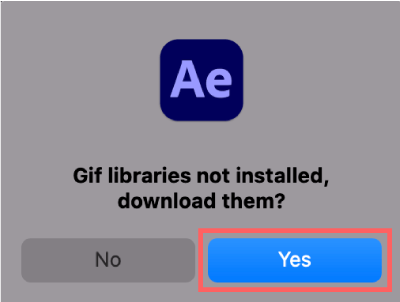
Gif libraries not installed, download them?(GIF ライブラリがインストールされていません。ダウンロードしますか?)と問われるので『Yes』をクリックします。
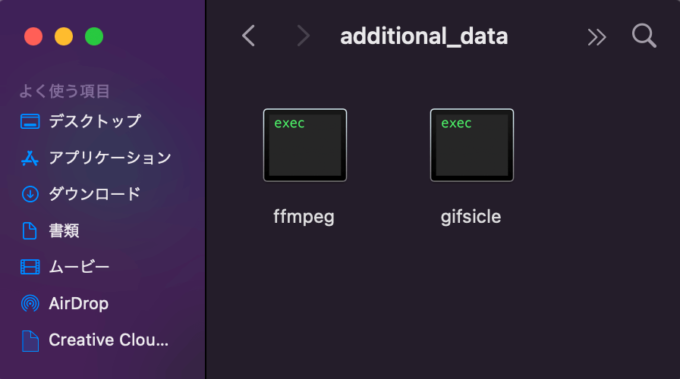
必要なファイルが自動でダウンロードされます。とりあえずスルーしておいて大丈夫です。
![Adobe After Effects Motion Tools Super GIF Gif libraries not installed, download them?](https://nextist.net/wp-content/uploads/adobe-after-effects-motion-tools-pro-super-gif-libraries-not-installed.png)
![Adobe After Effects Motion Tools Supper GIF ffmpeg gifsicle ダウンロード](https://nextist.net/wp-content/uploads/motion-tools-supper-gif-ffmpeg-gifsicle-download-e1695997861164.png)
『After Effects』日本語版では以下のエラーでGIFを書き出すことができませんでしたが
現在、日本語版でも書き出せるように改善されました。
以下のエラーができる方は公式サイトから新バージョンの『Motion Tools Pro(v1.3.1)』をダウンロードして
インストールし直してください。
![Adobe After Effects Motion Tools Supper GIF エラー](https://nextist.net/wp-content/uploads/motion-tools-supper-gif-error-e1695998376482.png)
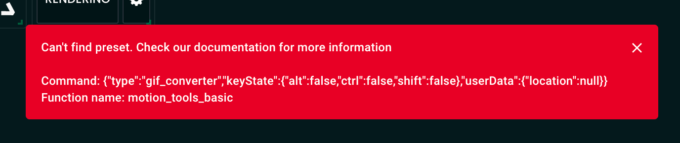
Can’t find preset. Check our documentation for more information
Command: {“type”:”gif_converter”,”keyState”: {“alt”:false,”ctrl”:false,”shift”:false},”userData”:{“location”:null}}
Function name: motion_tools_basic
プリセットが見つかりません。 詳細についてはドキュメントを確認してください
コマンド: {“type”:”gif_converter”,”keyState”: {“alt”:false,”ctrl”:false,”shift”:false},”userData”:{“location”:null}}
関数名:motion_tools_basic
![NEXTist](https://nextist.net/wp-content/uploads/2021/08/nextist-icon.png)
『v1.3.0』ではGIFが書き出せないことがあるので『v1.3.1』をインストールし直してくださいねd(゚∀゚)
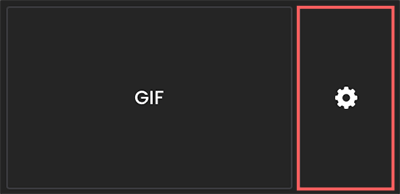
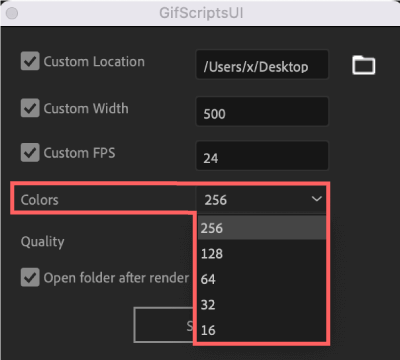
GIFの書き出し設定を調整することができます。
右側の歯車アイコンをクリックすると設定画面が表示されます。
![Adobe After Effects Motion Tools Super GIF 機能 設定 方法](https://nextist.net/wp-content/uploads/adobe-after-effects-motion-tools-pro-super-gif-setting.png)
デフォルトでは以下のように上の3つはプロジェクトやコンポジションと同じになるように設定されてます。
![Adobe After Effects Motion Tools Super GIF 機能 設定 方法 使い方](https://nextist.net/wp-content/uploads/adobe-after-effects-motion-tools-pro-super-gif-setting-usage.png)
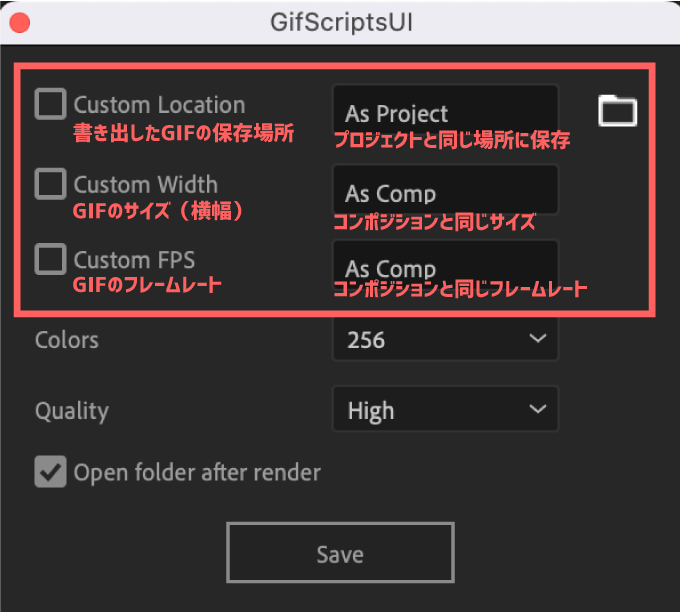
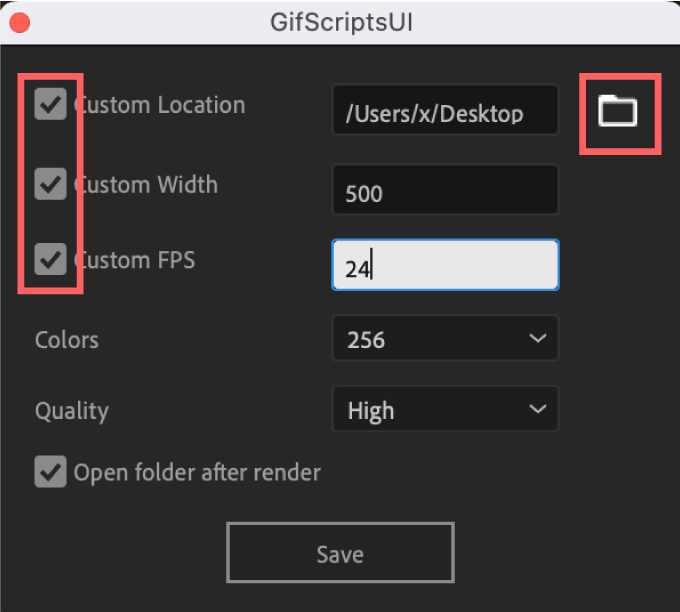
チェックを入れることで各種設定を変更できます。
*『Custom Location』は右側にあるフォルダアイコンをクリックして保存場所を設定します。
![Adobe After Effects Motion Tools Super GIF 設定 変更 使い方](https://nextist.net/wp-content/uploads/adobe-after-effects-motion-tools-pro-super-gif-setting-change.png)
『Color』は色深度の設定で画面や画素が表示可能な色数を16〜256で設定できます。
デフォルトの256から変更する必要はないかと思います。
『Quality』は書き出すGIFの解像度を『Extreme』『High』『Medium』『Low』の4つから選べます。
書き出したGIFのデータ容量とクオリティーを見ながら調整してください。
![Adobe After Effects Motion Tools Super GIF Colors 設定 変更 使い方](https://nextist.net/wp-content/uploads/adobe-after-effects-motion-tools-pro-super-gif-setting-colors.png)
![Adobe After Effects Motion Tools Super GIF Quality 設定 変更 使い方](https://nextist.net/wp-content/uploads/adobe-after-effects-motion-tools-pro-super-gif-setting-quality.png)
![NEXTist](https://nextist.net/wp-content/uploads/2021/08/nextist-icon.png)
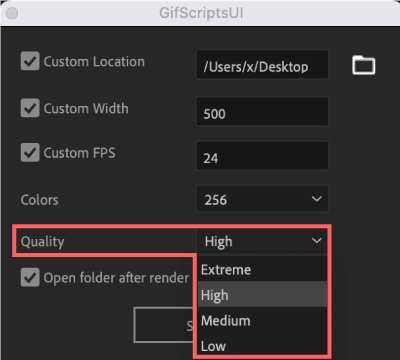
FPSや解像度を少し変えるだけで書き出したデータ容量はかなり違ってきますd(゚∀゚)
『X(旧Twitter)』ではGIFファイルのアップロードは15MBまでの制限があります。
Collect Colors Palette
![Adobe After Effects Motion Tools Collect Colors Palette 新機能](https://nextist.net/wp-content/uploads/adobe-after-effects-motion-tools-pro-collect-colors-palette-tool.png)
『Collect Colors Palette』では『Motion Tools Pro』上にカラーパレットを作ることができます。
パレットを作るには色情報をもったレイヤーを選択した状態で『Collect Colors』をクリックすれば
『Collect Colors Palette』上にレイヤーの持った色情報を取得します。
![Adobe After Effects Motion Tools Collect Colors Palette 使い方 機能](https://nextist.net/wp-content/uploads/adobe-after-effects-motion-tools-pro-collect-colors-palette-usage.gif)
1つ目の色情報を取得した後は、他に色情報を取得したいレイヤーを選択した状態で
『Collect Colors Palette』の右側にある『+』ボタンを押せばパレットに追加されていきます。
![Adobe After Effects Motion Tools Collect Colors Palette 色情報の取得 使い方 機能](https://nextist.net/wp-content/uploads/adobe-after-effects-motion-tools-pro-collect-colors-palette-color-information-acquisition.gif)
複数のレイヤーやコンポジションを選択して一気に色情報を取得することもできます。
色の数は表示される限り無限にストックできるみたいです。
![Adobe After Effects Motion Tools Collect Colors Palette 色情報の取得 使い方 機能](https://nextist.net/wp-content/uploads/after-effects-motion-tools-pro-collect-colors-palette-usage-1.gif)
![Adobe After Effects Motion Tools Collect Colors Palette 色情報の取得 使い方 機能](https://nextist.net/wp-content/uploads/after-effects-motion-tools-pro-collect-colors-palette-usage.gif)
パレットの色を使うときは対象のレイヤーを選択した状態で『Collect Colors Palette』上の色を選択するだけです。
![Adobe After Effects Motion Tools Collect Colors Palette 使い方 機能](https://nextist.net/wp-content/uploads/adobe-after-effects-motion-tools-pro-collect-colors-palette-usage-1.gif)
パレット上の色を削除したいときは alt or option + クリックで削除
パレット全体を削除したいときは右側にある『×』で削除できます。
![Adobe After Effects Motion Tools Collect Colors Palette 使い方 カラー 削除 方法](https://nextist.net/wp-content/uploads/adobe-after-effects-motion-tools-pro-collect-colors-palette-usage-delete.gif)
![NEXTist](https://nextist.net/wp-content/uploads/2021/08/nextist-icon.png)
一度色情報を削除すると Command or Ctrl + Z で戻れないので注意が必要ですd( ̄  ̄;)
パレットは横に配置したり縦に配置したり自由にレイアウトできます。これは便利!!
![Adobe After Effects Motion Tools Collect Colors Palette 使い方 パネル レスポンシブ](https://nextist.net/wp-content/uploads/adobe-after-effects-motion-tools-pro-collect-colors-palette-responsive.gif)
Toggle Stroke Style
![Adobe After Effects Motion Tools Toggle Stroke Style 新機能](https://nextist.net/wp-content/uploads/adobe-after-effects-motion-tools-pro-toggle-stroke-style-tool.png)
『Toggle Stroke Style』は『線端』『線の結合』を切り替えることができるスクリプトです。
![Adobe After Effects Motion Tools Toggle Stroke Style 機能 使い方](https://nextist.net/wp-content/uploads/after-effects-motion-tools-pro-toggle-stroke-style-usage.gif)
『Toggle Stroke Style』のボタンを
Command or Ctrl + クリックで『線端』を突出、『線の結合』をベベル
option or Alt + クリックで『線端』をバット、『線の結合』をマイター
Shift + クリックで『線端』を丸型、『線の結合』をラウンド
にそれぞれ切り替えることができます。
![Adobe After Effects Motion Tools Pro Uptate 新機能 使い方 Toggle Stroke Style](https://nextist.net/wp-content/uploads/motion-tools-toggle-stroke-style-usage.gif)
『Motion Tools Pro(v1.3.0)』で追加・修正された新機能
今回のアップデートで新しいカスタマイズ機能や既存ツールの機能が改善・修正された箇所がいくつかあります。
- 『Ease Keyframes』の仕様変更
✔︎ スライダーのホバー効果がなくなった
✔︎ スライダーの微調整ができるようになった
✔︎ スライダーを数値で調整できるようになった - パネルのカスタマイズ関連の新機能
✔︎ ボタン(セル)のレスポンシブが柔軟になった
✔︎ パネルの背景やボタン(セル)のカラー変更に『グラデーション』や『After Effects』が追加された
『Ease Keyframes』の仕様変更
![After Effects Motion Tools Pro Ease Key Frames 新機能 追加 使い方](https://nextist.net/wp-content/uploads/motion-tools-pro-ease-key-frames.png)
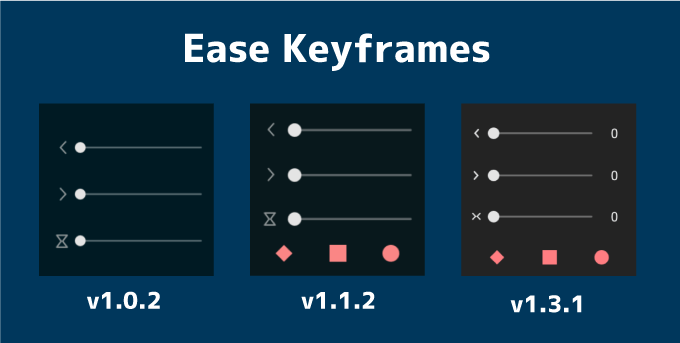
『Ease Keyframes』の仕様にいくつか変更がありました。
![After Effects 無料 Motion Tools Pro 新機能 Easy Keyframes ミラーリング](https://nextist.net/wp-content/uploads/after-effects-motion-tools-pro-new-function-keyframe-mirroring.gif)
![Motion Tools Ease Keyframes アップデート 機能 変更 ホバーなし](https://nextist.net/wp-content/uploads/after-effects-motion-tools-update-keyframe-non-hover.gif)
スライダーを Altor command を押しながらスライドすると細かい数字でゆっくりスライドできます。ブレーキが効いたような感じ…
Shift を押しながらスライドすると10ずつスライドすることができます。
![After Effects Motion Tools Ease Keyframes 新機能 変更 スライドの微調整](https://nextist.net/wp-content/uploads/after-effects-motion-tools-ease-keyframes-tweak.gif)
数字を入力してスライダーを調整できるようになりました。
数値の入力欄で上下矢印を押すことで1ずつ、Shiftを押しながらだと10ずつ調整できます。
![Motion Tools Ease Keyframes 数値入力](https://nextist.net/wp-content/uploads/adobe-after-effects-motion-tools-pro-collect-colors-palette-usage-numerical-input.gif)
![Motion Tools Ease Keyframes 数値入力 矢印キー 微調整](https://nextist.net/wp-content/uploads/adobe-after-effects-motion-tools-ease-keyframe-tweak.gif)
![NEXTist](https://nextist.net/wp-content/uploads/2021/08/nextist-icon.png)
『Motion Tools 2』からのアップデートでなくなった数値入力機能が復活しました٩( ᐛ )و
なくなって嘆いていた方も多かったのでこれは嬉しい人も多いかもd(゚∀゚)
パネルのカスタマイズ関連の新機能
パネルのカスタマイズ機能が進化してます。
パネル上に配置された1つ1つのボタン『セル』が柔軟に動かせるようになりました。これは嬉しい!!
縦長や横長に配置したり、アンカーポイントもセンターだけなど
ボタン(セル)が柔軟に動かせるようになったことでカスタマイズ性が格段に向上しました!!
![After Effects Motion Tools パネル カスタマイズ 新機能 レスポンシブ 自由に拡大 縮小](https://nextist.net/wp-content/uploads/after-effects-motion-tools-pro-panel-customize-responsive.gif)
パネルのカスタマイズの『Panel BG』に『After Effects』のパネルカラー設定が追加
![After Effects Motion Tools パネル カスタマイズ 新機能 Panel BG After Effects カラー 追加](https://nextist.net/wp-content/uploads/after-effects-motion-tools-pro-customize-panel-bg-after-effects-color.gif)
『Panel BG』と『Cell BG』の両方にグラデーション設定が追加されました。
![Adobe After Effects Motion Tools パネル カスタマイズ 新機能 カラー グラデーション](https://nextist.net/wp-content/uploads/after-effects-motion-tools-pro-sell-bg-gradation-color.gif)
スクリプトの設定パネルに検索バーが追加されました。
![Adobe After Effects Motion Tools Pro Uptate 新機能 使い方 スクリプト 検索](https://nextist.net/wp-content/uploads/motion-tools-script-search-function.gif)
![NEXTist](https://nextist.net/wp-content/uploads/2021/08/nextist-icon.png)
スクリプトの数も随分と増えてきたので、探すのが少し楽になります( ´ ▽ ` )♪
『Motion Tools Pro』のアップデート方法
『Motion Tools Pro』のアップデート方法を順を追って解説します。
![Adobe After Effects Motion Tools Pro アップデート zxp インストール 方法](https://nextist.net/wp-content/uploads/after-effects-motion-tool-pro-update-method.gif)
『Motion Tools Pro』のアップデートする手順
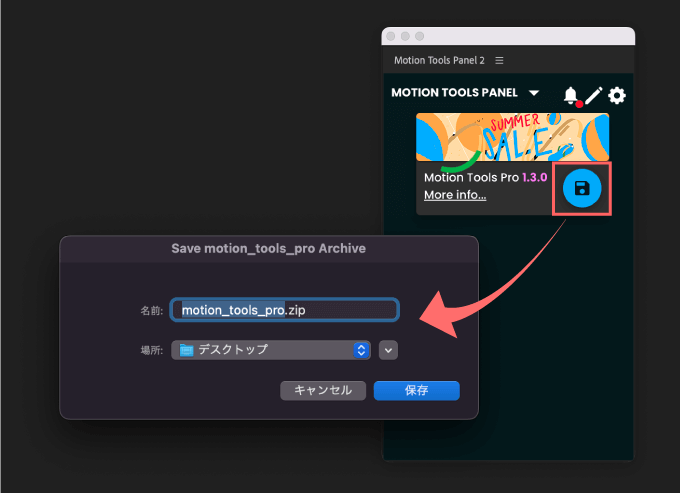
『Motion Tools Pro』のパネル右上にあるお知らせ(ベルアイコン)をクリックします。
![Adobe After Effects Motion Tools Pro アップデート 方法 お知らせ アイコン](https://nextist.net/wp-content/uploads/motion-tool-pro-update-method-notification-icon.png)
青色のフロッピーディスクアイコンをクリックするとアップロードに必要なファイルをどこに保存するか表示されるので
ファイル名と保存場所を指定して『保存』をクリックします。
![Adobe After Effects Motion Tools Pro アップデート 方法 フロッピーディスク ファイル 保存](https://nextist.net/wp-content/uploads/motion-tool-pro-update-method-floppy-disk-file-save.png)
![NEXTist](https://nextist.net/wp-content/uploads/2021/08/nextist-icon.png)
もしもお知らせのベルマークやフロッピーディスクのアイコンが表示されない場合は
公式サイトで最新のファイルをダウンロードしてくださいd(゚∀゚)
以下手順は同じです。
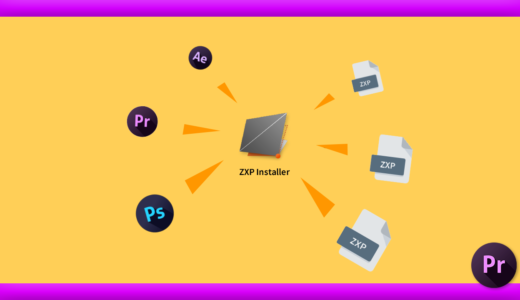
.zipファイルがダウンロードされたら展開して
フォルダ内にある.zxpファイルを『ZXPInstaller』へドラッグ&ドロップします。
これでアップデート完了です。
![Adobe After Effects Motion Tools Pro zxp インストール 方法](https://nextist.net/wp-content/uploads/motion-tool-pro-update-zxp-install-method.gif)
『ZXPInstaller』のインストール方法や使い方を解説した記事はこちら⬇︎⬇︎
最後に
今回のアップデートで『Motion Tools Pro(v1.3)』はさらに扱いやすくなりました。
『Motion Tools Pro』には有料で追加して使えるツールもすでに出ているので
現在無料で使えるツールはずっと無料で使えることを祈るばかりですね…
![Adobe After Effects Motion Tools Pro 有料 機能](https://nextist.net/wp-content/uploads/motion-tools-pro-paid-features-e1695999719807.jpg)
『Motion Tools Pro』について過去に解説した記事はこちら⬇︎⬇︎
*『Motion Tools Pro』の既存ツールやカスタマイズ方法をまとめて解説した記事はこちら⬇︎⬇︎
*前回のアップデート(v1.1.3)の追加機能を解説した記事はこちら⬇︎⬇︎
*『Motion Tools Pro』のインストール方法やアクティベート方法を解説した記事はこちら⬇︎⬇︎
*『After Effects』で使える無料・有料スクリプトやプラグインをまとめた記事はこちら⬇︎⬇︎
以上、最後まで読んでいただきありがとうございました(=゚ω゚)ノ✨