Adobe Premiere Pro 59
![NEXTist](https://nextist.net/wp-content/uploads/nextist-icon-1.png)
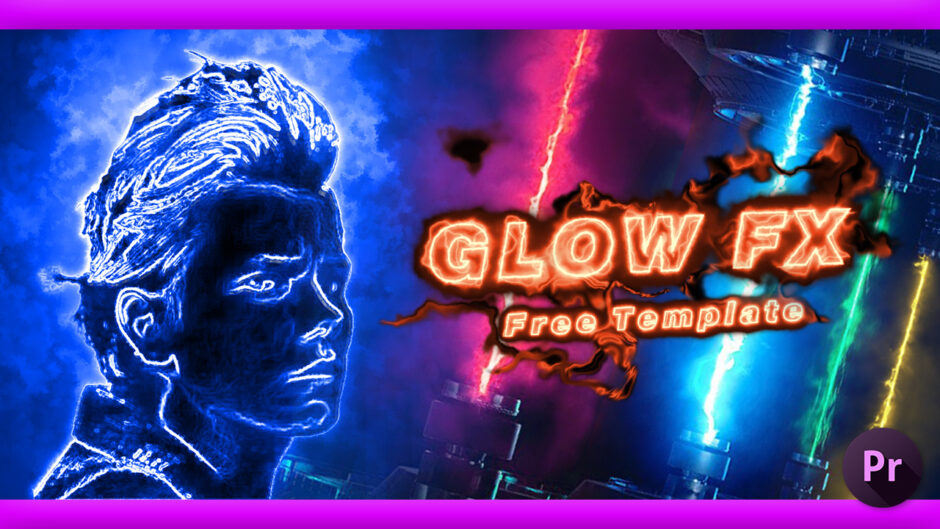
『Glow FX』っていうテンプレート知ってる!?
![ふにゃ太郎](https://nextist.net/wp-content/uploads/hunyataro-calm-nextist-studio.png)
何ですかそれは…(ー ー;)
![NEXTist](https://nextist.net/wp-content/uploads/nextist-icon-1.png)
『After Effects』の神プラグイン『Saber』みたいなグローを『Premiere Pro』でも簡単に使えるテンプレートだよd(゚∀゚) しかも無料 v( ̄∀ ̄)v
![ふにゃ太郎](https://nextist.net/wp-content/uploads/2021/07/funyataro-gaaaan-e1626679551945.png)
それはーーーっ( Д ) =͟͟͞͞ ⊙ ⊙
今すぐに解説してください!!
*『After Effects』の神プラグイン『Saber』が『Premiere Pro』でも使える!? 無料テンプレート『GLOW FX』を紹介した動画はこちら⬇︎⬇︎
目次
『GLOW FX』とは!?
![Premiere Pro Customizable GLOW EFFECT Template 無料 Saber](https://nextist.net/wp-content/uploads/premiere-pro-free-glow-effect-template-e1706148527763.webp)
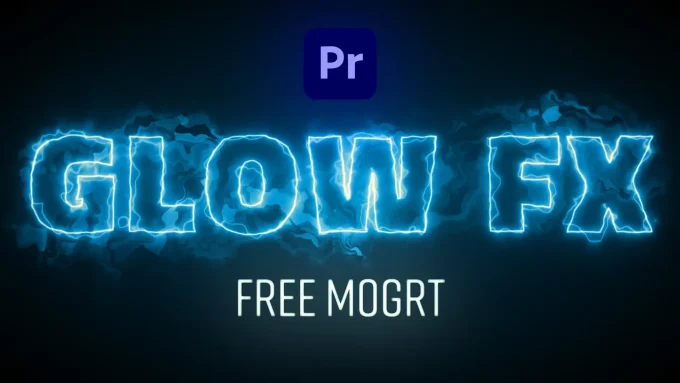
『GLOW FX』は海外クリエーターの『Michael Ponch』さんという方が無料配布している
『Premiere Pro』のモーショングラフィックステンプレート(.mogrt)になります。
『GLOW FX』は『After Effects』で使える神プラグイン『Saber』と同じようなグロー効果を
『Premiere Pro』でも手軽に扱えるようにしたフリーテンプレートで
![](https://nextist.net/wp-content/uploads/premiere-pro-free-glow-effect-template-usage.gif)
配布されているとモーショングラフィックステンプレート(.mogrt)をインストールすれば
各プロパティーを調整するだけで、簡単に『Sabar』風のかっこいいグローエフェクトテキストを作ることができます。
![Premiere Pro Customizable GLOW EFFECT Template 無料 アレンジ](https://nextist.net/wp-content/uploads/premiere-pro-free-glow-effect-template-arrange.gif)
『GLOW FX』はテキストだけではなく
フッテージにもグロー効果を適用してカスタマイズすることもできます。
![Premiere Pro 無料テンプレート Glow Saber 使い方](https://nextist.net/wp-content/uploads/adobe-premiere-pro-free-template-glow-footage.gif)
![](https://nextist.net/wp-content/uploads/premiere-pro-free-template-glow.gif)
![ふにゃ太郎](https://nextist.net/wp-content/uploads/2021/07/funyataro-gaaaan-e1626679551945.png)
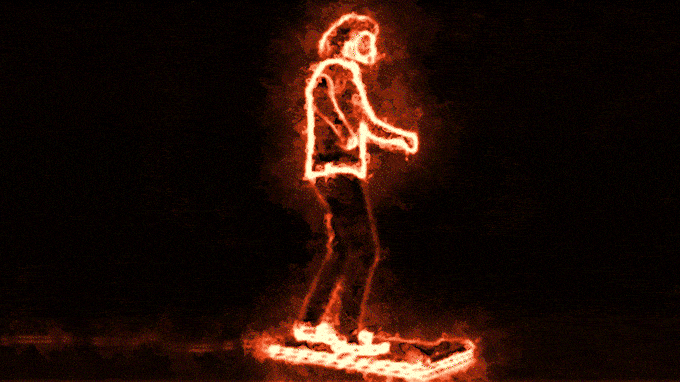
無料でここまでできるってありがたすぎですね…_(┐「ε:)_
『GLOW FX』を使ってフッテージにグロー効果を適用する方法
『GLOW FX』を使ってフッテージにグロー効果を適用する方法を紹介します。
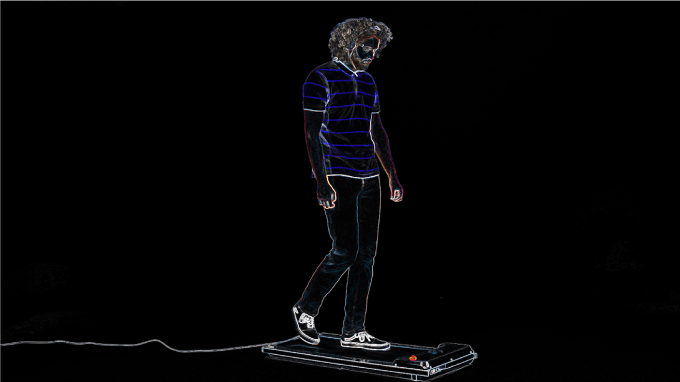
使用する素材を『Premiere Pro』に読み込みます。
![Premiere Pro Customizable GLOW EFFECT Template 無料 使い方](https://nextist.net/wp-content/uploads/premiere-pro-free-glow-effect-template-usage-material-import.png)
![NEXTist](https://nextist.net/wp-content/uploads/2021/08/nextist-icon.png)
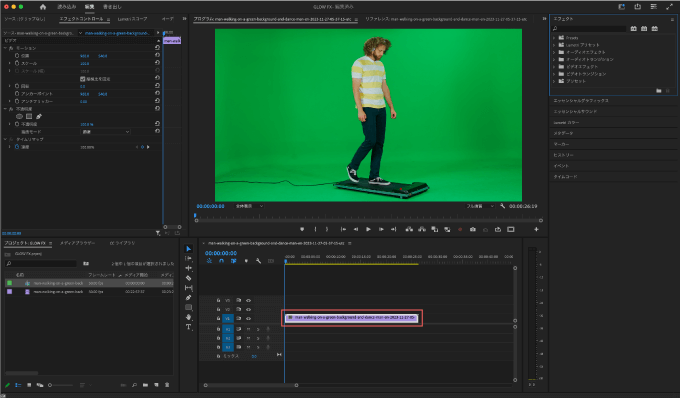
使用する素材はグリーンバックで撮影されたような背景が抜ける素材を選んでくださいd( ̄  ̄)
エフェクトの『Ultra キー』で背景(グリーンバック)を抜きます。
![Premiere Pro Customizable GLOW EFFECT Template 無料 使い方 Ultra キー グリーンバック](https://nextist.net/wp-content/uploads/premiere-pro-free-glow-effect-template-usage-ultrakey.gif)
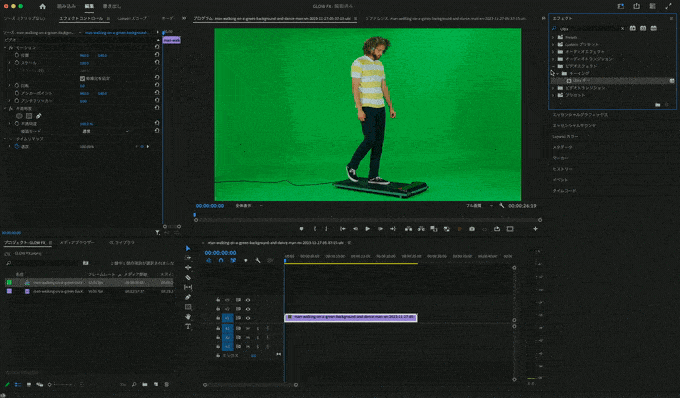
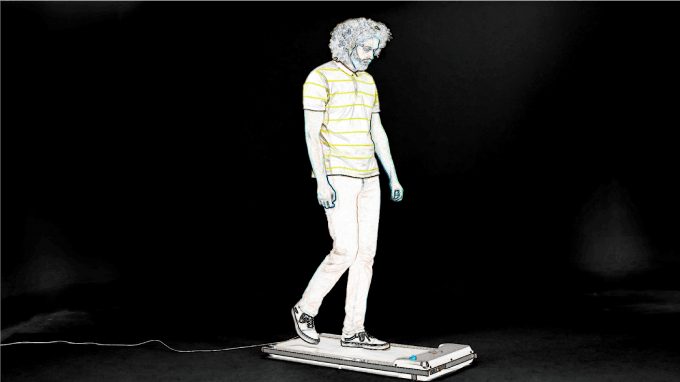
次にエフェクトの『輪郭検出』、『反転』を適用します。
これでフッテージ側の準備は完了です。
![Premiere Pro Customizable GLOW EFFECT Template 無料 使い方 輪郭検出](https://nextist.net/wp-content/uploads/premiere-pro-free-glow-effect-template-usage-contour-detection.png)
![Premiere Pro Customizable GLOW EFFECT Template 無料 使い方 反転](https://nextist.net/wp-content/uploads/premiere-pro-free-glow-effect-template-usage-inversion.png)
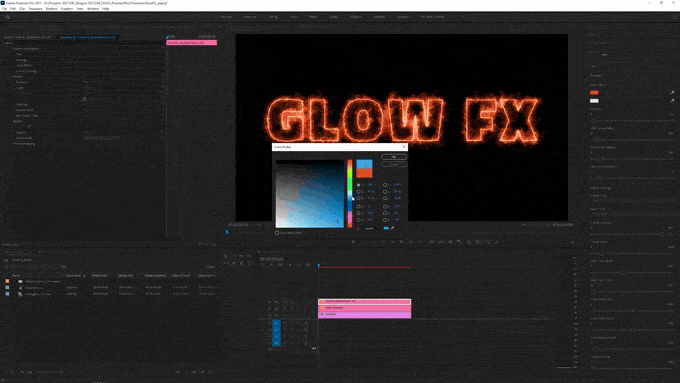
新しくシーケンスを作成してから、エッセンシャルグラフィックス ▶︎ 参照タブ ▶︎ GLOW FXを適用します。
![Premiere Pro Customizable GLOW FX EFFECT Template 無料 使い方](https://nextist.net/wp-content/uploads/premiere-pro-free-glow-effect-template-usage-glowfx.png)
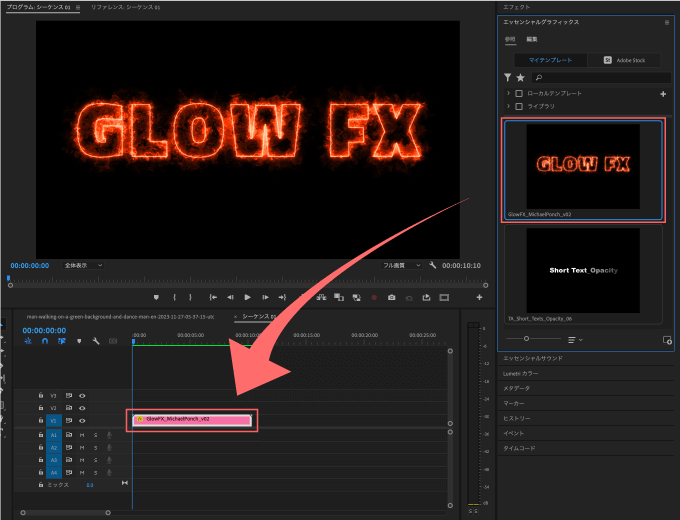
エッセンシャルグラフィックス ▶︎ 編集タブ ▶︎ Text ▶︎ Text Opacity を0にします。
![Premiere Pro Customizable GLOW FX Template 無料 使い方 Text Opacity 0](https://nextist.net/wp-content/uploads/premiere-pro-free-glow-effect-template-usage-text-opacity-0.gif)
エッセンシャルグラフィックス ▶︎ 編集タブ ▶︎ Footage ▶︎ Footage Opacity を100にします。
![Premiere Pro Customizable GLOW FX Template 無料 使い方 Footage Opacity 100](https://nextist.net/wp-content/uploads/premiere-pro-free-glow-effect-template-usage-glowfx-footage-opacity.gif)
エッセンシャルグラフィックス ▶︎ 編集タブ ▶︎ Footage ▶︎ Insert HD Footage を開いて
最初に調整したフッテージのシーケンスを黒枠へドラッグ&ドロップします。
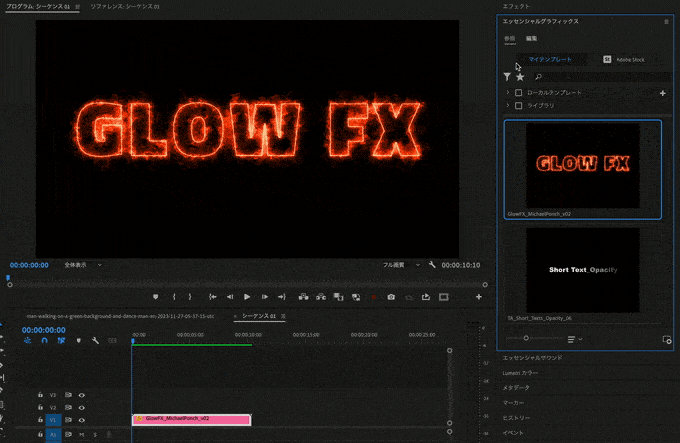
これでフッテージにグローがかかります。
![Premiere Pro Customizable GLOW FX Template 無料 使い方 Insert HD Footage](https://nextist.net/wp-content/uploads/premiere-pro-free-glow-effect-template-usage-glowfx-insert-hd-footage.gif)
各プロパティーをお好みで調整して完成です。
![Premiere Pro 無料テンプレート Glow Saber 使い方](https://nextist.net/wp-content/uploads/premiere-pro-free-template-glow.gif)
『GLOW FX』のダウンロード・インストール方法
『GLOW FX』をダウンロード・インストールする方法を解説します。
ダウンロード手順(ダウンロードページリンク有)
『GLOW FX』を無料でダウンロードする手順を解説します。
『GLOW FX』は無料ですが購入手続きを行う必要があります。
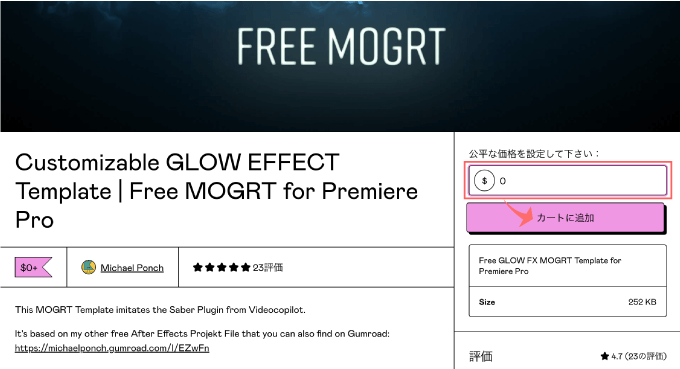
公式ダウンロードサイトに入ります⬇︎⬇︎
![Customizable GLOW EFFECT Template 無料 ダウンロード 方法](https://nextist.net/wp-content/uploads/premiere-pro-glow-effect-template-free-download.png)
![NEXTist](https://nextist.net/wp-content/uploads/2021/08/nextist-icon.png)
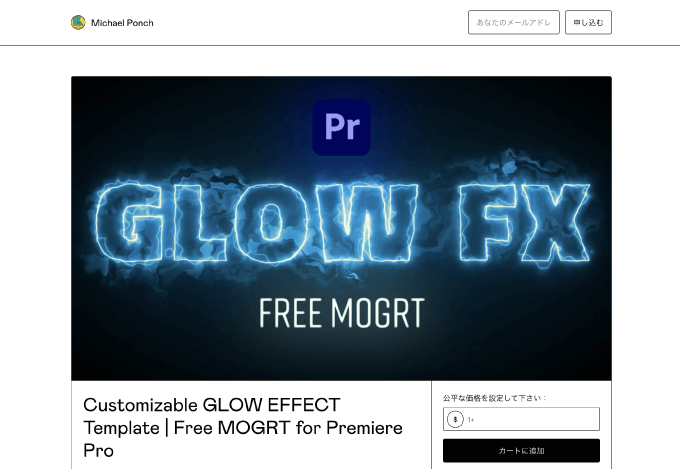
ダウンロードにはメールアドレスの入力が必要になりますd(゚∀゚) 予めご了承ください。
右下にある『公平な価格を設定してください』に『0』と入力して『カートに追加』をクリックします。
![Customizable GLOW EFFECT Template 無料 ダウンロード 方法](https://nextist.net/wp-content/uploads/premiere-pro-glow-effect-template-free-download-method.png)
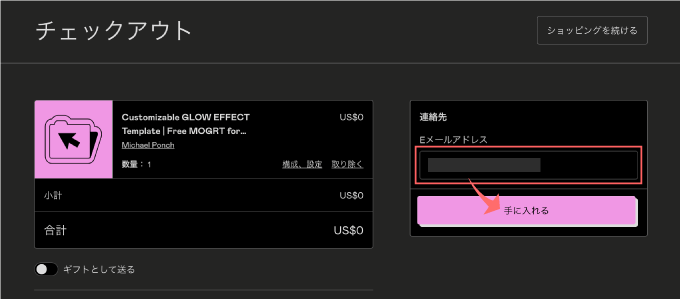
Eメールアドレスを入力して『手に入れる』をクリックします。
![Customizable GLOW EFFECT Template 無料 ダウンロード 手順](https://nextist.net/wp-content/uploads/adobe-premiere-pro-glow-effect-template-free-download-method.png)
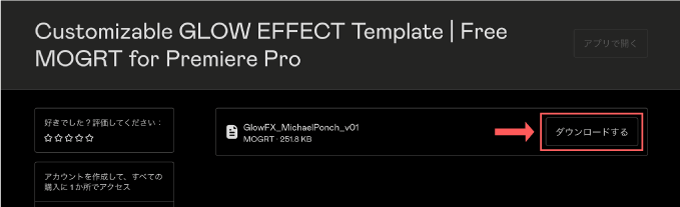
ダウンロードできるファイルが表示されるので『ダウンロードする』をクリックします。
![Customizable GLOW EFFECT Template 無料 ダウンロード 手順](https://nextist.net/wp-content/uploads/premiere-pro-glow-effect-template-free-download-mail-address.png)
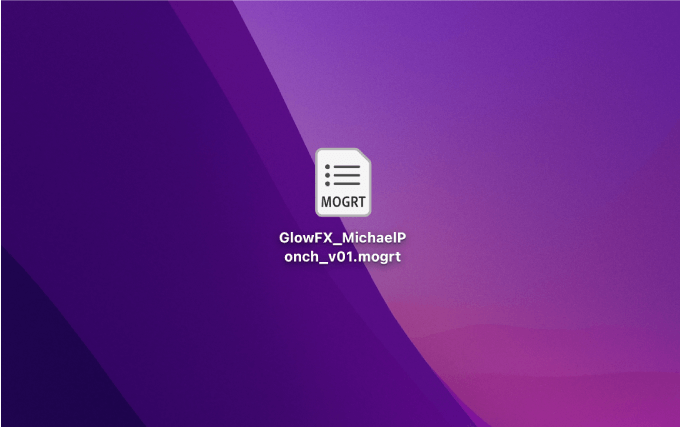
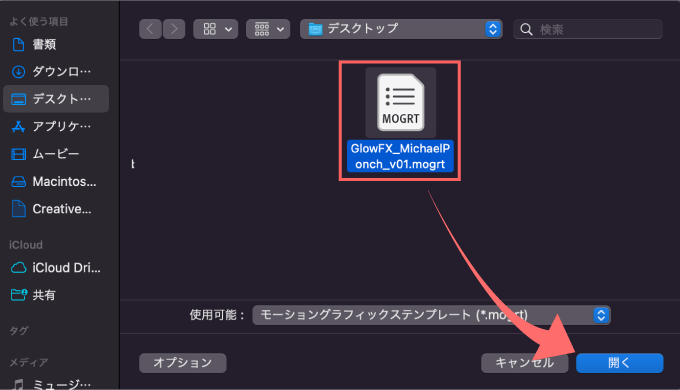
モーショングラフィックステンプレートファイル(GlowFX_MichaelPonch_v01.mogrt)がダウンロードされます。
![Customizable GLOW EFFECT Template 無料 ダウンロード mogrt](https://nextist.net/wp-content/uploads/premiere-pro-glow-effect-template-free-download-mogrt.png)
インストール方法
『GLOW FX』を『Premiere Pro』へインストールする方法を解説します。
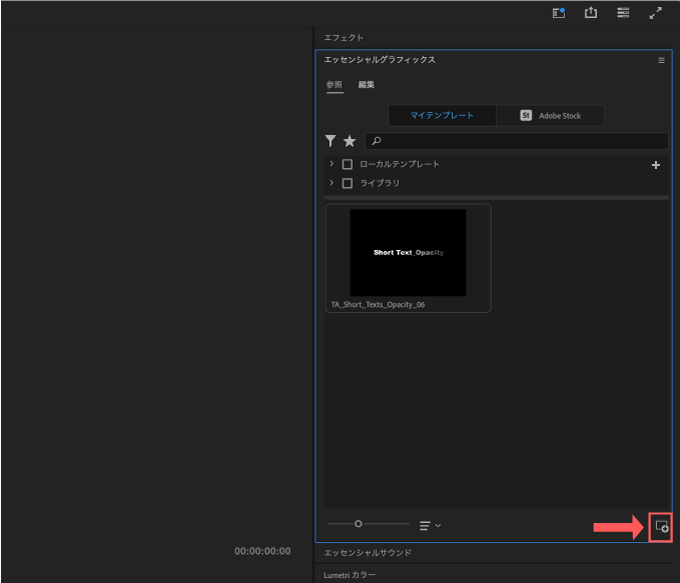
『Premiere Pro』のエッセンシャルグラフィックスパネル(参照タブ)を開いて
右下にあるプラスマークをクリックします。
![Customizable GLOW EFFECT Template 無料 mogrt インストール 方法](https://nextist.net/wp-content/uploads/premiere-pro-free-glow-effect-template-install.png)
ダウンロードしていたモーショングラフィックステンプレート『GlowFX_MichaelPonch_v01.mogrt』を選択して『開く』をクリックします。
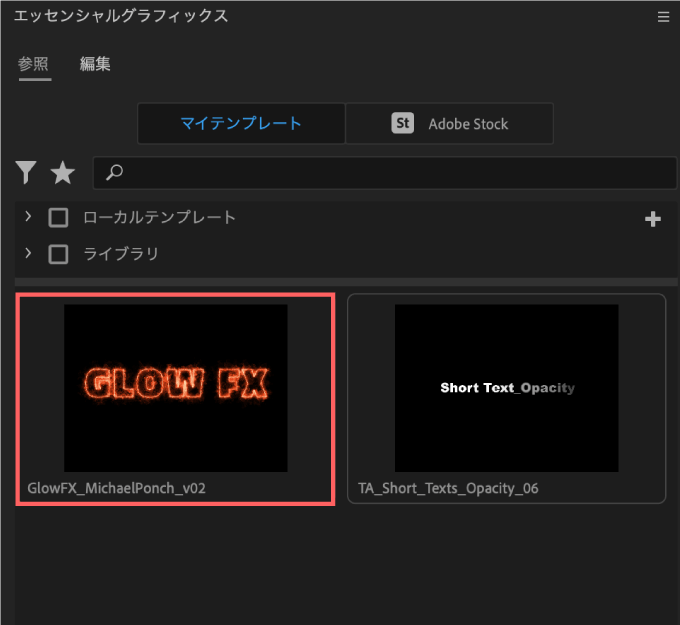
![Customizable GLOW EFFECT Template 無料 mogrt インストール 手順](https://nextist.net/wp-content/uploads/premiere-pro-free-glow-effect-template-install-method.png)
インストール完了です。
![Premiere Pro Customizable GLOW EFFECT Template 無料 mogrt インストール 手順](https://nextist.net/wp-content/uploads/adobe-premiere-pro-free-glow-effect-template-install-method.png)
最後に
今回紹介した『Glow FX』以外にも『Adobe Premiere Pro』で使える便利な無料テンプレートや無料ツールはたくさんあります。
*『Adobe Premiere Pro』で使える無料テンプレートや無料ツールをまとめて紹介した記事はこちら⬇︎⬇︎
*『Adobe Premiere Pro』で使える無料・有料のプラグインやスクリプトをまとめて紹介した記事はこちら⬇️⬇️
以上、最後まで見ていただいてありがとうございました(=゚ω゚)ノ