Adobe Premiere Pro 81 / After Effects

たくさんモザイク処理するのって時間かかるし面倒ですよね…_(┐「ε:)_
人の顔なら『Blace』で超絶簡単にモザイクかけれるよーd( ̄  ̄)

なんですかそれは〜っ( Д ) =͟͟͞͞ ⊙ ⊙
ぜひ教えてくださいっ(゚∀゚(゚∀゚(゚∀゚!!
いいよ〜、紹介するね〜(=゚ω゚)ノ
目次
『Blace』とは!?
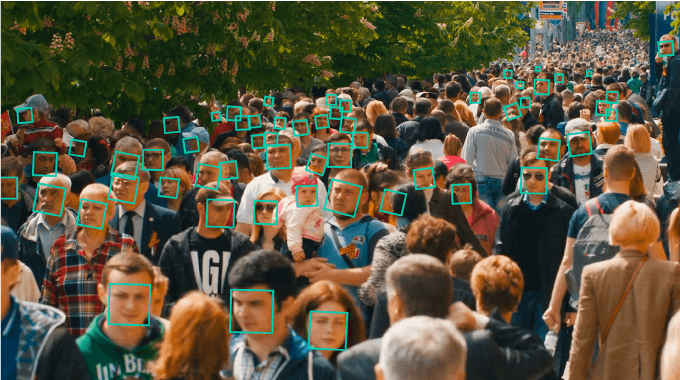
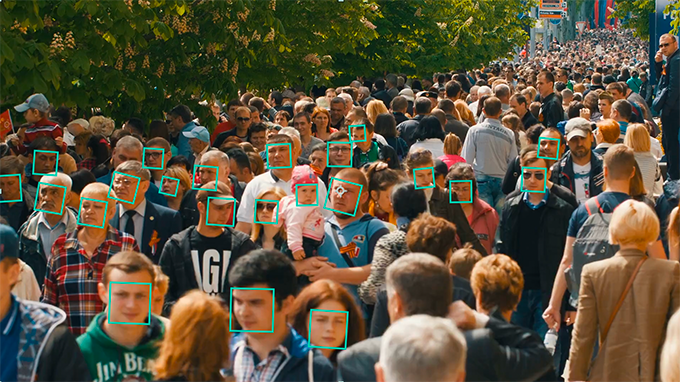
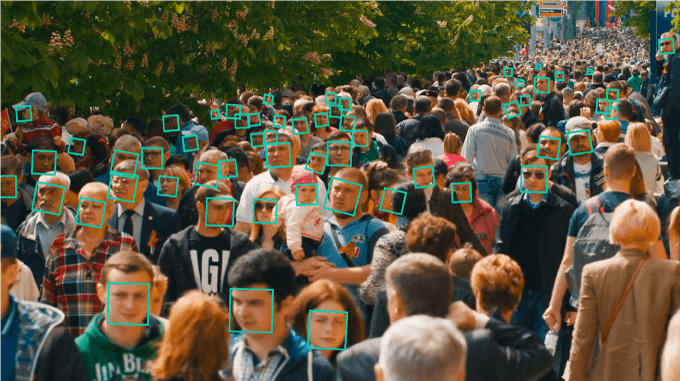
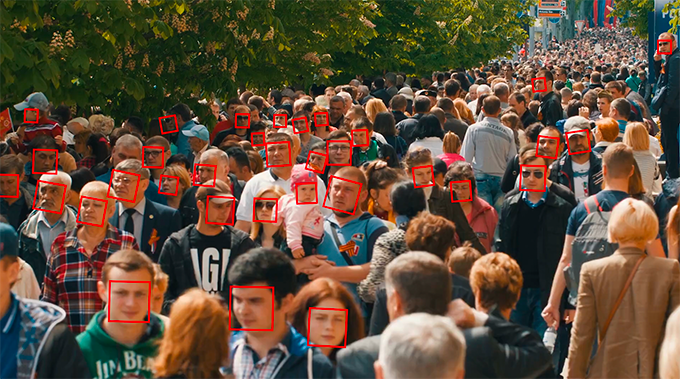
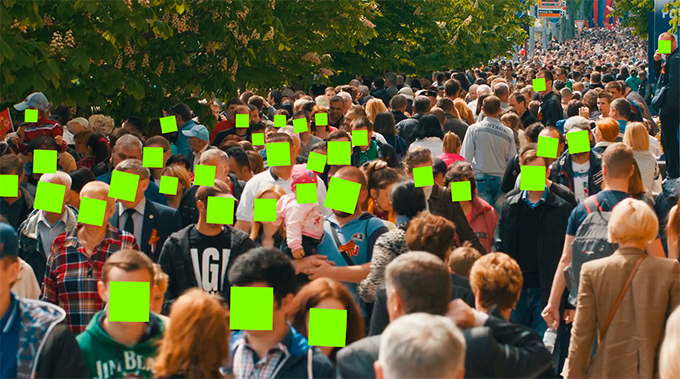
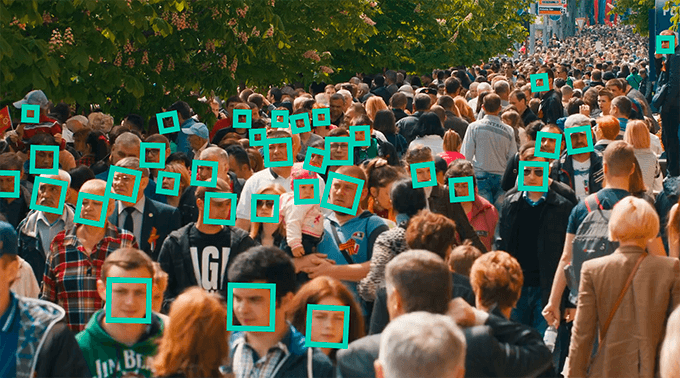
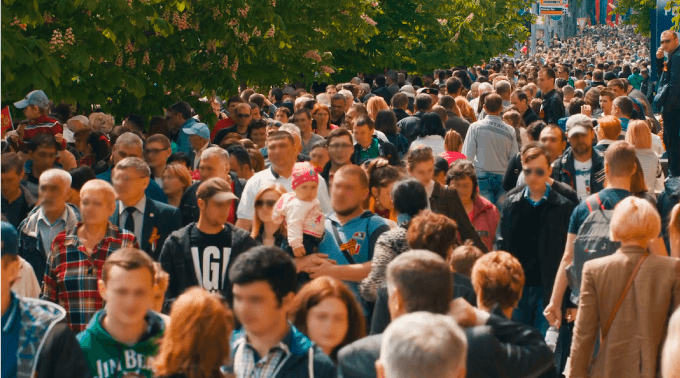
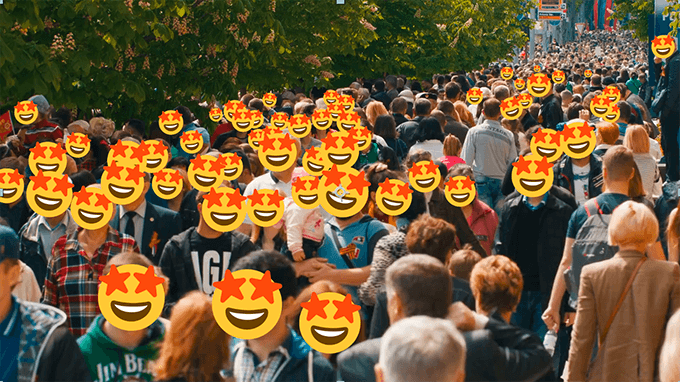
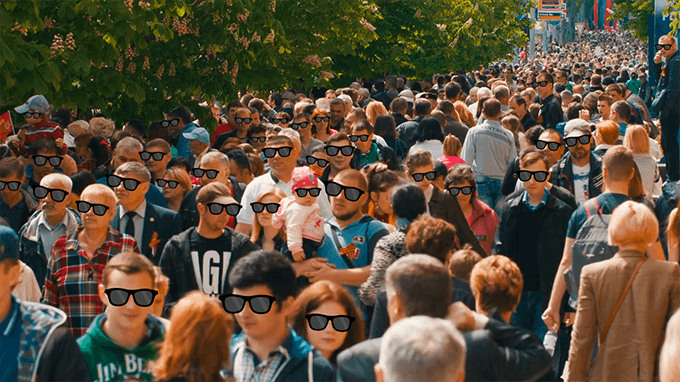
『Blace』はAIを使って顔を検知し、自動でモザイクやぼかし処理をしてくれるプラグインになります。
適用するだけで顔や目を自動検知して『Outline』や『Mosaic』などを合わせて追従してくれるので、モザイクをかけて1つ1つ動きをつける必要はありません。
めちゃくちゃ便利ですね(゚∀゚!!
検知した顔や目の部分はモザイクやブラー、四角、外枠などを設定することができます。

『Blace』は『Premiere Pro』でも『After Effects』でも使うことができますが、『After Effects』でのみ指定したレイヤーを追従されることができる『Custom』設定があります。
『Blace』を実際に使ってみて良い点と悪い点を書き出しておきます。
・Premiere ProとAfter Effectsの両方で使える。
・AIの自動検知機能が優秀
・範囲指定しやすい
・自動スタビ機能が優秀
・パソコンのスペックで処理速度がかなりの差が出る
・たまにAescripts+aepluginsやPrが落ちる…
【『Blace』の価格比較表 】
『Blace』の機能や使い方
『Blace』の機能や使い方を一通り解説していきます。
『Premiere Pro』も『After Effects』も機能や使い方はほぼ同じです。
今回は『Premiere Pro』で解説しますが、『After Effects』と違う点はその都度説明していきますd( ̄  ̄)
Detection
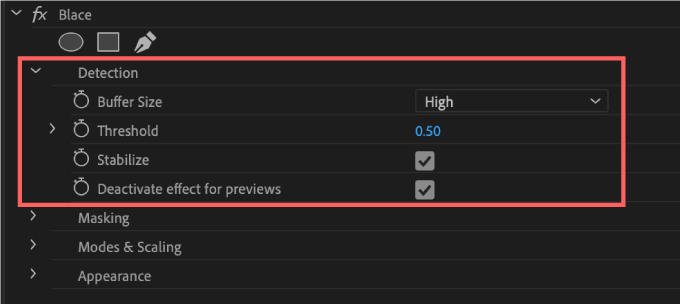
『Detection』ではクオリティーや処理速度に関連した項目を調整することができます。
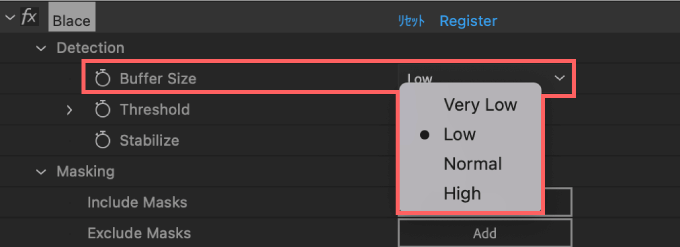
『Buffer Size』は『Very Low』『Low』『Nomal』『High』の4つから選択することができます。
基本的には『Buffer Size』を上げるほど自動検知の精度は高くなりますが、その分動作が重くなります。


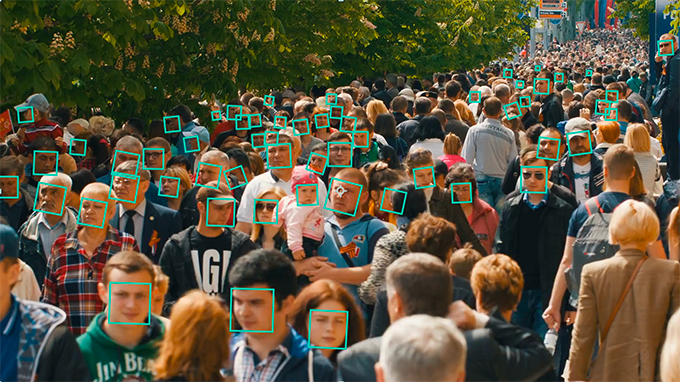
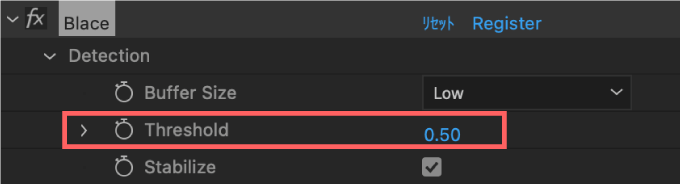
『Threshold』ではしきい値を調整できます。
数値を下げれば自動検知の精度は上がり、数値を上げれば精度は落ちます。

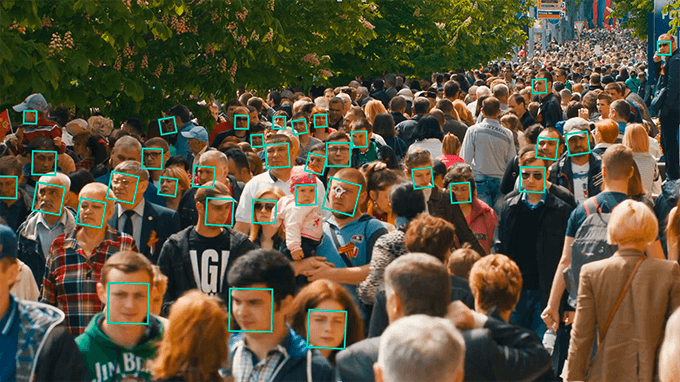

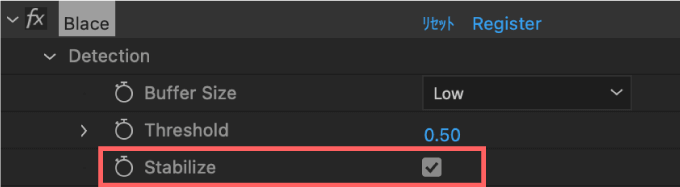
『Stabilize』では自動検知を顔の向きや角度によって安定させることができます。
『Stabilize』OFFの方が枠が安定しませんが、動画は軽くなります。

Masking
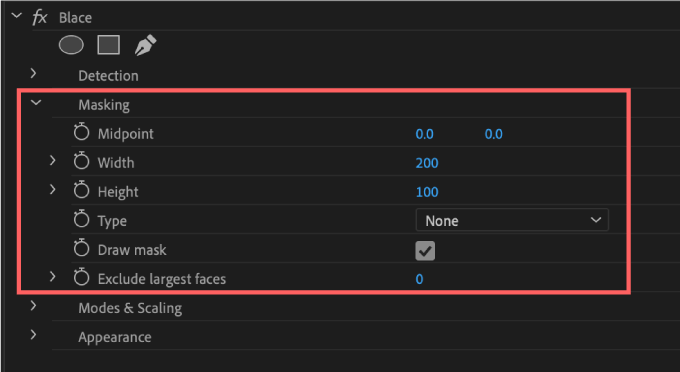
『Masking』設定ではマスクでエフェクトをかける範囲を微調整することができます。
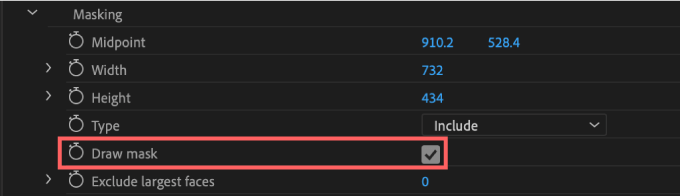
『Draw Mask』ではマスク範囲の表示・非表示を切り替えることができます。
マスキングの機能を使うのであれば、まずは『Draw Mask』にチェックを入れて、マスクの範囲を表示させると視覚的にわかりやすいです。

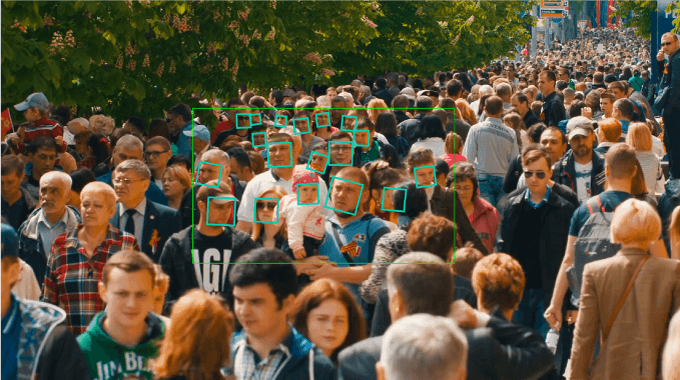
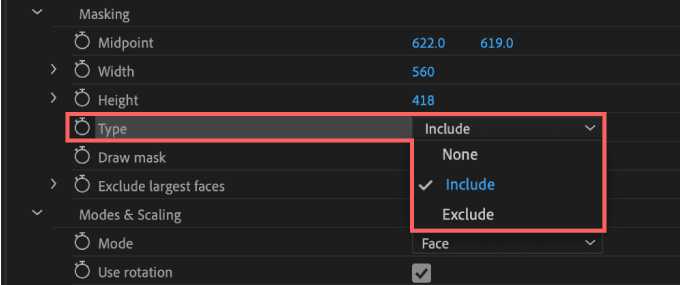
マスクのタイプには『Include』『Exclude』の2種類があります。
『Include(緑ライン)』に設定するとマスクの範囲内にだけエフェクトが適用されます。
『Premiere Pro』でマスクの数を増やしたい時には『Blace』エフェクトを重ね掛けして増やすことは可能ですが
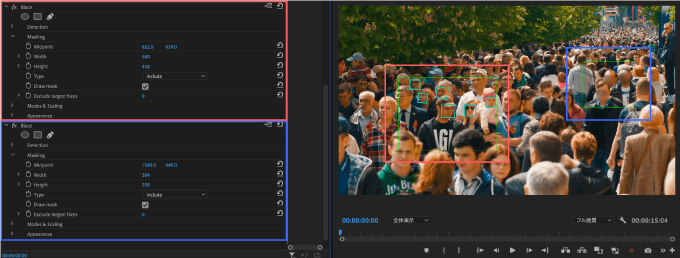
『After Effects』の場合は『Blace』エフェクトを一回適用すれば
『Include』マスクも『Exclude』マスクもいくつでも作ることができます。変形も可能です。
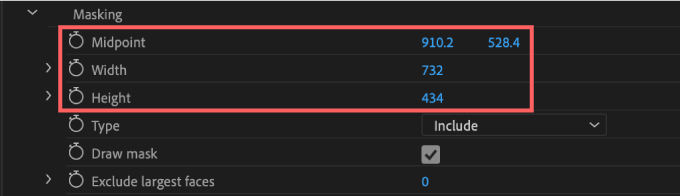
マスクの位置やサイズは『Midpoint』『Width』『Hight』で調整することができます。
Midpoint ▶︎ マスクの中心位置を調整
Width ▶︎ マスクの横幅を調整
Hight ▶︎ マスクの縦幅を調整
『Exclude Largest faces』は数値を上げると認識範囲の大きなサイズ(顔)からエフェクトの適用を除外していきます。
Modes & Scaling
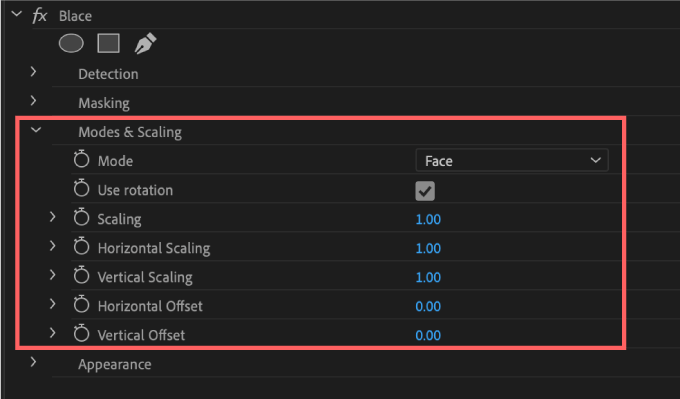
『Modes & Scaling』では自動検知部分の選択(顔 or 目)や認識部分のサイズを調整することができます。
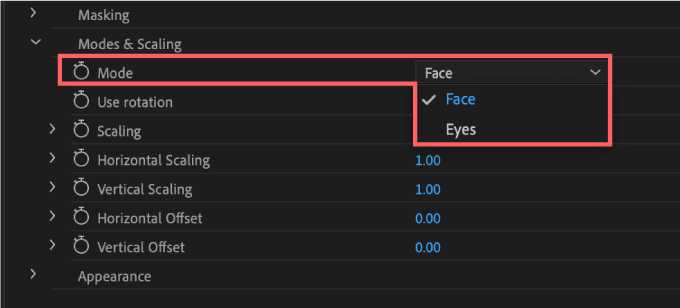
『Mode』は自動検出する部位を『Face』or 『Eyes』 から選択することができます。
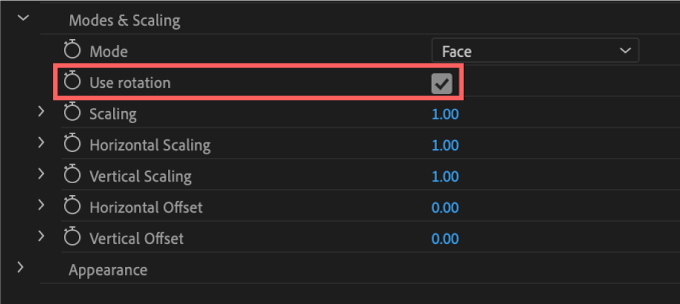
『Use rotation』は自動検出した顔や目の回転(角度)をエフェクトに反映するかどうかを選択できます。


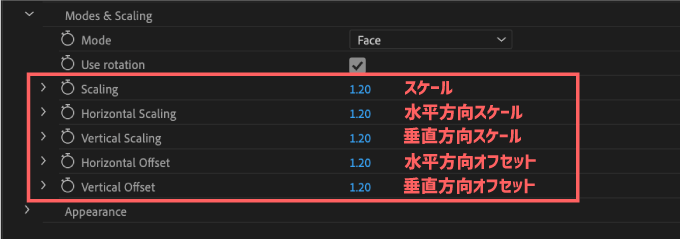
『Scaling』ではエフェクト(outline,mosaicなど)のサイズを調整したりズラしたりできます。
Appearance

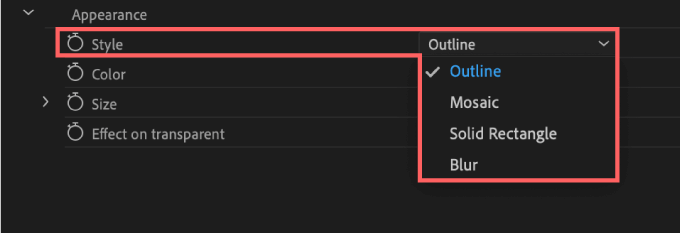
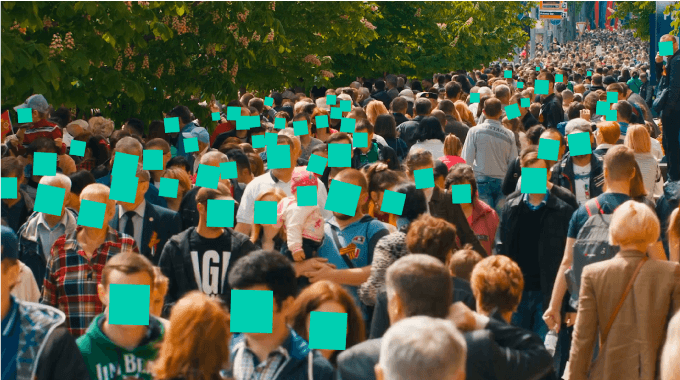
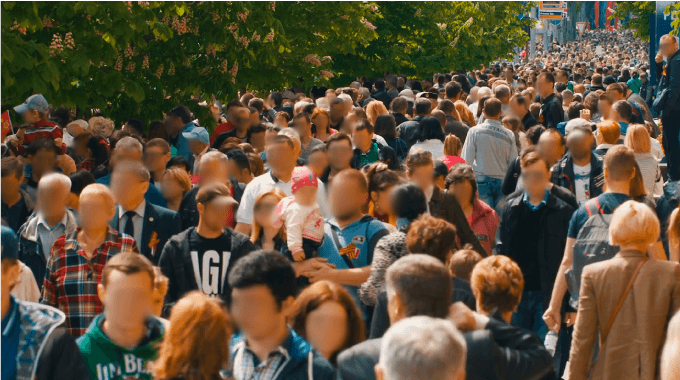
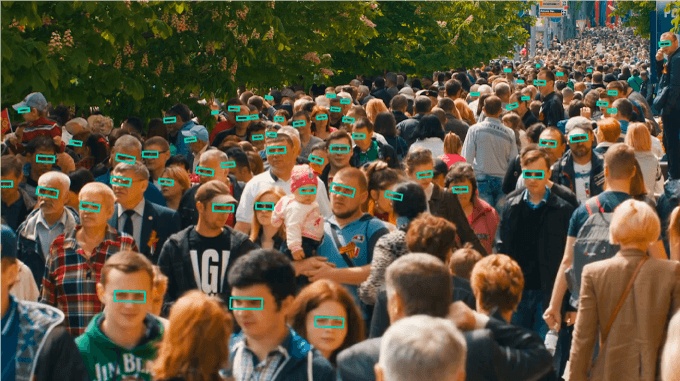
『Style』ではエフェクトのスタイルを『Outline』『Mosaic』『Solid Rectangle』『Blur』の4種類から選ぶことができます。
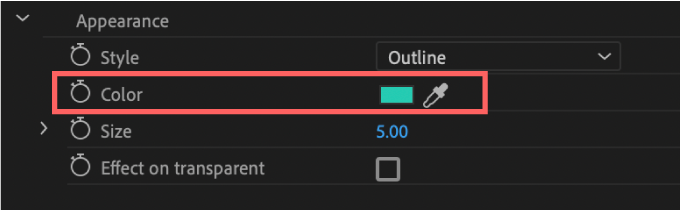
『Color』では『Outline』『Solid Rectangle』のカラーを変更することができます。
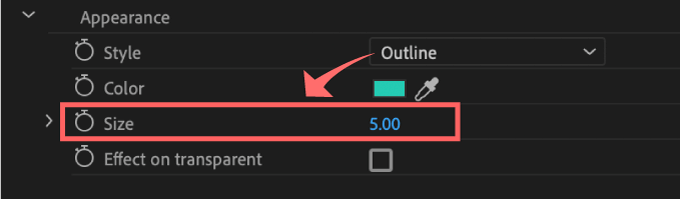
『Style』で『Outline』を選択するとプロパティーに『Size』が追加
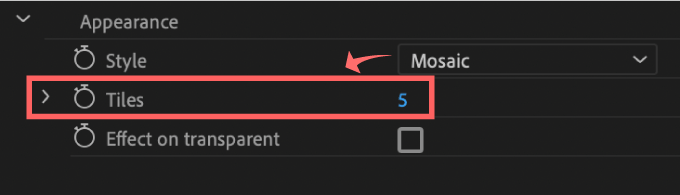
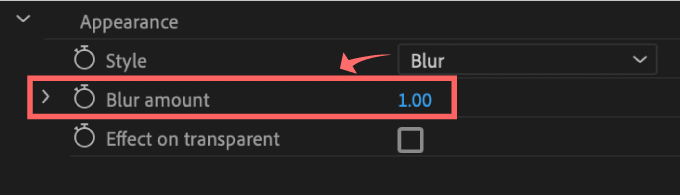
『Mosaic』を選択すると『Tiles』、『Blur』を選択すると『Blur amount』が追加されます。
『Outline』の『Size』▶︎ アウトラインの線のサイズを調整
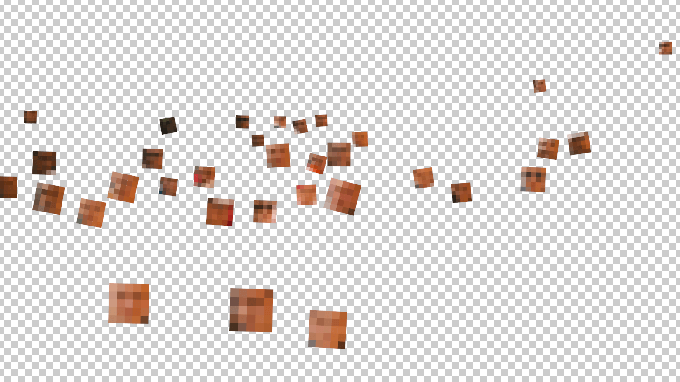
『Mozaic』の『Tiles』▶︎ モザイクのタイルの数(複雑度)を調整
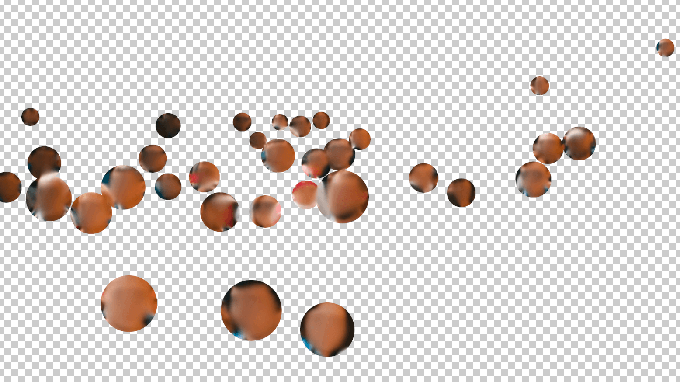
『Blur』の『Blur Amount』▶︎ ブラーのかかる量の調整

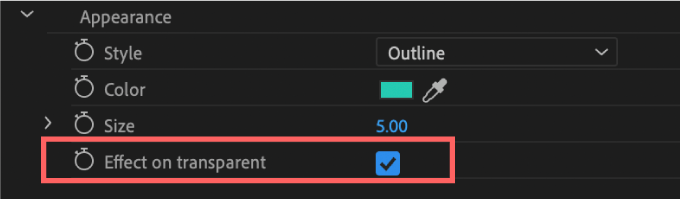
『Effect on transparent』をONにすると自動検知された部分以外は透明化(アルファ)されます。
『Outline』と『Solid Rectangle』はそのまま枠だけ表示されますが
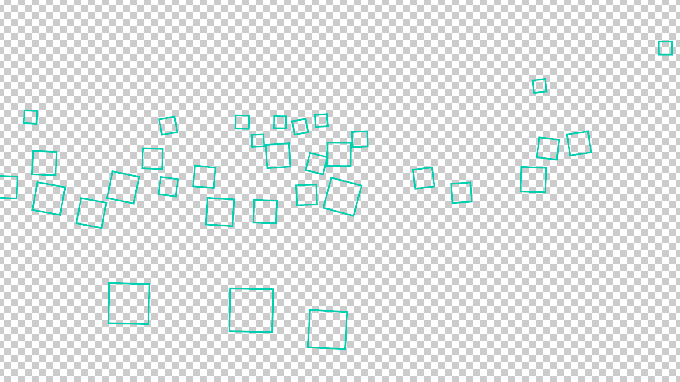
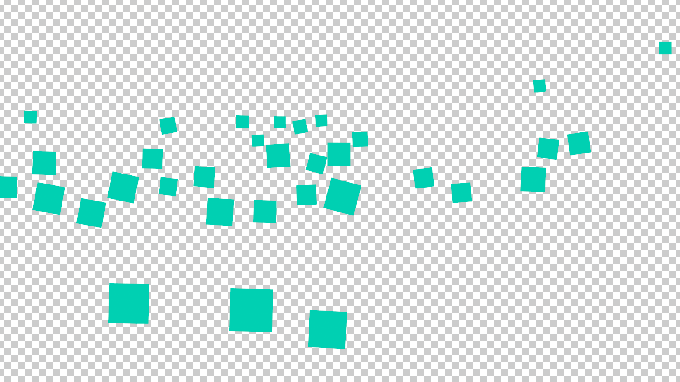
『Mozaic』と『Blur』では自動検知された範囲をくり抜く形で表示されます。
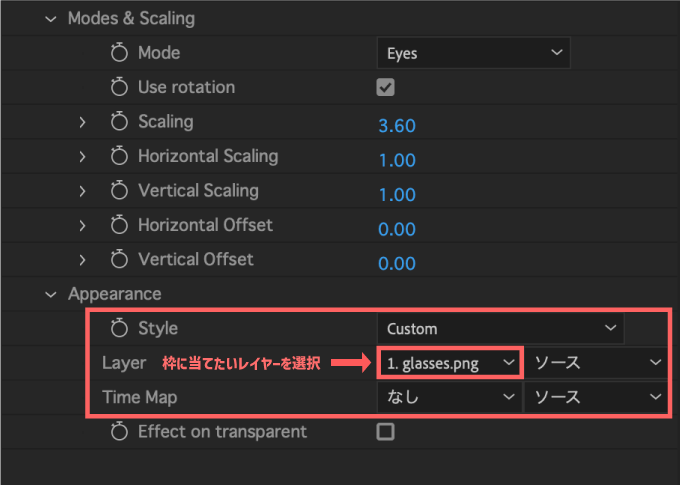
『After Effects』は『Style』の設定で『Custom』を選択することができます。
『Custom』の設定では自動検知された顔や目の部分に指定したレイヤーを当てることができます。
『なんで目に枠をつけるんだろう…』って不思議に思ってましたが、こういうことだったのかとw
『Blace』のインストール・アクティベート(アカウント認証)方法
『Blace』のインストール方法からアクティベート(アカウント認証)するまでの手順を解説します。
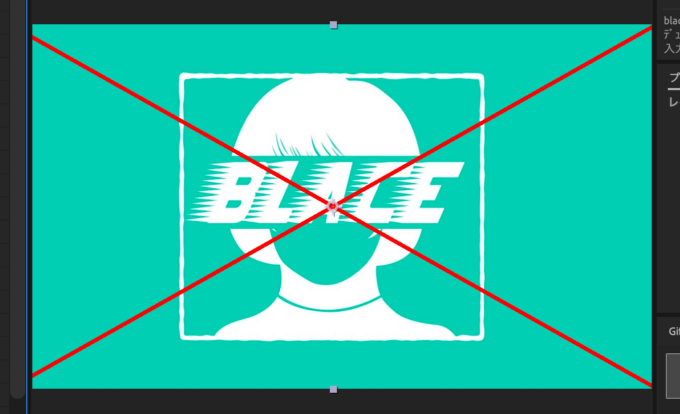
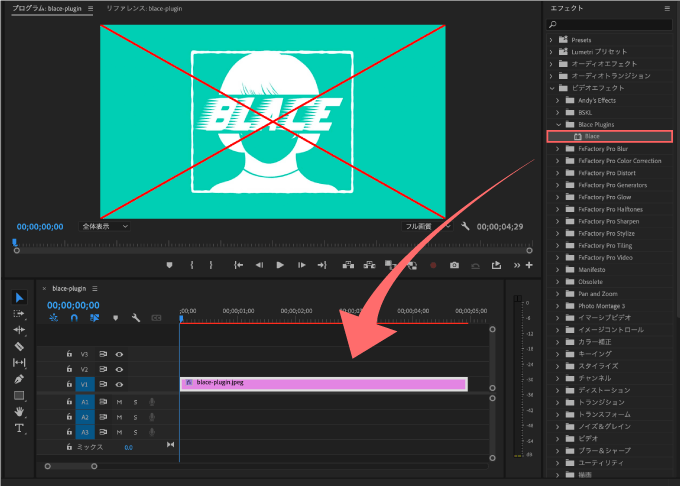
アクティベート(アカウント認証)しないと『バツ印(ウォーターマーク)』が表示されます⬇︎⬇︎
『Blace』のインストール手順
『Blace』を『Premiere Pro』や『After Effects』へインストールする手順を解説します。
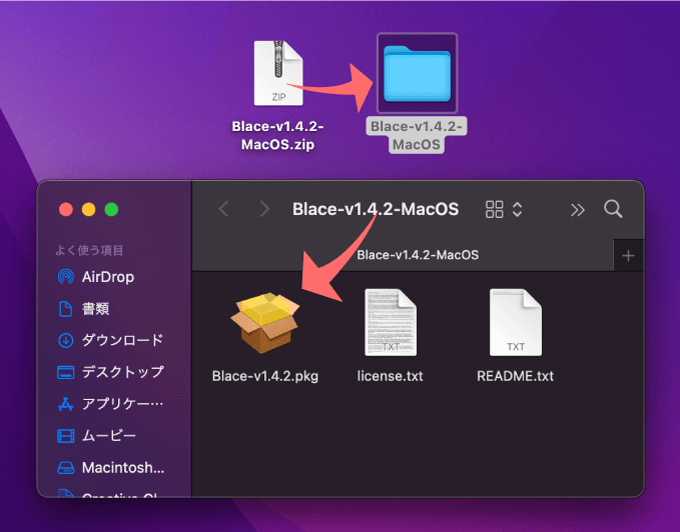
購入後zipファイルをダウンロードしたら展開します。
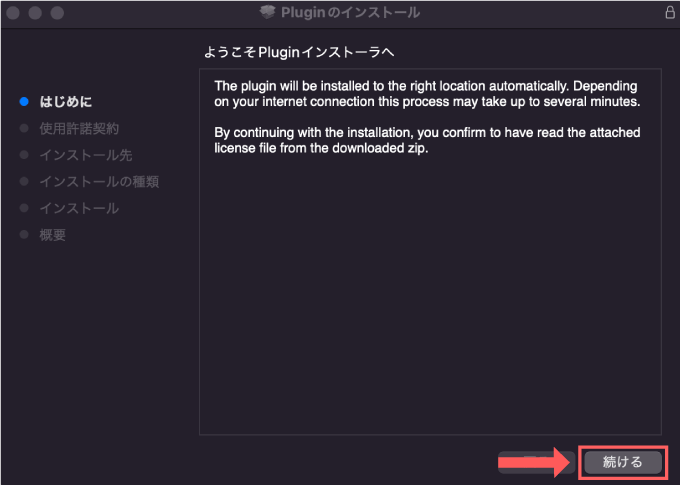
フォルダ内にインストーラー(.pkg)が入ってるのでダブルクリックで開きます。
インストーラーを起動したら右下の『続ける』をクリックします。
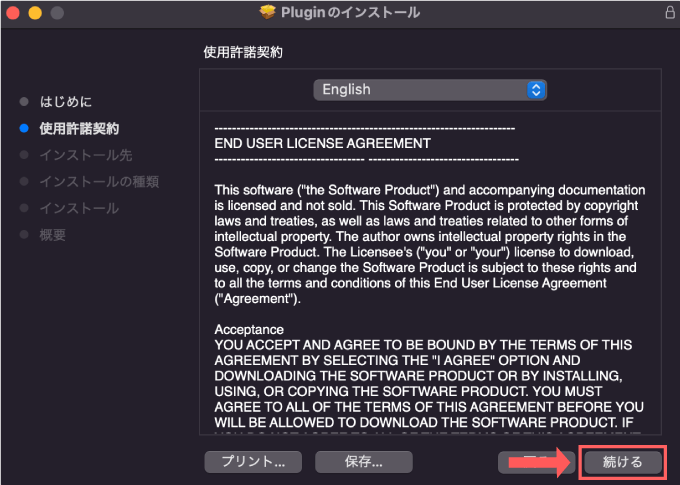
使用許諾契約の内容が表示されますが全て英語です。
『続ける』をクリックして
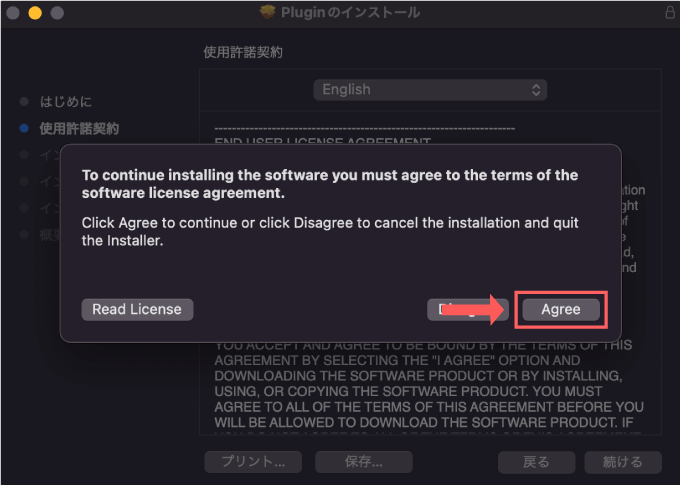
同意する(Agree)を選択します。
右下の『インストール』をクリックするとインストールが開始します。

特定の場所でインストールファイルを管理したい場合には『インストール先を変更…』を選択して
場所を指定してください。
インストールが完了するので、インストーラーは『閉じる』で閉じてください。
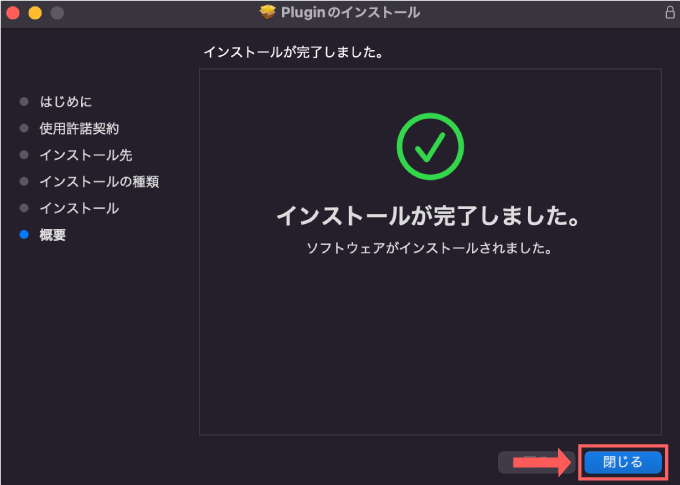
これで『Premiere Pro』にも『After Effects』にもインストールされてますd(゚∀゚)
【Premiere Pro】『Blace』のアクティベート(アカウント認証)手順
『Premiere Pro』を開いて素材を読み込んだら
エフェクト ▶︎ ビデオエフェクト ▶︎ Blace Plugins ▶︎ Blace を適用します。
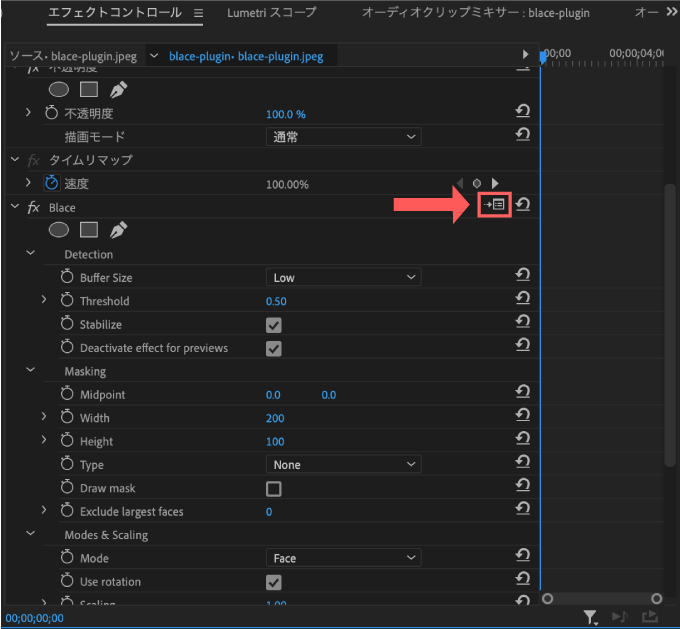
エフェクトコントロールパネルに『Blace』が表示されるので、右上にあるアイコンをクリックします。
枠にライセンスコードを入力して『Activate』をクリックします。
これでアクティベート完了です。
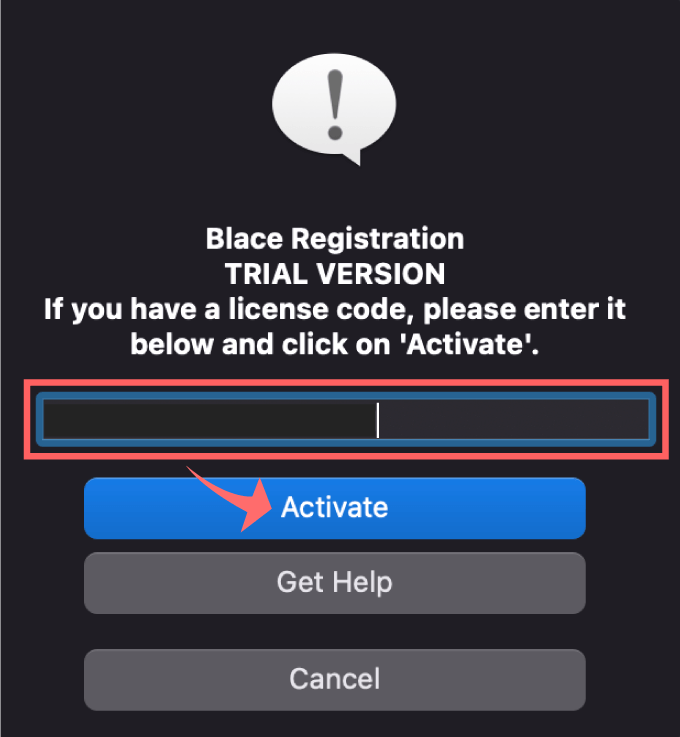
アクティベートが1回でうまくいかないことがありますが、『Deactive(アカウント認証解除)』して再度『Active』を繰り返せばうまくいきますd( ̄  ̄;)
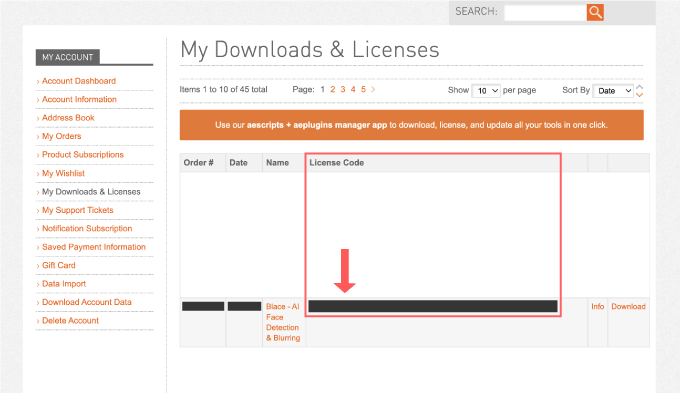
ライセンスコードは aescripts+aeplugins▶︎MY ACCOUNT ▶︎My Downloads & Licenses の中に『License Code』があるのでコピペしてください。
【After Effects】『Blace』のアクティベート(アカウント認証)手順
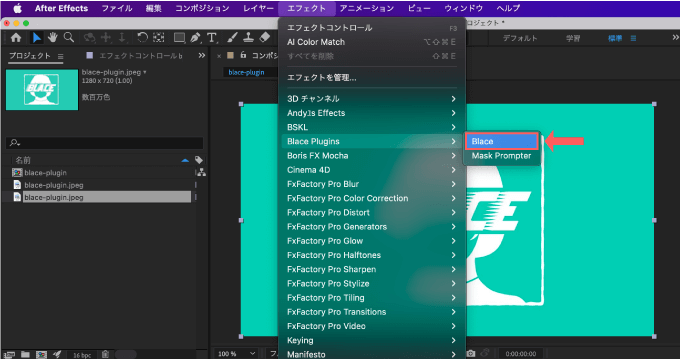
『After Effects』を開いて素材を読み込んだら、エフェクト ▶︎ Blace Plugins ▶︎ Blace を適用します。
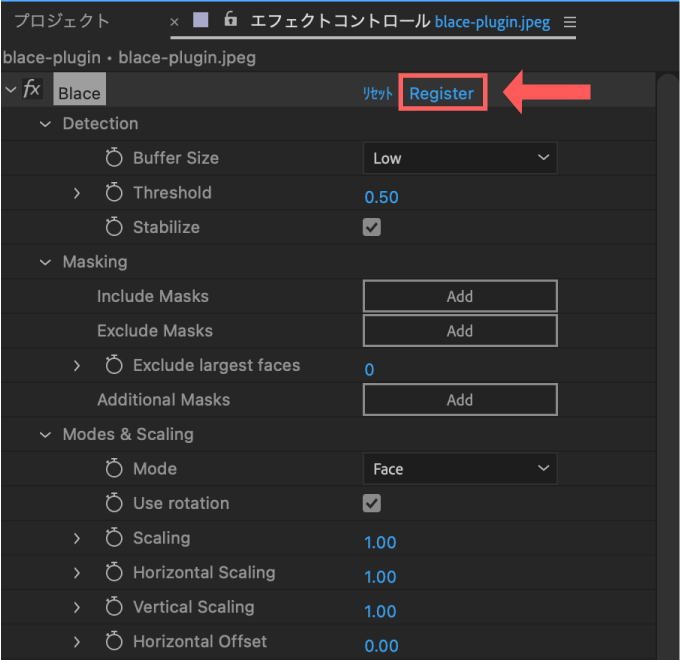
エフェクトコントロールパネルに『Blace』が表示されるので、右上にある『Register』をクリックします。
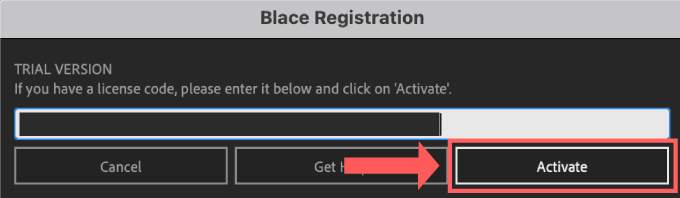
枠にライセンスコードを入力して『Activate』をクリックします。
これでアクティベート完了です。
ライセンスコードは aescripts+aeplugins▶︎MY ACCOUNT ▶︎My Downloads & Licenses の中に『License Code』があるのでコピペしてください。
最後に
『Blace』以外にも『Premiere Pro』や『After Effects』で使える無料・有料のツールや素材はたくさんあります。
*『Adobe Premiere Pro』で使える無料ツール、素材をまとめた記事はこちら⬇️⬇️

*『Adobe Premiere Pro』で使える無料・有料プラグインやスクリプトをまとめた記事はこちら⬇️⬇️
*『Adobe After Effects』で使える無料・有料プラグインやスクリプトをまとめた記事はこちら⬇️⬇️
以上、最後まで見ていただいてありがとうございました(=゚ω゚)ノ