
Adobe After Effects

『AutoFill』というエフェクトプラグインが気になっています(゚∀゚)
もしよろしければ…解説してもらえませんか(゚∀゚(゚∀゚(゚∀゚!?
『AutoFill』はちょうど紹介しようと思ってたんだよねー
日本語で解説した記事や動画が全くないから紹介して欲しいっていう要望もちょこちょこあったんだよね(^ ^)
そうなんですね!! ではぜひぜひ解説をよろしくお願いしま〜す(=゚ω゚)ノ
『AutoFill』は機能が膨大だから記事の量も膨大になってしまった…
見たいところだけ飛ばして読んでね( ´ ▽ ` 😉
『AutoFill』を使えば様々な塗りアニメーションを簡単に作ることができます。
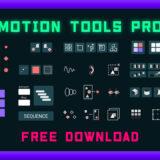
50種類のプリセットを使えば『After Effects』初心者でも面白い塗りアニメーションを作ることができるので
興味のある方はぜひ最後まで読んでいただけると嬉しいです。
この記事は以下のような悩みや疑問を解決できる内容になってます⬇︎⬇︎
それではいってみましょう!!
*複雑な塗りアニメーションを簡単に作ることができるプラグイン『Auto Fill』を徹底解説した動画はこちら⬇︎⬇︎
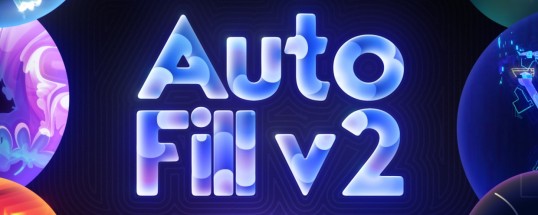
2023.8.7に新しいバージョン『Auto Fill v2』の販売がスタートしました!!
v2になり新機能が追加されてますが、基本的な機能は前バージョンのv1とさほど変わりないです。
目次
『AutoFill』とは!?

『AutoFill』は『Deep Glow』や『Text Box 2』『Shadow Studio』など数々の優秀なプラグインを開発している
『Plugin Everything』社が無料で提供しているエフェクトプラグインになります。
『AutoFill』を使えば…
素材の不透明度を塗りや拡大のガイドとして利用することで
シェイプやイメージから塗りつぶしアニメーションを自動生成することができます。


『AutoFill』では草木が育っていくようなグロープランツ系のアニメーションにもよく使われてます。

一度作ってみたいです(*゚▽゚*)
v1.1のアップデートで25種類のプリセットにさらに25種類追加され
合計50種類のプリセットを使えるようになりました。
50種類もあればプリセットだけでも色々と楽しめそうですねd(゚∀゚)
めちゃくちゃ楽しめるよ〜ψ(`∇´)ψ
50種類のプリセットをまとめて紹介するから、ぜひ参考にしてみてね♪( ´θ`)ノ
『AutoFill』のプリセット一覧
『AutoFill』に収録されているプリセットをまとめてみました。
Complex ▶︎ 12種類
Fast ▶︎ 14種類


New Presets ▶︎ 13種類


Other Presets ▶︎ 3種類


Handwriting Presets ▶︎ 15種類


『AutoFill』はどこで購入すればいい!?最安は!?
『AutoFill』はどこで購入できるのか、最安価格を紹介しておきます。
『AutoFill』を国内で唯一販売している『フラッシュバックジャパン』はやや割高となります。
「海外へ個人情報を登録するのが嫌だ…(ー ー;)」
「何か起こったときのサポートが日本語対応している方がいい…_(┐「ε:)_」
という方はフラッシュバックジャパン一択となります。
海外では『TOOLFARM』と『aescripts+aeplugins』が『AutoFill』を最安価格で購入することができます。
クレジットカードを登録するのが不安な方は『PayPal』を経由するといいかと思います。

海外サイトでの購入は不安かもしれませんが…
海外クリエーターのほとんどは『TOOLFARM』もしくは『aescripts+aeplugins』でプラグインやスクリプトを購入しているので、かなり安心な販売サイトかと思います。
【『AutoFill v2』の価格比較表】
海外サイトの方が3,000円以上安いので海外サイトで購入したいのですが
初めてなのでちょっと抵抗がありますね…ヽ(´o`;
自分はいつも『aescripts+aeplugins』か『TOOLFARM』で購入してるよー
今まで一度もサポートを必要とする事態になったことはないし、支払いには『PayPal』を使ってるけどトラブルになったことない( ´ ▽ ` )♪
『AutoFill』のインストール方法
『Auto Fill』を『After Effects』にインストールして使えるようにするまでの流れを解説していきます。
『AutoFill』のインストール方法
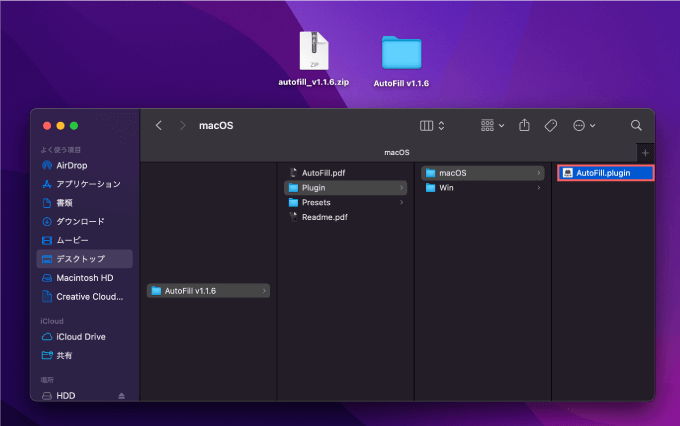
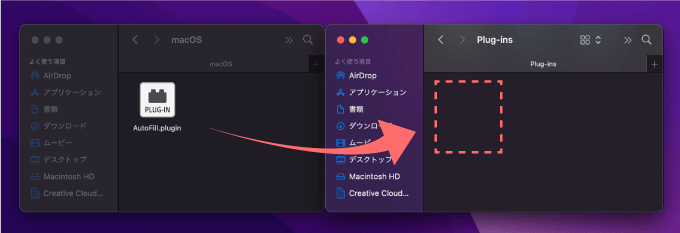
【プラグインファイル(.pluginの保存場所】
Windows ▶︎ C: ▶︎ Program Files ▶︎ Adobe ▶︎ Adobe After Effects <AE version> ▶︎ Support Files ▶︎ Plug-ins
Mac ▶︎ アプリケーション ▶︎ Adobe After Effects <AE version> ▶︎ Plug-ins
Zipファイルを展開して、表示されたフォルダ内に『AutoFill』のプラグインファイルが入っていることを確認します。
『After Effects』のアプリケーションファイルを開いて
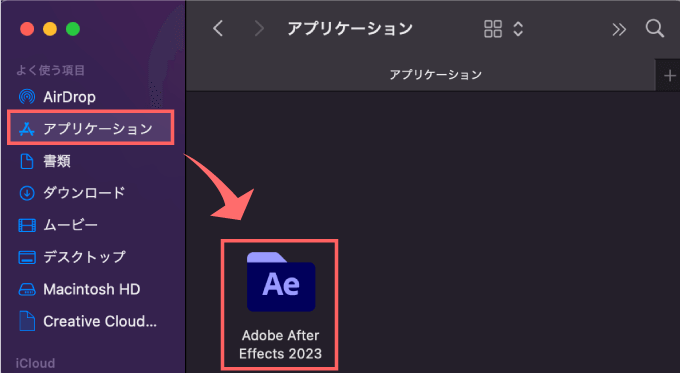
『Plug-ins』フォルダーを開いて
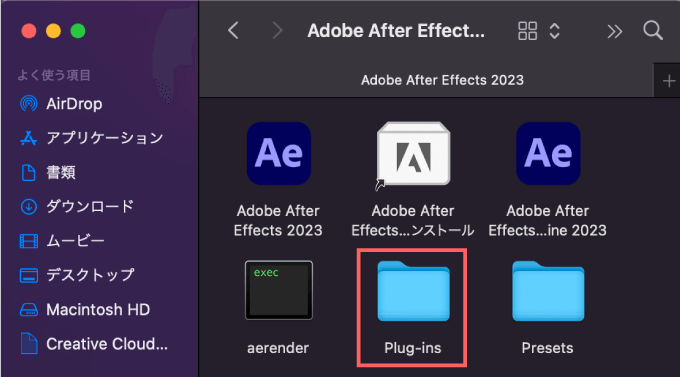
『Plug-ins』フォルダーの中にプラグインファイル『AutoFill.plugin』をコピペ、もしくはドラッグ&ドロップします。
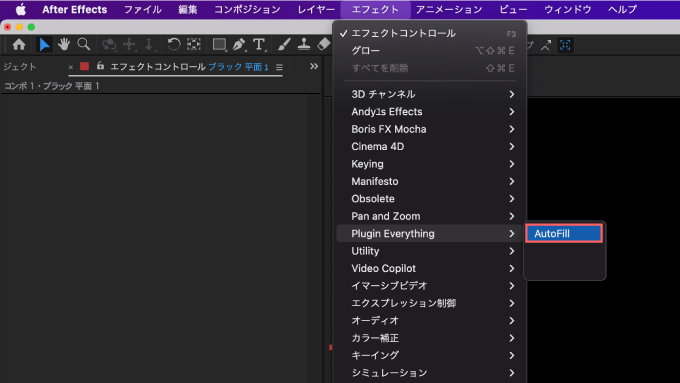
『After Effects』を開いて、上部メニューのエフェクト▶︎Plugin Everything ▶︎AutoFill が追加されています。
『Auto Fill』のライセンス認証(アクティベート)方法
『AutoFill』はプラグインファイルをインストールしただけでは
プレビューにバツ印が表示され、まだ使うことができません。
ここではライセンスコードを入力してライセンス認証(アクティベート)する方法を解説していきます。
上部メニューのエフェクト▶︎Plugin Everything ▶︎AutoFill を適用して
エフェクトコントロールパネルの『AutoFill』プロパティー上部にある『Register』をクリックします。
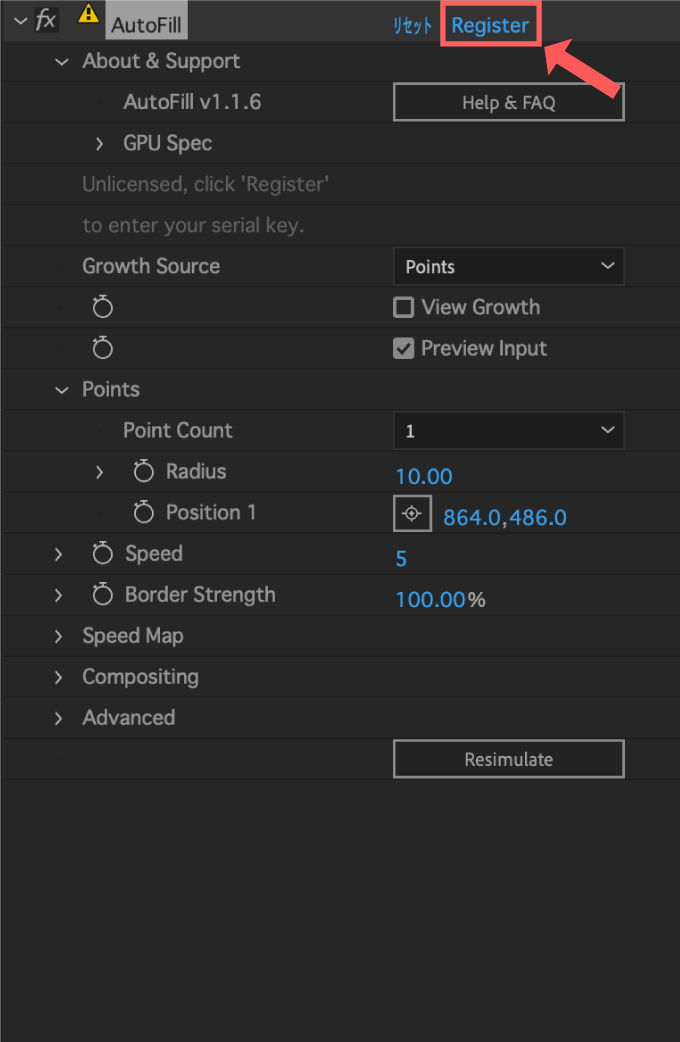
ライセンスコードの入力画面が表示されるので『Get Help』をクリックします。
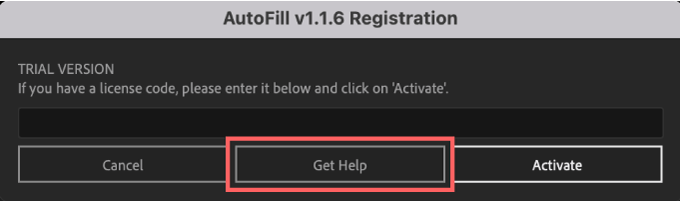
『aescripts+aeplugins』のサイトが開くのでログインしてから
① 右上部にあるアカウント名をクリック
② 左側にあるメニューから『My Downloads & Licenses』をクリック
③『AutoFill』の『License Code』をコピーします。

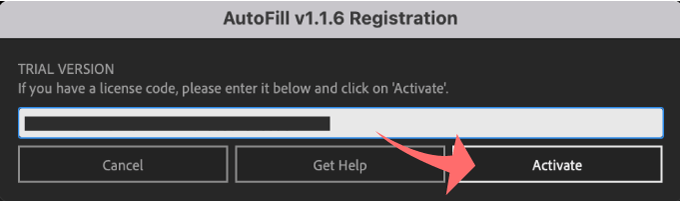
『After Effects』のライセンスコード入力画面に戻って
ライセンスコードを貼り付けて『Activate』をクリックします。
ライセンス認証(アクティベート)が完了するので『OK』をクリックします。
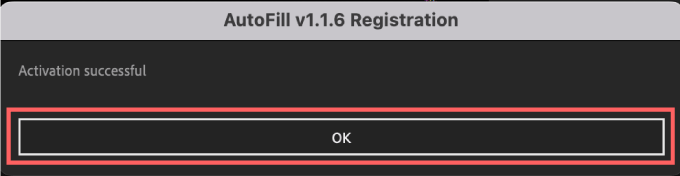
これで『AutoFill』を使うことができます。
『Auto Fill』の機能や使い方
『AutoFill』の具体的な機能や使い方を解説していきます。
- Growth Source
✔︎ Points
✔︎ Noise
✔︎ Layer - Speed
- Border Strength
- Speed Map
✔︎ Auto ▶︎ Map Softness
✔︎ Auto ▶︎ Edge Erode
✔︎ Speed Map Influence - Speed Map Mode ▶︎ Custom Layer
- Compositing
✔︎ Color Fill、Composite Over Original、Delay
✔︎ Ignore Previous Effects
✔︎ Border Expand - Advanced
Growth Source
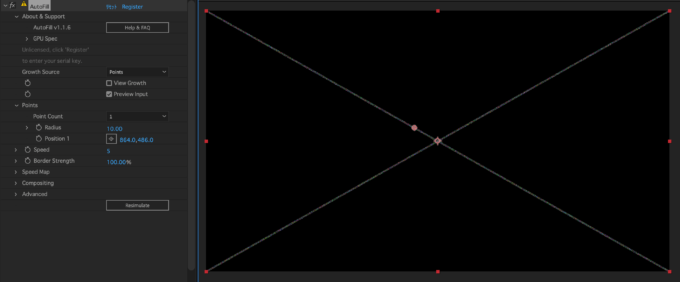
『Growth Source』では塗りつぶしアニメーションをトリガーするための開始点を『Points』『noise』『Layer』の3種類から選択することができます。
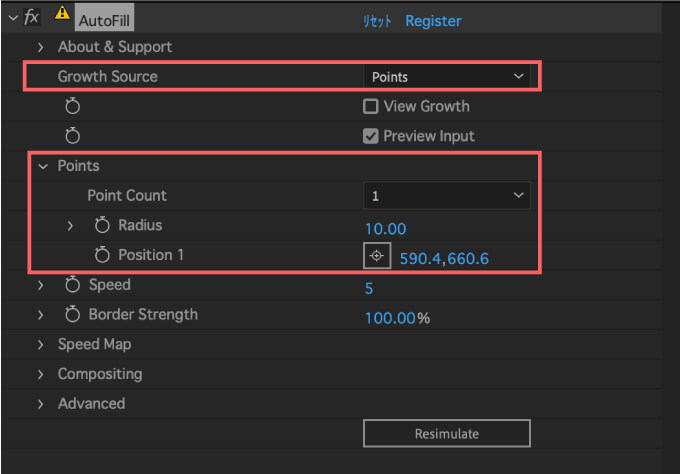
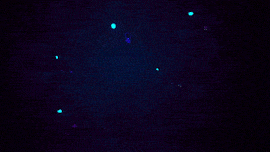
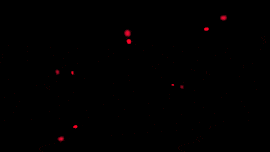
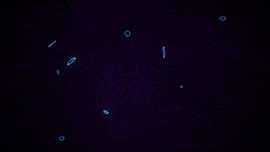
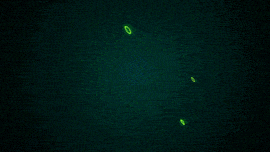
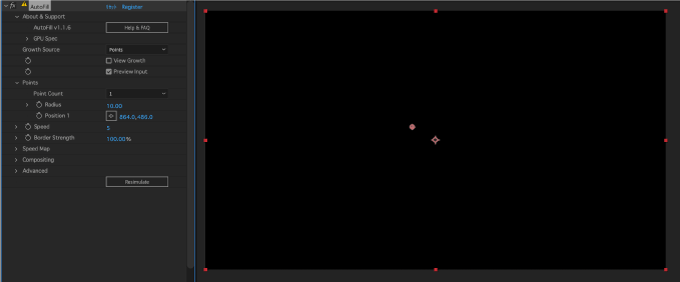
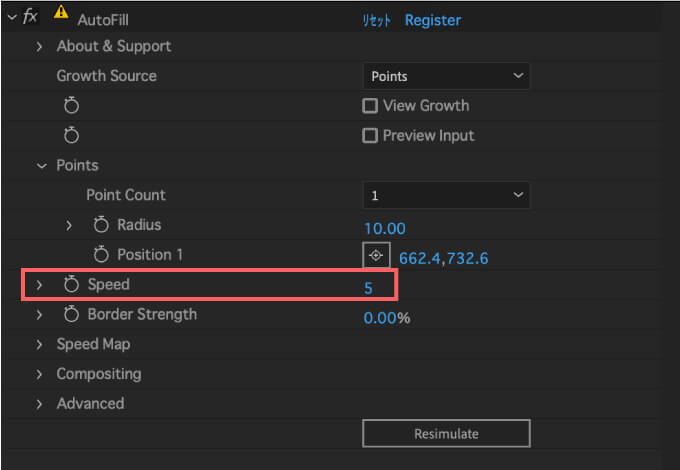
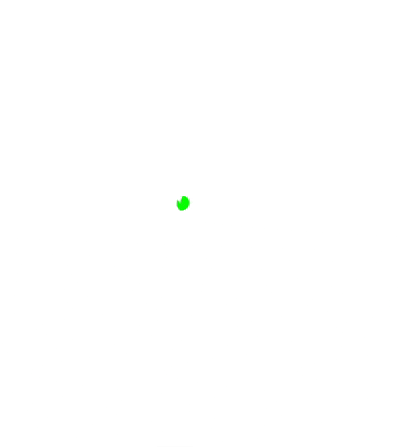
『Growth Source』を『Points』に設定するとポイントを起点に塗りつぶしを開始することができます。
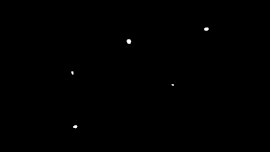
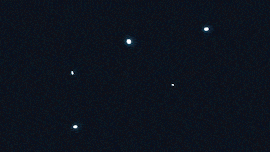
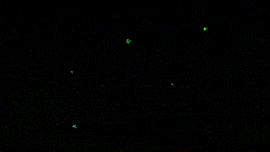
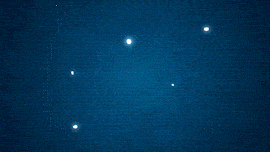
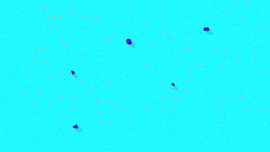
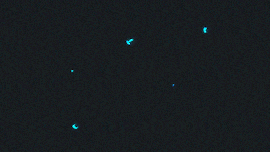
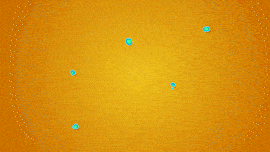
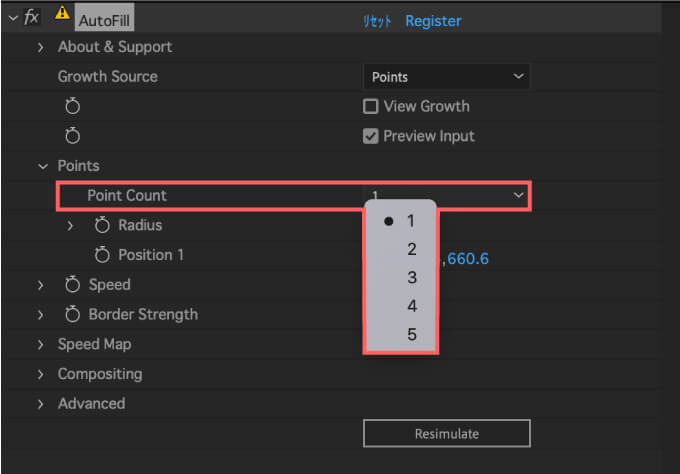
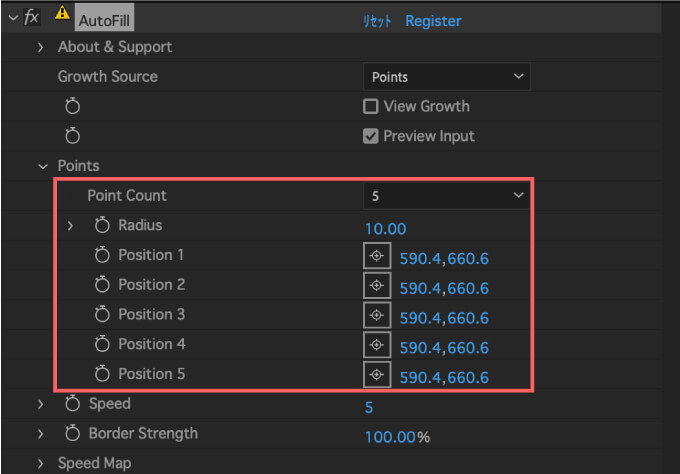
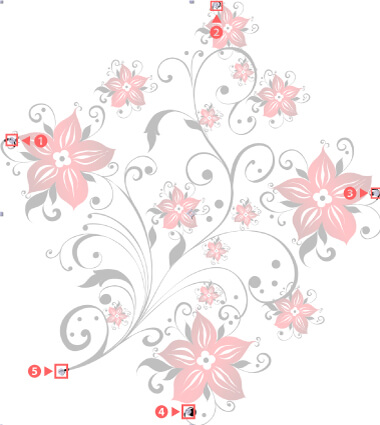
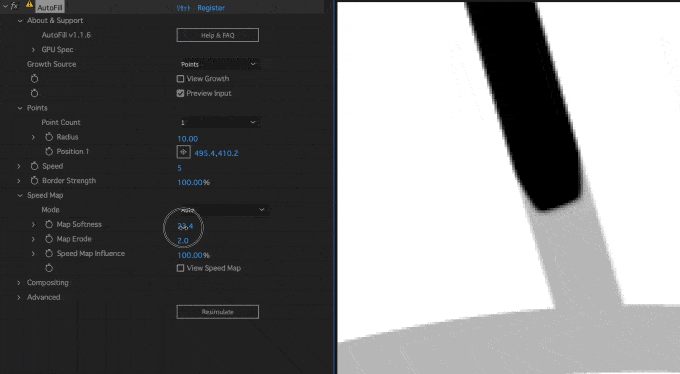
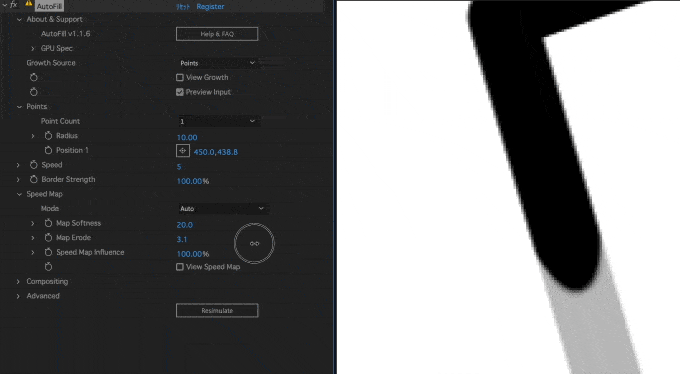
『Point Count』でポイント(塗りの開始点)を1〜5個まで選択することができます。
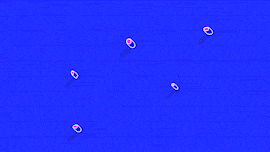
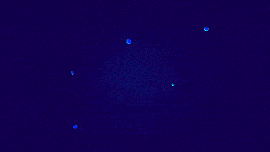
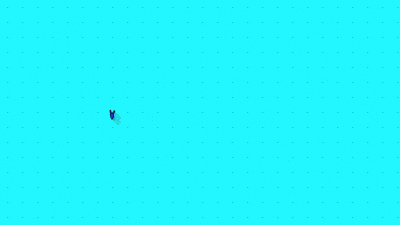
『Point Count』を1に設定、ポイント(塗りの開始点)を中心に配置⬇︎⬇︎
『Point Count』を5に設定、ポイント(塗りの開始点)を周囲に配置⬇︎⬇︎
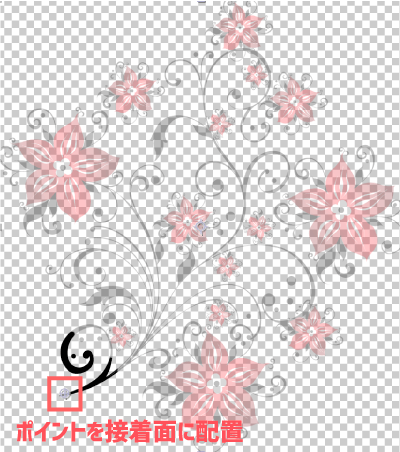
最初のフレームをよりスムーズに開始するためには…
ポイントをレイヤーのアルファ(透明部分)に配置した方がアニメーションがスムーズに開始されます。

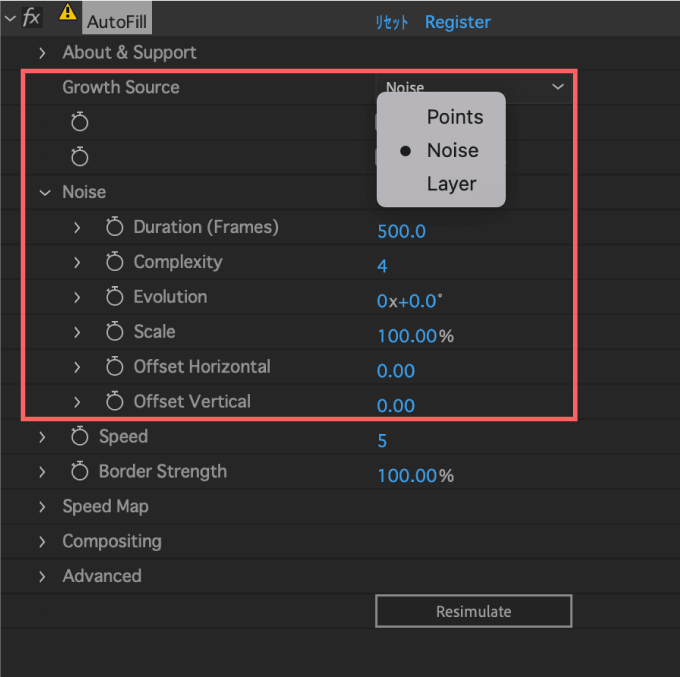
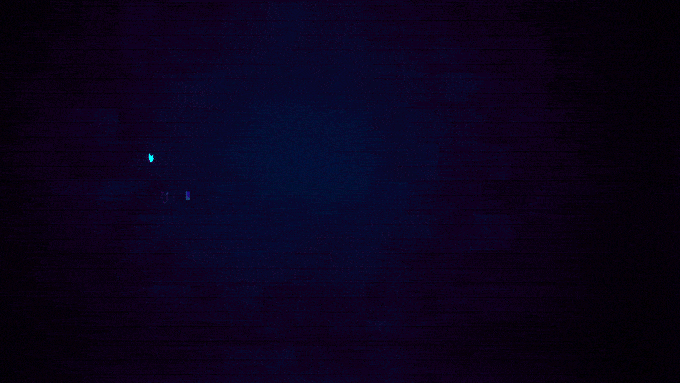
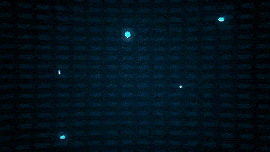
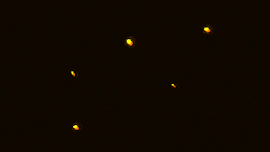
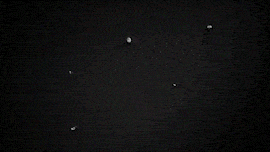
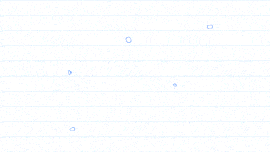
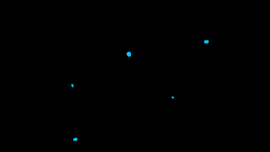
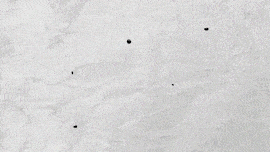
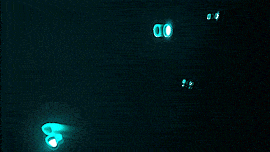
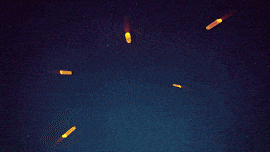
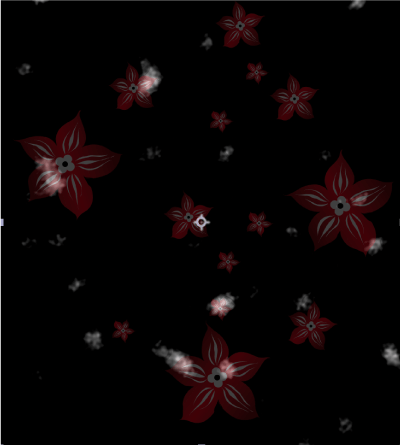
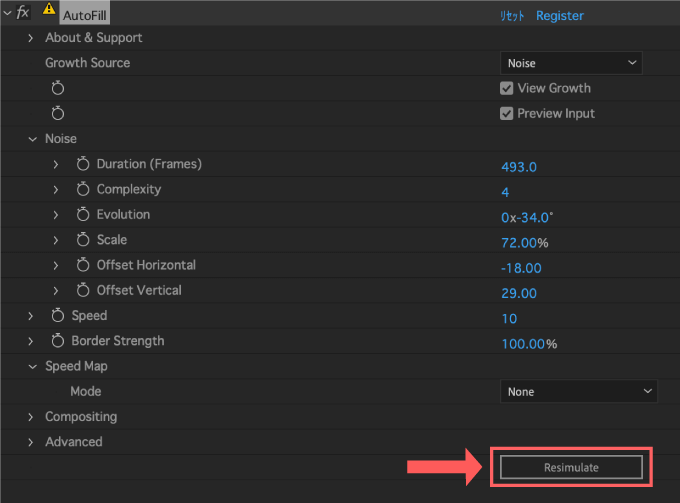
『Growth Source』を『Noise』に設定すると間隔が離れている要素も問題なくアニメーションさせることができます。
『Noise』では自動で黒と白のフラクタルノイズのマップを作成してくれます。
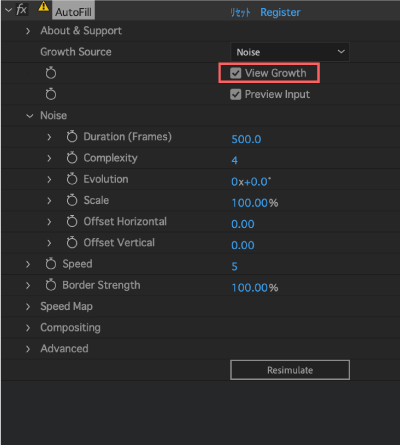
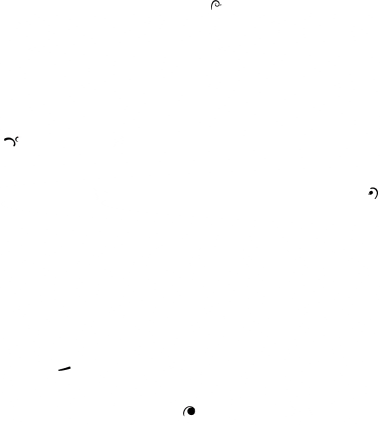
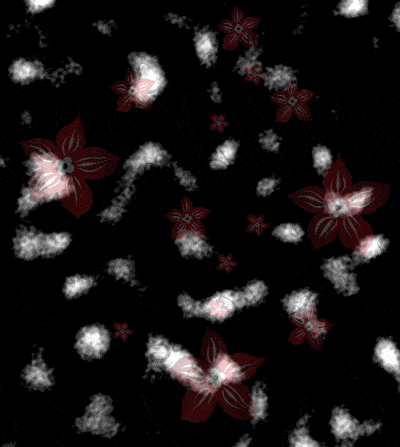
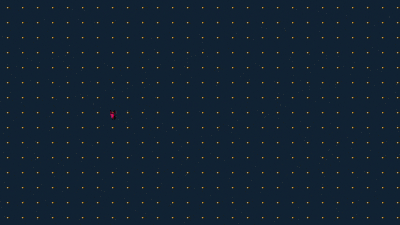
『Growth Source』を『Noise』に設定した後に『View Growth』にチェックを入れると古くたるノイズのマップを見ることができますd(゚∀゚)
自動生成されたフラクタルノイズは黒から始まって最終的には全体を白く埋めます。
白いノイズの部分から表示されていくといった感じです。

要素同士の距離が離れて『Points』では全ての要素に塗りが行き届かない場合に便利ですd(゚∀゚)
『Growth Source』を『Noise』に設定することで表示されるプロパティーで
生成されるフラクタルノイズのデュレーションやサイズ、位置などを微調整することができます。
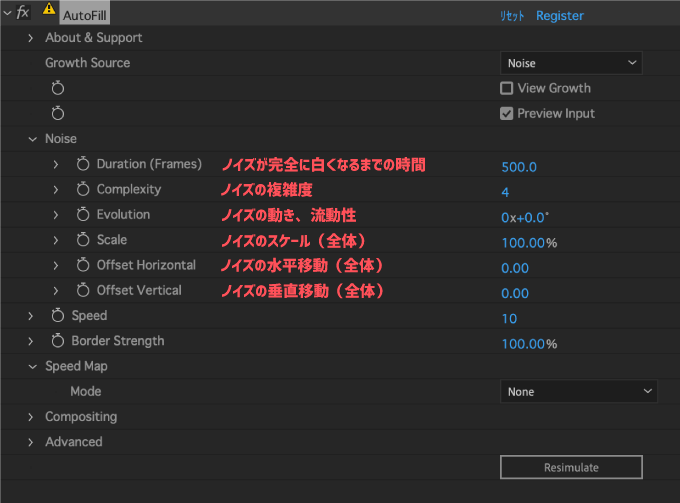
『Growth Source』を『Noise』に設定しているときは
設定変更するたびに『Resimulate』ボタンを押さないと不具合が発生する可能性があります。
Speed
『Speed』では塗りつぶされる速度を調整することができます。
Border Strength
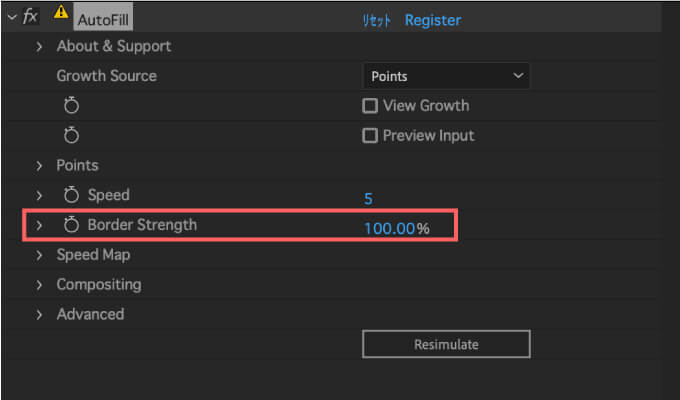
『Border Strength』では塗りの境界線(範囲)を調整することができます。
連続してない部分や連続している部分が細いなど認識されにくい箇所は塗りが行き届かない箇所が出てしまいます。

『Border Strength』の数値を調整することで塗りの境界線(範囲)を調整することができます。


Speed Map
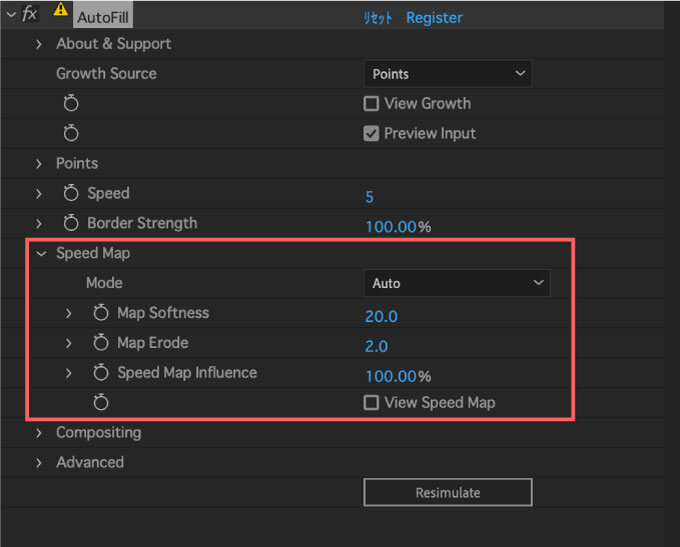
『Speed Map』は『AutoFill バージョン1.1』から追加された新機能で、『Speed Map』を利用すれば簡単にスムーズな塗りつぶしアニメーションを作ることができます。
『Speed Map』の『Mode』を『None(OFF)』に設定した場合には『Auto』と比べて塗りアニメーションのエッジの丸みがなくなります。
『Speed Map』を設定した方が、より水が浸透していくようなイメージの柔らかいアニメーションになるというところでしょうか。
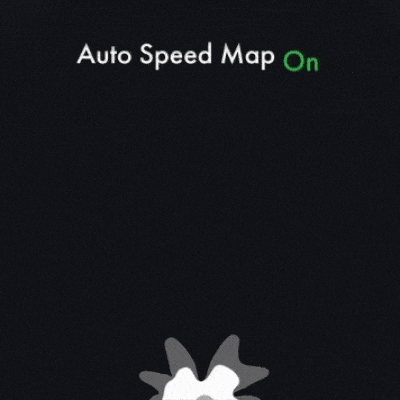
デフォルトでは『Speed Map』は『Auto』で適用されてますd(゚∀゚)
『Auto』モードでは『Map Softness』と『Map Softness』のプロパティーを追加で調整することができます٩( ᐛ )و
『Map Softness』では塗りのエッジをソフトに調整することができます。
『Edge Erode』では塗りの進行具合(侵食=Erode)を調整することができます。
『Speed Map Influence』では塗りの広がり具合を調整することができます。
数値をマイナスに大きく振ることで、エッジ側から染み込んでいく感じの表現をすることもできます。

Speed Map Mode ▶︎ Custom Layer
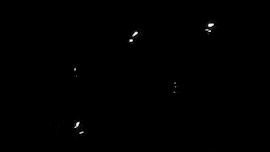
『Speed Map』の『Mode』を『Custom Layer』に設定すると、マッピングとして設定したレイヤーの輝度やアルファの情報をもとにして塗りアニメーションのスピードや動きに変化をつけることができます。
意味わかないですよね…
簡単に説明すると、マッピングしたレイヤーの白の部分は塗りアニメーションの速度が早くなり、黒の部分は塗りアニメーションの速度が遅くなります。
例えば…
『Speed Map』を『Auto』に設定してプロパティーを調整した場合には以下のような塗りアニメーションになります⬇︎⬇︎
対して『Speed Map』の『Mode』を『Custom Layer』に設定して塗りアニメーションに変化をつけていきます。
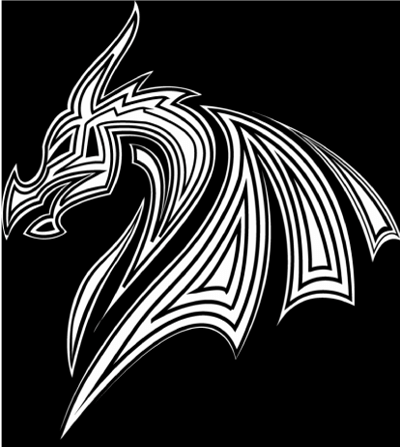
まずはマッピングに使用するレイヤーを作ります。
まずは『Auto Fill』を適用しているレイヤーを複製して、エフェクトコントロールパネル▶︎『AutoFill』を削除します。
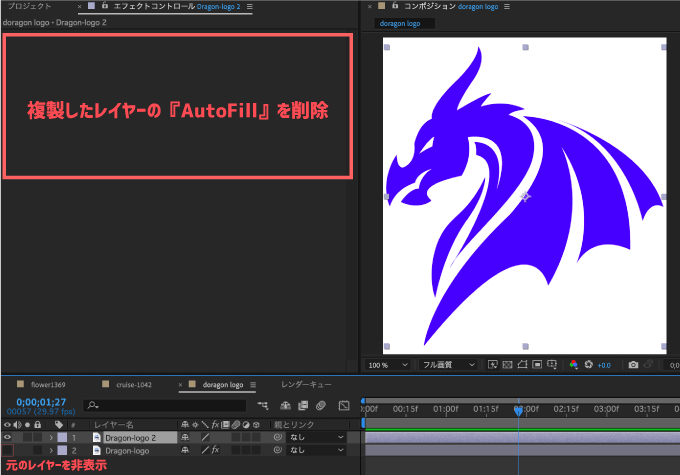
元のレイヤーは非表示にしてくださいd(゚∀゚)
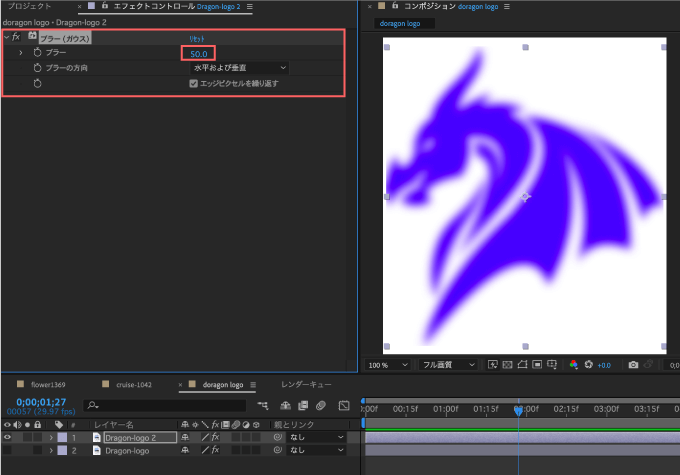
複製したレイヤーにエフェクト ▶︎ ブラー&シャープ ▶︎ ブラー(ガウス)を適用して
ブラーの数値を50くらいに設定します。
複製したレイヤーにエフェクト ▶︎ カラー補正 ▶︎ レベル補正を適用して
チャンネルをRGB ▶︎ アルファへ
アルファの黒入力レベルを上げる
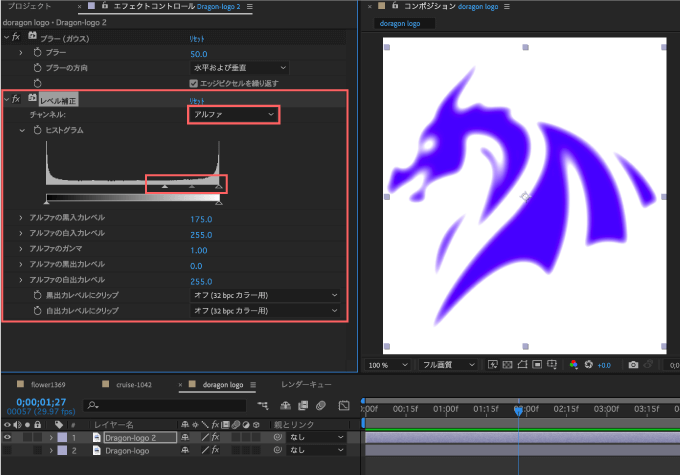
『アルファの黒入力レベル』は最終的に230に設定しましたd(^ ^)
複製したレイヤーにエフェクト ▶︎ 描画 ▶︎ 塗りを適用してカラーを白に設定します。
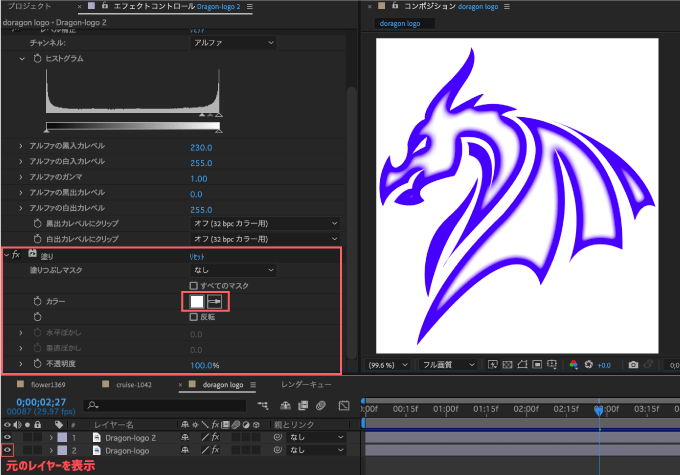
元レイヤーを表示に戻しますd( ̄  ̄)
これでマッピング用のレイヤーは完成です(゚∀゚)
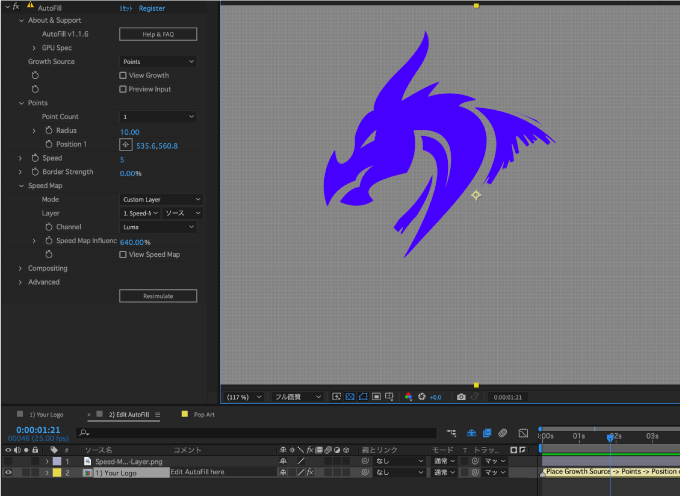
マッピング用に作成したレイヤーを『Speed Map』として設定していきます。
① マッピング用に作成したレイヤーを非表示にします。
②『AutoFill』を適用していた元レイヤーのSpeed Map ▶︎ Custom Layerへ設定
③ 『Layer』をマッピング用レイヤーに指定(1 Dragon logo 2)
④ 『Layer』の対象を『エフェクトとマスク』へ設定
⑤ 『Channel』設定を『Alpha』へ設定
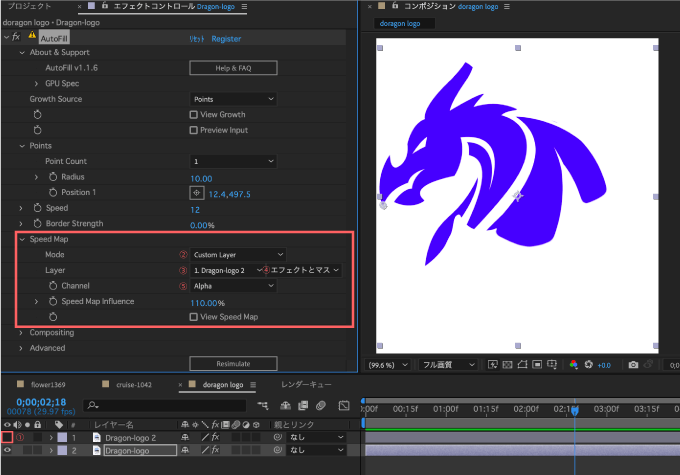
表示されるタイミングや塗りアニメーションの広がり具合は『Speed』や『Speed Map Influence』で調整してくださいd(゚∀゚)
ちなみに
『View Speed Map』をONにしてSpeed Mapとしてマッピングされているレイヤーを表示すると
作成したマッピング用のレイヤーがSpeed Mapとして適用されているのが確認できます。
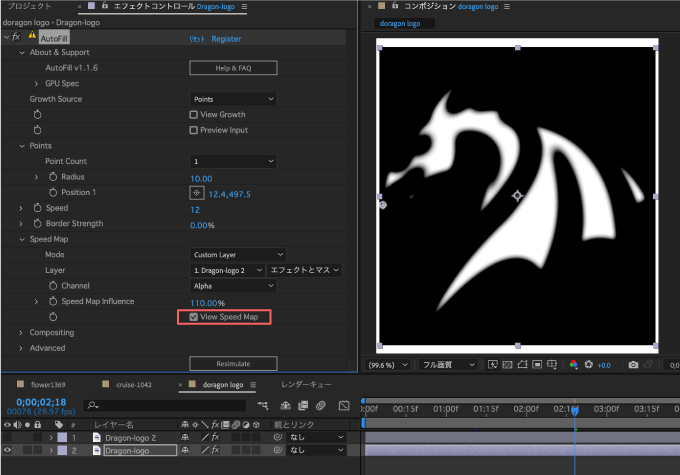
マッピング用のレイヤーの白い部分が早く、黒い部分が遅くアニメーションされます(=゚ω゚)ノ
『Auto』と『Custom Layer』でオリジナルのスピードマップを適用した場合を比較すると以下のような感じです⬇︎⬇︎

『Auto』と『Custom Layer』でオリジナルのスピードマップを適用した場合を比較すると以下のような感じです⬇︎⬇︎
いろんなタイプのマップを自作して設定すると色んな表現ができます。

『AutoFill』では花や草木が成長するようなアニメーション『Growing Plants Animation』をよく見ますが
このアニメーションも『Speed Map』で枝野部分を白くしたマップを使用することで
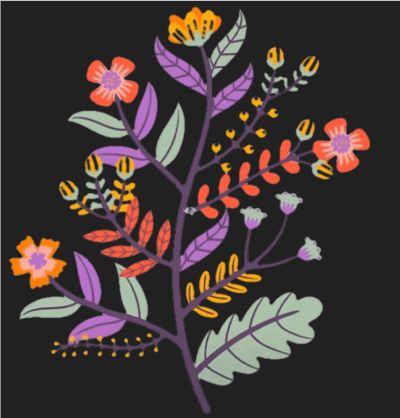
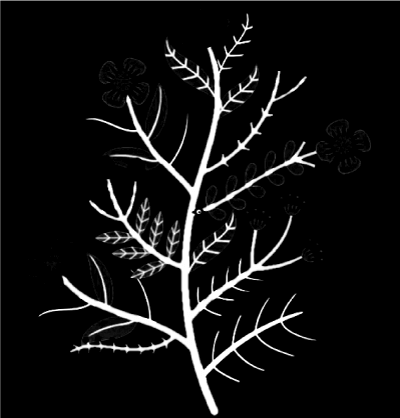
いい感じの『Growing Plants Animation』を作ることができます。

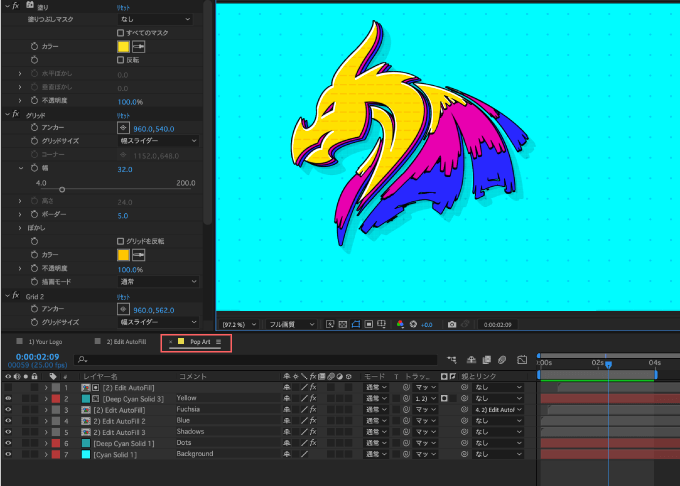
Compositing
『Compositing』ではアルファ反転マット『Alpha Inverted Matte』を適用したり
色の塗りつぶし『Color Fill』、ブレンドモード『Blend Mode』などを適用してアレンジすることができます。
例えば一例として…
『AutoFill』を適用して調整し終わったレイヤーの『AutoFill』エフェクトを複製します。

複製した『AutoFill』のプロパティーを
①『Color Fill』にチェックを入れて好きなカラーを選択
②『Composite Over Original』にチェックを入れて『Blend Mode』から『Screen』を選択
③『Delay(Frames)』を25に設定
この①〜③の設定で
カラーとブレンドモードの適用された塗りが25フレームズレてアニメーションします。
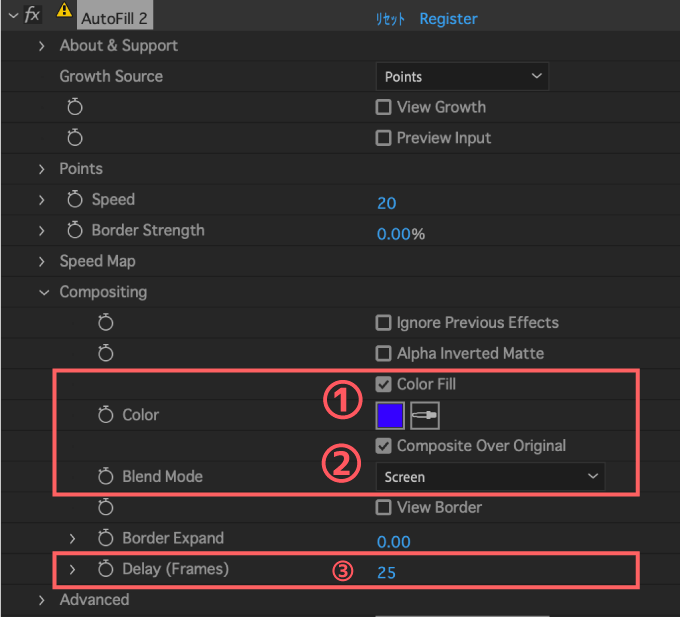
『Composite Over Original』では描画モードを適用できるので、画像の上に『AutoFill』がオーバーレイしてカラーが変化していいくアニメーションを作ることができますd( ̄  ̄)
再生するとこんな感じです⬇︎⬇︎

『AutoFill』を複数適用して全ての『Composite Over Original』をON、『Delay』を1つずつずらせば以下のように幾つでも塗りを重ねてアニメーションさせることができます。
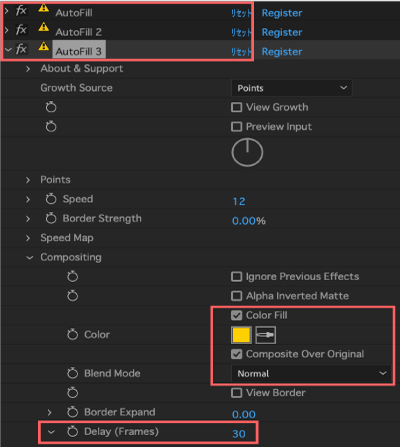
『Delay』を使えば『AutoFill』のアニメーションの開始をフレーム単位で遅らせることができるよ٩( ᐛ )و
もう一段こだわったアニメーションを作るのに『Compositing』のプロパティー調整は欠かせない感じ(´∀`*)
『Compositing』を調整すれば色々とアレンジの幅が広がりそうですね(゚∀゚)

『Ignore Previous Effects』をONにすると
『AutoFill』よりも上位に適用しているエフェクトを無効化することができます。
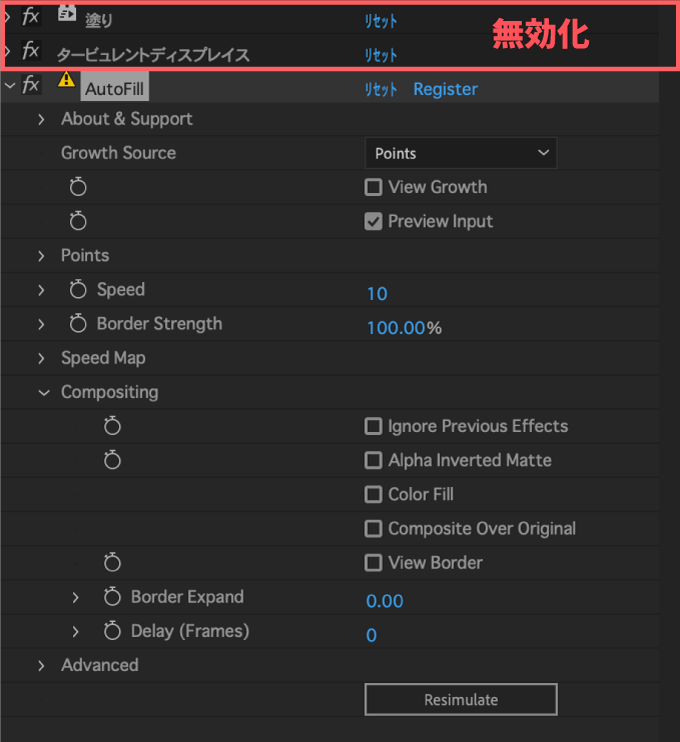
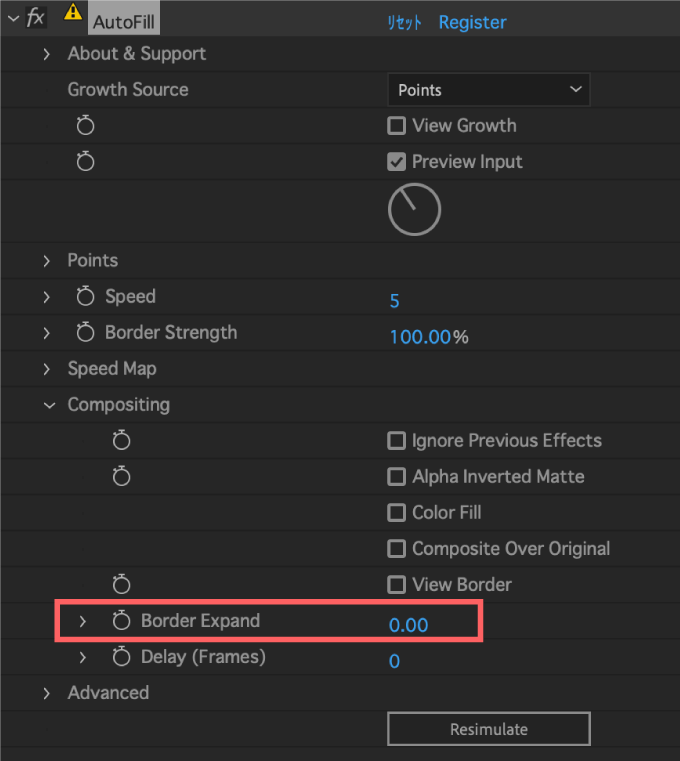
『Border Expand』では塗りつぶしの境界を拡大または縮小することができます。
『Ignore Previous Effects』をONにすると
『AutoFill』よりも上位に適用しているエフェクトを無効化することができます。


『Border Expand』は『Border Strength』の値と相関するので、プレビューを確認しながら両方の値を微調整してくださいd( ̄  ̄)
Advanced
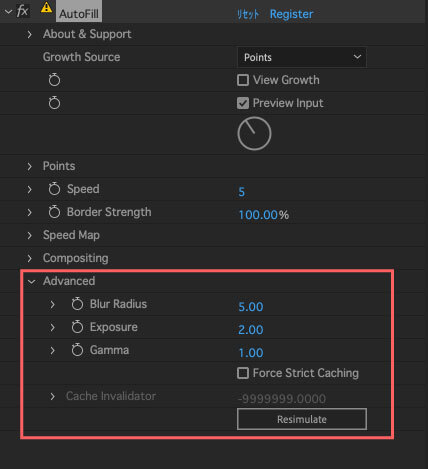
『Advanced』は『Blur Radius(ぼかし)』『Exposure(露出)』『Gamma(ガンマ)』の3つのプロパティーを調整できますが
公式では「調整は自己責任でお願いします」「あまり役に立ちません」と操作することをあまり推奨していない感じです…
実際に使ってみると『Blur Radius』は最大数値にしても塗りがぼけたり、ぼけなかったりで
使うことはなさそう…
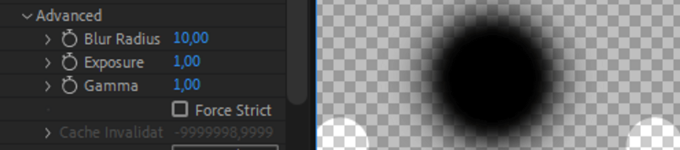
『Exposure(露出)』は塗りが浸透する速度を速くする
『Gamma(ガンマ)』は塗りが浸透する速度を遅くする
機能になります。
『Gamma(ガンマ)』の数値を上げると塗りアニメーションが細いラインのように伸びていくようなアニメーションになるので、個人的にはかなり好みです(〃ω〃)
ただ『Gamma(ガンマ)』の数値を上げすぎると、塗りアニメーションが全ての要素に行き届かなくなってしまうので
同時に『Border Strength』や『Speed Map Influence』の数値も調整しながらいい感じに微調整してます。
『AutoFill』プリセットの使い方
『AutoFill』を購入すると50種類のプリセットが収録されたプロジェクトファイルが付属しています。
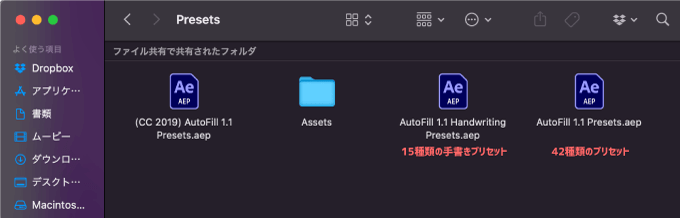
ここではプリセットを使って塗りアニメーションを作る流れを解説していきます。
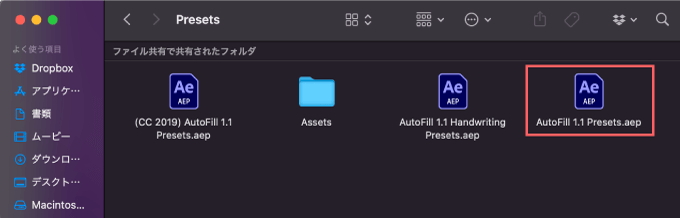
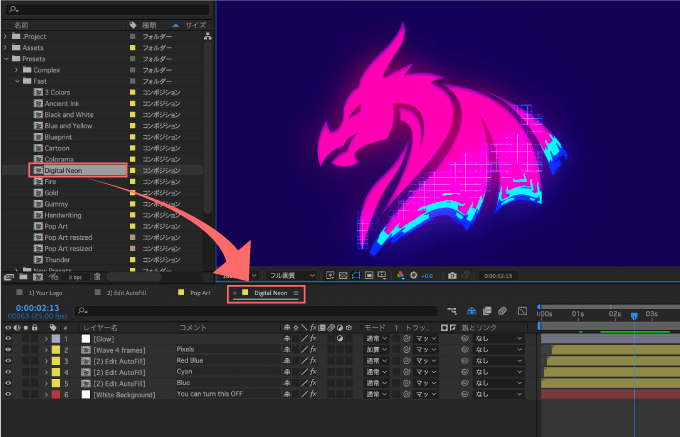
『AutoFill』購入後にダウンロードしたファイルのPresetsフォルダーに入っている『After Effects』のプロジェクトファイル『AutoFill 1.1 Presets.aep 』を開きます。
プロジェクトパネルに各プリセットが適用できるコンポジションが入ったフォルダーが4つと
プリセットの中からすでに3つのプリセット『Gummy』『Planet』『Realistic Gold』のコンポジションが開いています。
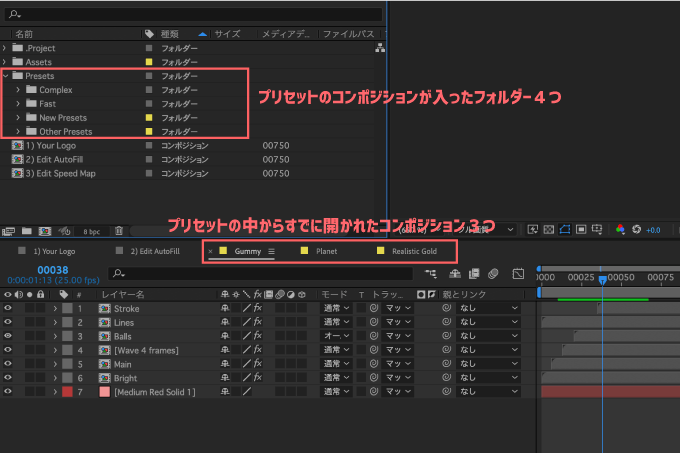
プリセットの中からすでに開かれている3つのコンポジションは解説の邪魔になるので、3つとも閉じでおきますd( ̄  ̄)
プリセットを使う流れは
① プロジェクトパネル内から適用したいプリセット▶︎コンポジションを開く
②『1)Your Logo』のコンポジションにプリセットを適用したいロゴやシェイプを配置
③『2)Edit AutoFill』でエフェクト『AutoFill』の設定を調整
④ ②と③で調整した内容が①で開いたコンポジションに反映される
といった流れです。
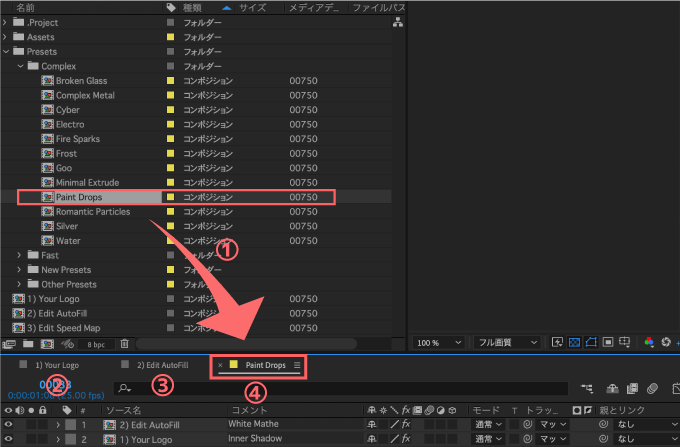
手順を1つずつ解説していきます。
まずはプロジェクトパネル内から適用したいプリセット▶︎コンポジションを開きます。
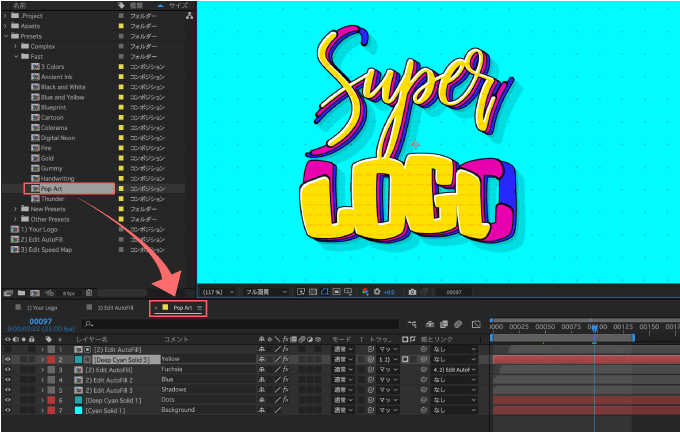
今回は『Pop Art』を使います٩( ᐛ )و
『1)Your Logo』のコンポジションにプリセットを適用したいロゴやシェイプを配置します。
元から配置されていた『Your LOGO(Supar LOGO)』は削除してください。
コンポジション『2)Edit AutoFill』でエフェクトコントロールパネルから『AutoFill』のプロパティーを調整します。
『Speed Map』で解説した内容とほぼ同じ調整をしました٩( ᐛ )و
コンポジション『Pop Art』を開くと調整した内容が反映されます。
コンポジション『Pop Art』に含まれる各レイヤーのエフェクトを調整してプリセットをアレンジすることもできます。
一度『1)Your Logo』と『2)Edit AutoFill』を調整してしまえば
他のプリセット ▶︎ コンポジションを開くだけで全ての設定が反映されます。
最後に
『AutoFill』以外にも購入をおすすめできる有料プラグインや有料スクリプトはたくさんあります。
*『After Effects』で使えるおすすめの有料プラグインやスクリプトをまとめた記事はこちら⬇︎⬇︎
『After Effects』で使えるおすすめの無料プラグインや無料スクリプトをまとめた記事はこちら⬇︎⬇︎
以上、最後まで読んでいただきありがとうございました(=゚ω゚)ノ