
Adobe Premiere Pro 51

『Manifesto』というスクロールアニメーションが作れる無料プラグインをインストールしたんですが…使い方がイマイチよくわからず困っていますヽ(´o`;
確かに『Premiere Pro』版のチュートリアルは海外のしかないかもー、元々『Final Cut Pro X』のプラグインだしね〜♪( ´θ`)ノ

そうなんですね!! ぜひ使ってみたいので詳しく解説していただけないでしょうか |ω・`)チラッ
意外と便利なプラグインだからみんなに知ってほしいしねー
よしわかった!!『Manifesto』を徹底解説してみるよ٩( ᐛ )و
『Adobe Premiere Pro』で14種類の便利なプラグインを無料で使うことができる『FxFactory』。
今回は『FxFactory』が提供している無料プラグインで簡単にスクロールアニメーションが作れる『Manifesto』の機能や使い方を徹底解説していきたいと思います。
『FxFactory』では編集の作業効率を上げてくれる無料プラグインがたくさんあるので、『Manifesto』以外でも使ってみたいものがあれば、ぜひインストールして使ってみてくださいね。
*『FxFactory』14種類の便利なプラグインが無料で使える『FxFactory』を徹底解説した記事はこちら⬇︎⬇︎
目次
『Manifesto』とは!?

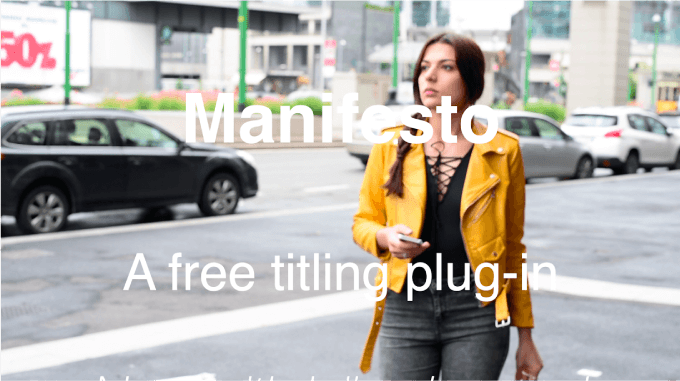
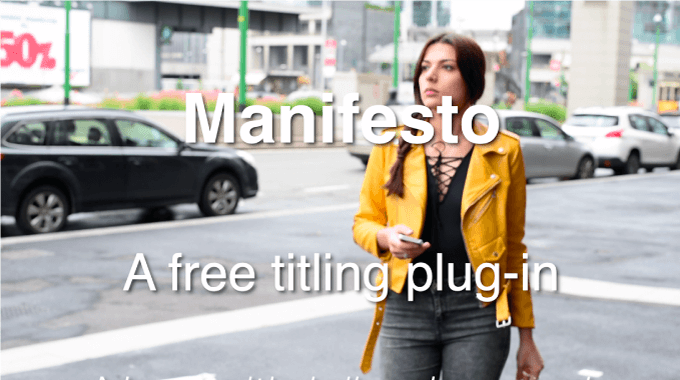
『Manifesto』はタイトルロールのようなスクロールアニメーションを簡単に作ることができる無料プラグインになります。
| ホストアプリ | Premiere Pro,After Effects,FCPX,Motion |
| 料金 | 無料 |
| 利用期限 | なし |
| Apple and Intel processors(M1) | 利用可能 |
一々キーフレームを設定しなくても、テキストを打ち込む、またはテキストファイルをインポートして、カラーやフォント、サイズや位置、カーニングなどをお好みで調整するだけで簡単にロールアニメーションを作ることができます。

『Premiere Pro』の自動翻訳機能で書き出したテキストファイル(.txt)や『Vrew』で作ったテロップテキストをSRTファイルで書き出して『Manifesto』に読み込めば、スクロールする台本が作れますね^ ^ 【インポート方法はこちら】
他にもドロップシャドウを入れたり画像も貼り付けることができますし、マスククリップを追加して、テキストにマスクを切ることもワンボタンでできちゃいます。
さらに『After Effects』の標準機能でお馴染みのモーションブラー機能つき!!
『Manifesto』ではロールアニメーションだけではなくて、静止したタイトルアニメーションを作成する機能もついます。こちらでも簡単にテキストにマスクをきったりすることができます。
さらに『Manifesto』を適用して調整した設定をプリセットファイル(.fxprest)として保存したり共有することができちゃいます。
無料とは思えない… 【『.fxpreset』を共有する方法はこちら】
*『Manifesto』のトレーラーです。『Manifesto』がどのようなプラグインなのか知ることができます⬇︎⬇︎
『Manifesto』の機能と使い方
- 『Manifesto』の概要
✔︎『Manifesto Roll/Crawl』
✔︎『Manifesto Static』 - 『Presets』
✔︎『Save As…』 - 『Text』
✔︎『Type』
✔︎『Source』
✔︎『Width & Horizontal』&『Fade In/Out』 - 『Animation』
✔︎ Timing ▶︎『Duration of the clip』
✔︎ Timing ▶︎『Duration in seconds』
✔︎ Timing ▶︎『Progress via keyframes』 - 『Style』
✔︎『Font Zoom』
✔︎『Allow Ligatures』
✔︎『Capitalize』
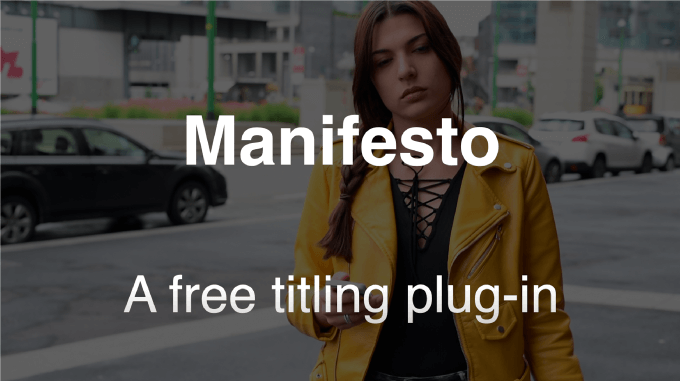
✔︎『Remove All Bold』
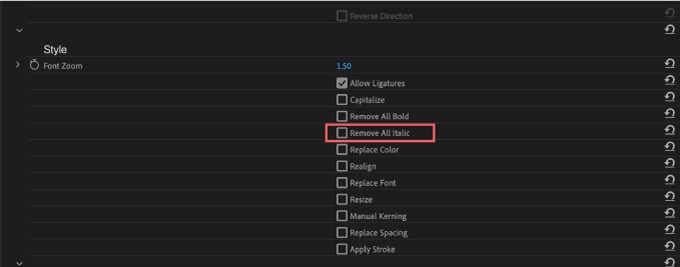
✔︎『Remove All Italic』
✔︎『Replace Color』
✔︎『Realign』
✔︎『Replace Font』
✔︎『Resize』
✔︎『Manual Kerning』
✔︎『Replace Spacing』
✔︎『Apply Stroke』 - 『Drop Shadow』
- 『Mask』
✔︎『Mask Extraction』
✔︎『Blur Mask』
✔︎『Invert Mask』 - 『Quality』
✔︎『Motion Blur』
✔︎『Shutter(Angle)』&『Shutter(Offset)』
✔︎『Deflicker』
✔︎『Composite on Original』
『Manifesto』の概要
まず最初に『Manifesto』の大まかな概要(使う流れ)を簡単に解説しておきます。
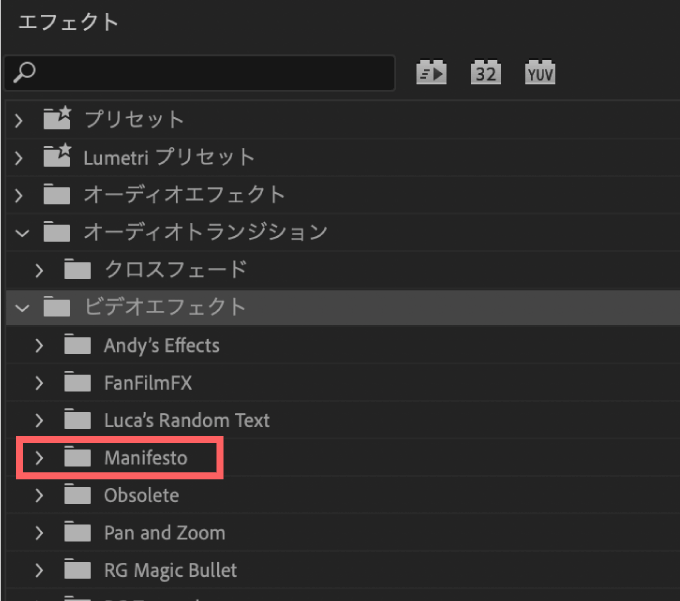
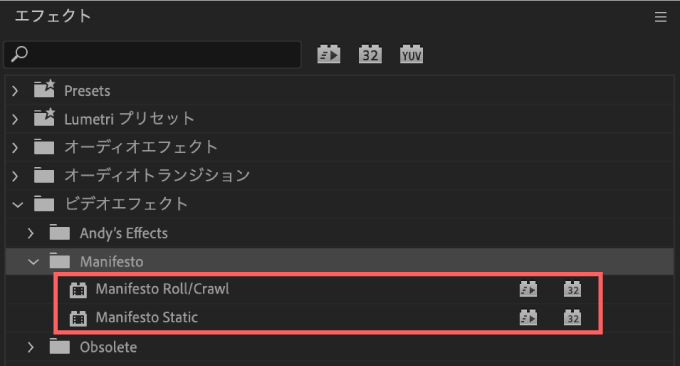
『Manifesto』を『Premiere Pro』へインストールするとエフェクト▶︎ビデオエフェクトに『Manifesto』が表示されるようになります。
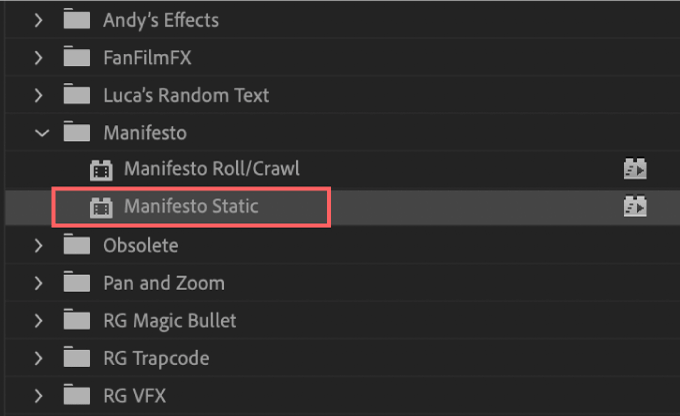
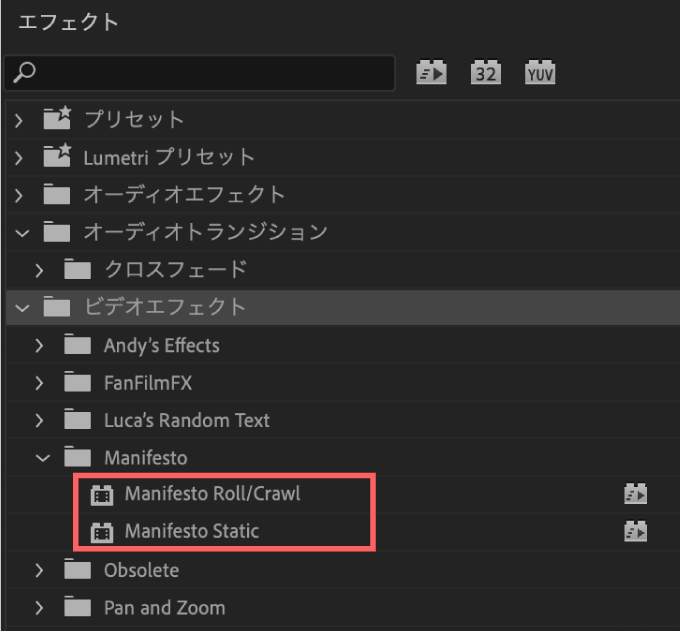
『Manifesto』は『Manifesto Roll/Crawl』と『Manifesto Static』の2種類があります。
『Manifesto Roll/Crawl』▶︎ 縦か横方向にスクロールするアニメーションの作成
『Manifesto Static』 ▶︎ 静的なタイトル作成
以上の用途で使い分けます。
『Manifesto Static』はテキストにチャチャっとマスクを切りたいときに使うと便利ですv( ̄∇ ̄)v
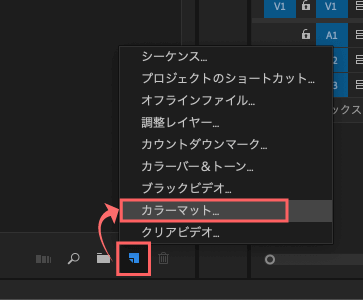
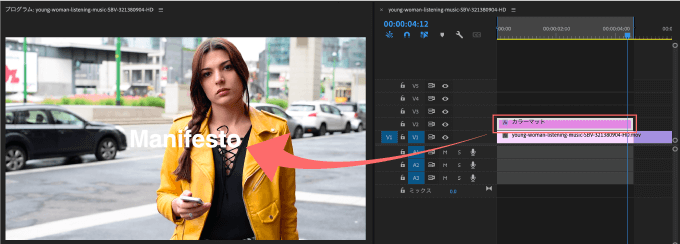
『Manifesto Roll/Crawl』or『Manifesto Static』はシーケンス内の既存のビデオクリップに直接ドラッグ&ドロップで適用できますが、『カラーマット』を作成して適用した方がスクロールアニメーション専用クリップとして尺やタイミングなどプロパティの調整がしやすいのでおすすめです。
*【クリップに直接『Manifesto』を適用して、背景が真っ黒になったときの解決方法はこちら】
調整レイヤーでは機能しませんd( ̄  ̄;)
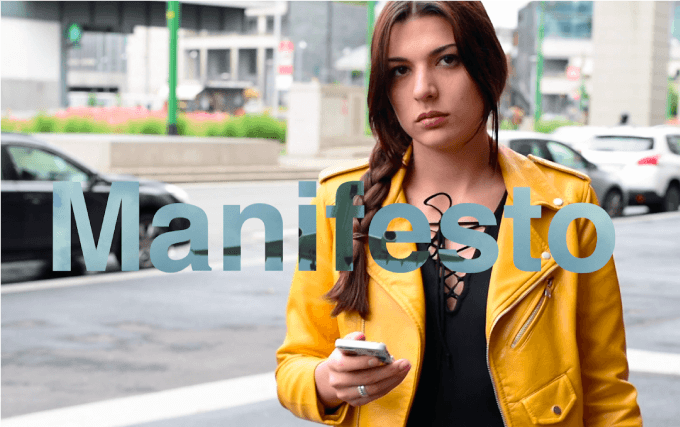
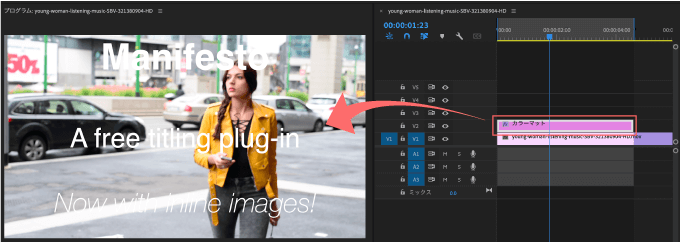
作成したカラーマットに『Manifesto Roll/Crawl』を適用するとテキストが表示されます。
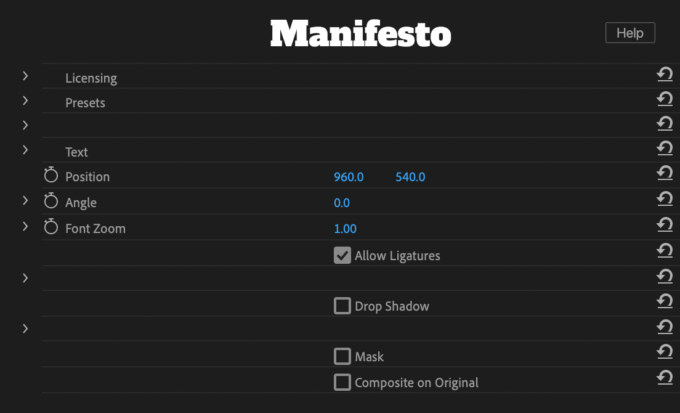
『Manifesto Roll/Crawl』を適用したクリップを選択した状態で、エフェクトコントロールパネルの『Manifesto Roll/Crawl』からText ▶︎ Edit を選択すると
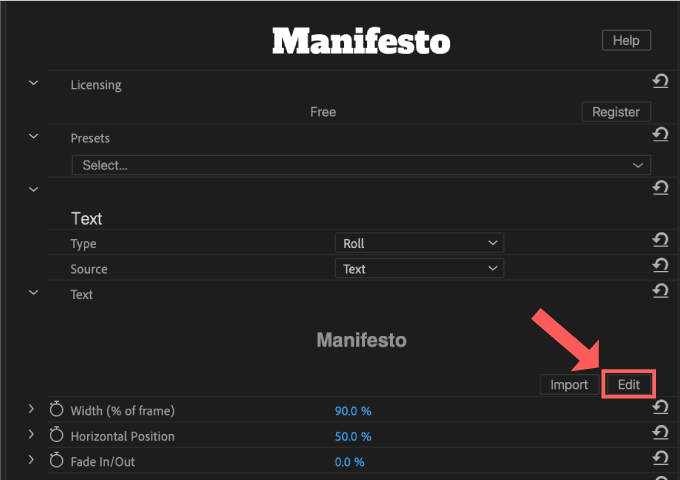
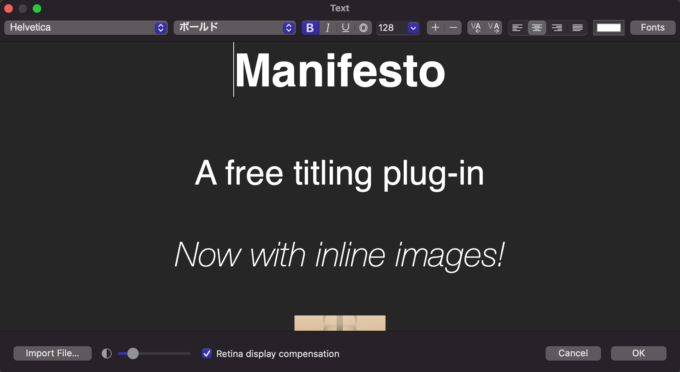
テキストエディターが表示されるので、こちらでテキストを変更したり画像をドラッグ&ドロップで貼り付けることができます。
テキストを調整し終わったらあとは幅やスクロールのタイミングなど各プロパティーを微調整していきます。
各プロパティの詳細設定はあとで1つずつ徹底解説していきます(゚∀゚)
『Manifesto Static』はシーケンス内の既存のクリップに直接ドラッグ&ドロップで適用できますが、『カラーマット』を作成して適用した方がクリップの長さを自由に変更できるので使いやすいです。
調整レイヤーでは機能しませんd( ̄  ̄;)
作成したカラーマットに『Manifesto Static』を適用するとテキストが表示されます。
『Manifesto Static』を適用したクリップを選択した状態で、エフェクトコントロールパネルの『Manifesto Static』からText ▶︎ Edit を選択すると
テキストエディターが表示されるので、こちらでテキストを変更したり画像をドラッグ&ドロップで貼り付けることができます。
テキストを調整し終わったらあとはフォントやカラー、サイズや位置など各プロパティーを微調整していきます。
『Manifesto Static』の設定項目は『Manifesto Roll/Crawl』とほぼ同じです(゚∀゚)
『Presets』
『Presets』では3種類のテキスト+スクロールのパターンを適用することができます。
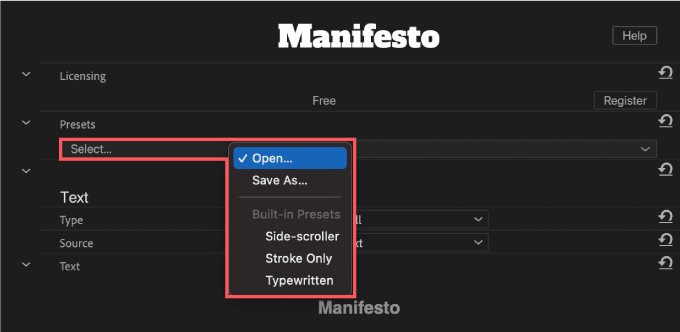


『Manifesto Roll/Crawl』ではプリセットが3種類ありますが『Manifesto Static』はプリセットがありませんd( ̄  ̄)
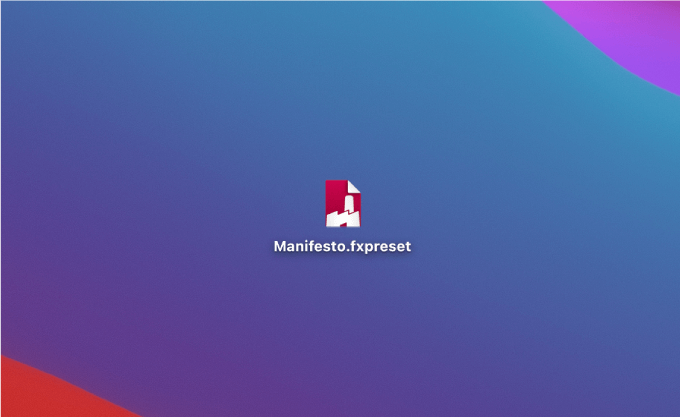
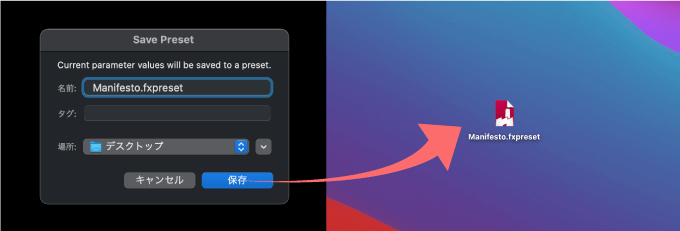
『Save As…』では自身で調整した『Manifesto』のプロパティー設定をファイル (.fxprest)として書き出して保存したり共有することができます。
『Manifesto』のプロパティーを調整し終わったら、Presets ▶︎ Save As…をクリックすると
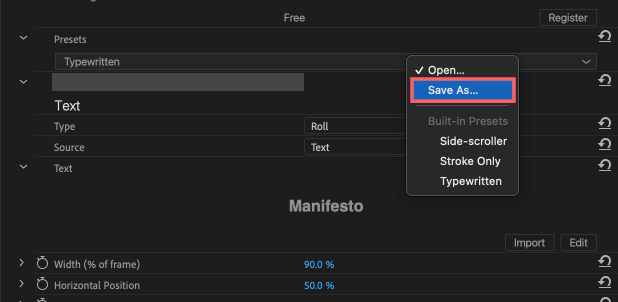
『Save Preset』パネルが表示されるのでファイル名の入力と保存先を指定して保存をクリックすると『.fxpreset』ファイルが書き出されます。
他のプロジェクトで 『Manifesto』を適用してから、エフェクトコントロールパネルのPreset ▶︎ Open…を選択して、書き出しておいた『.fxpreset』を選択して開くをクリックすると、『Manifesto』 の設定をインポートすることができます。

よく使用する設定はプリセットを書き出しておくと便利ですねd( ̄∇ ̄)
『Text』
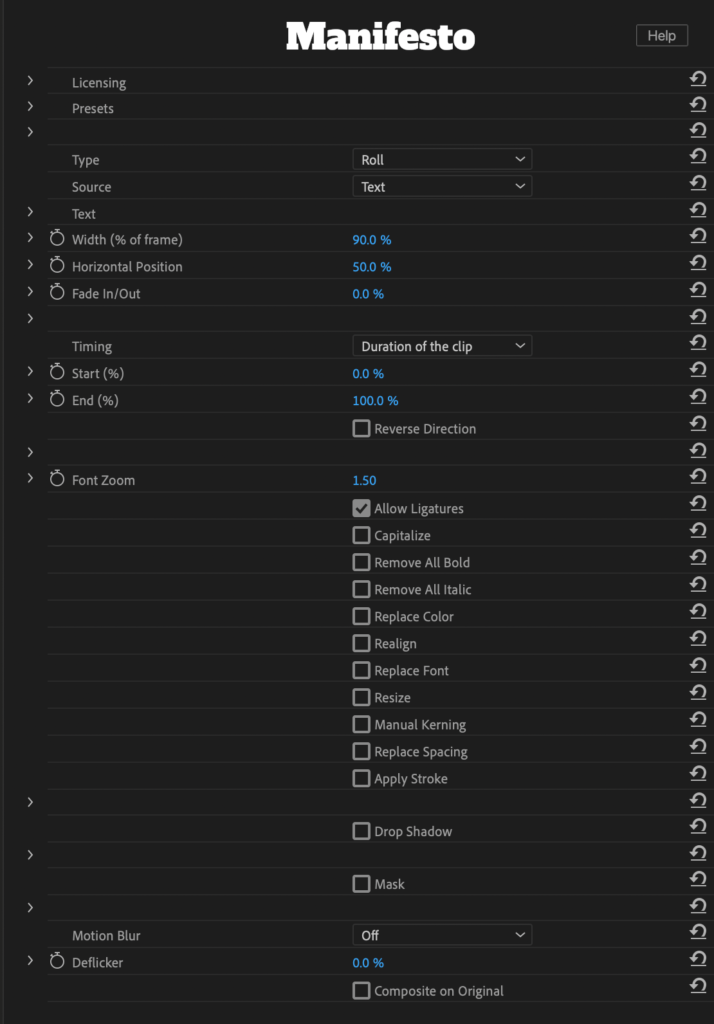
『Text』ではスクロールする向きやテキストの編集やインポート、位置や幅、フェードの調整などができます。
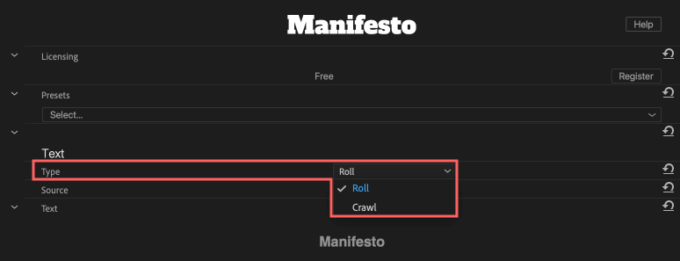
『Type』ではテキストがスクールする向きを設定することができます。
Text ▶︎ Type から2方向設定することができます。
Roll ▶︎ 縦方向へスクロール
Crawl ▶︎ 横方向へスクロール
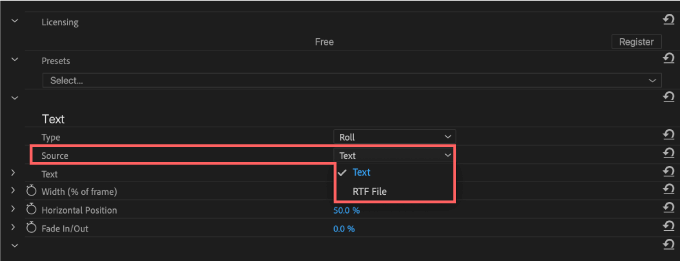
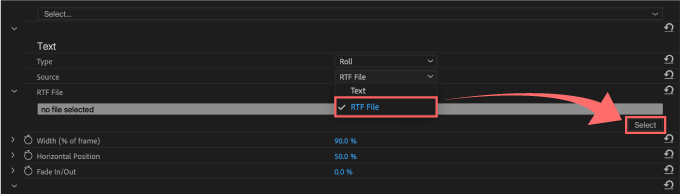
『Source』はテキストの編集や外部からテキストファイル(.rtf)をインポートすることができます。
Text ▶︎ Source ▶︎ Text でテキストエディターで編集
Text ▶︎ Source ▶︎ Text でRTF File で.rtfファイルをインポート
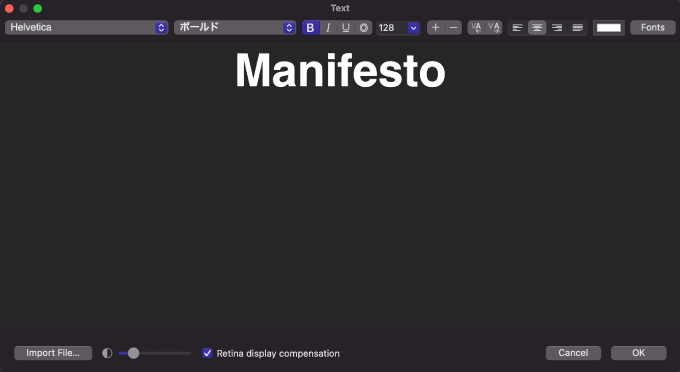
Text ▶︎ Source ▶︎ Text を選択して、1段下にあるText ▶︎ Editを選択するとテキストエディターが開きます。
エディターではエキストやカラー、フォント、サイズなどなど編集・調整することができます。
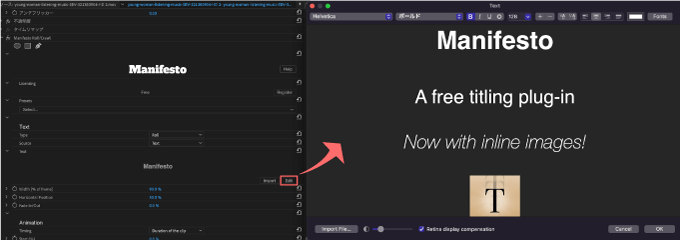
画像も貼り付けることができますd( ̄  ̄)
Text ▶︎ Editボタンの左側にある『Import』ボタンを押すと、テキストファイルをインポートすることができます。
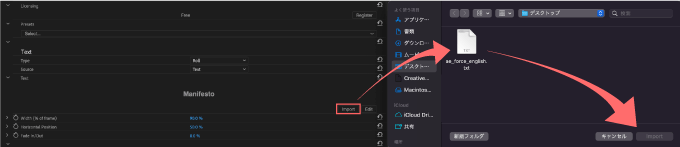
現在『Manifesto』へインポートできることを確認できているファイルフォーマットは.txt、.rtf、.srt、.csvになります( ̄  ̄)
音声をテキスト化してテキストアニメーションやスクロールする台本などにも活用できますね。
『Adobe Premiere Pro』自動翻訳機能 ▶︎ .rtf or .csv のエクスポート ▶︎ 『Manifesto』へインポート
『Vrew』▶︎ .srtファイルのエクスポート▶︎ 『Manifesto』へインポート
*『Adobe Premiere Pro』で使える自動翻訳機能について解説した記事はこちら⬇︎⬇︎
Text ▶︎ Source ▶︎ Text でRTF File で.rtfファイルをインポートすることができます。
先ほど紹介したText ▶︎ Importボタンからでも『.rtf』ファイルを読み込むことはできます。こちらの『RTF File』との違いが分かりません…_(┐「ε:)_
Text ▶︎ Width(% of frame)=テキストの幅を調整
Text ▶︎ Horizontal Position =水平位置を調整
Text ▶︎ Fade In/Out =縦スクロール(Roll)なら上下のフェード、横スクロール(Crawl)なら左右のフェードを調整

『Width(% of frame)』を100%に設定していると『Horizontal Position』は調整できません(゚∀゚)
『Animation』
『Animation』 でアニメーションのコントロールを調整することができます。
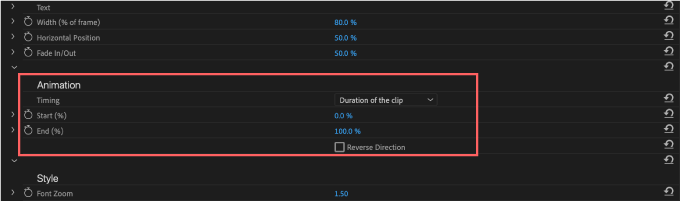
『Animation』▶︎『Timing』ではタイミングを調整する方法を3種類から選択することができます。
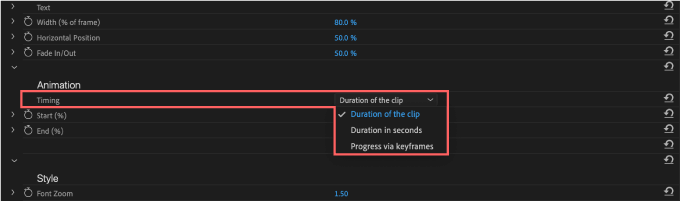
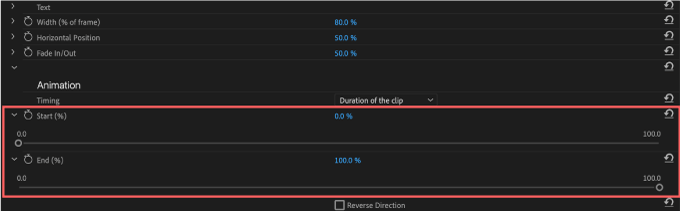
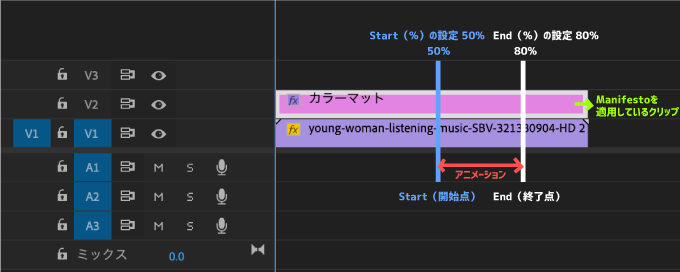
『Duration of the clip』ではロールアニメーションのStart(開始点)とEnd(終了点)をクリップの尺に合わせてパーセンテージで調整することができます。
例えばStart[%]を50%、End[%]を80%に設定したとします。
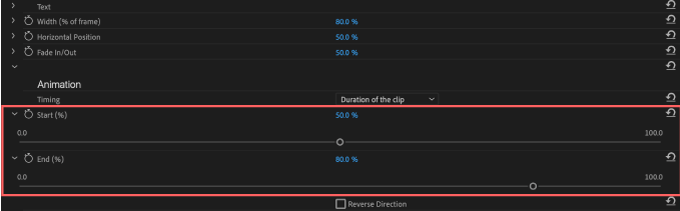
すると『Manifasto』を適用しているクリップ(カラーマット)のStart 50%(開始点)〜 End 80%(終了点)までの間でロールアニメーションがつきます。

%でアニメーションを調整するのは難しいので、秒数で調整できる『Duration in seconds』で設定した方が微調整がしやすいです。次で解説しますd( ̄  ̄)
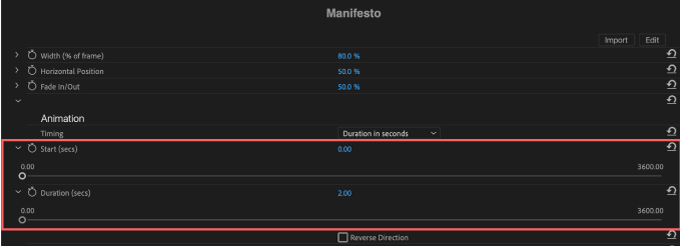
『Duration in seconds』は『Start(secs)』と『Duration(secs)』▶︎ 秒数でアニメーションを調整することができます。
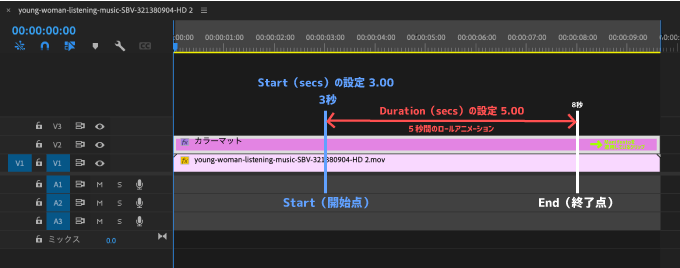
例えばStart(secs)を3.00(秒)、Duration(secs)を5.00秒に設定したとします。
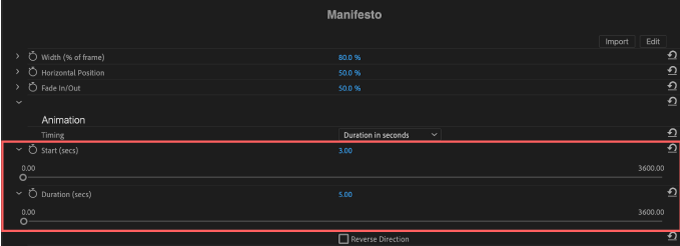
すると『Manifesto』を適用しているクリップの3秒からアニメーションが開始して、5秒間で停止▶︎クリップの8秒のところで停止します。
『Progress via keyframes』はクリップの長さ(尺)に関係なくアニメーションの開始から終了までを100%としてキーフレームで調整する設定になります。
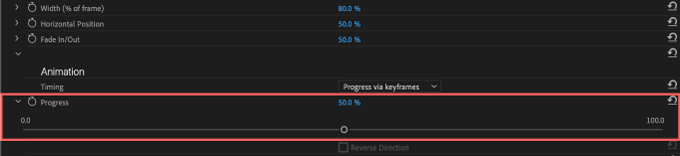
キーフレームで自由にロールアニメーションのタイミングをコントロールできるので『Duration of the clip』や『Duration in seconds』の設定方法がよくわからない人は、『Progress via keyframes』設定がシンプルで調整しやすいですd( ̄  ̄)
『Style』
『Style』では主にテキストのデザインを細かく調整ができます。
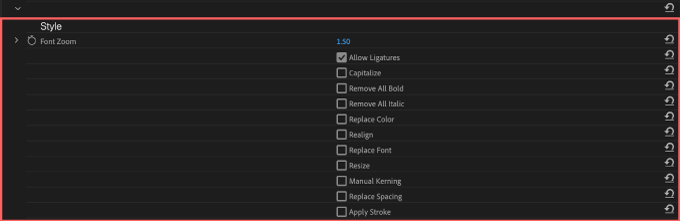
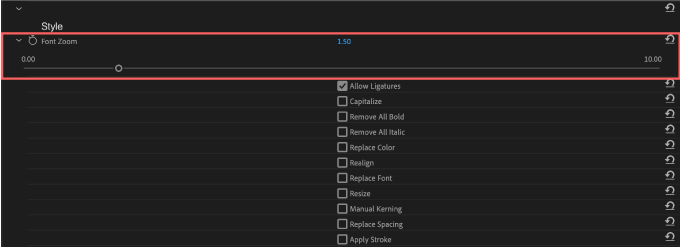
『Font Zoom』はフォントの拡大・縮小ができます。
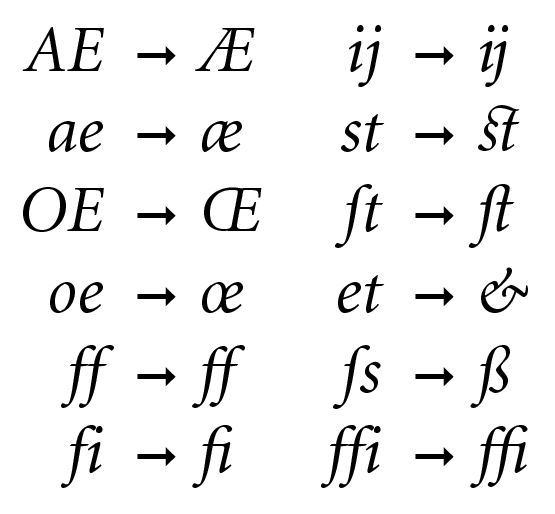
『Allow Ligatures』は『合字』の読み込みを許可するかどうかを設定します。
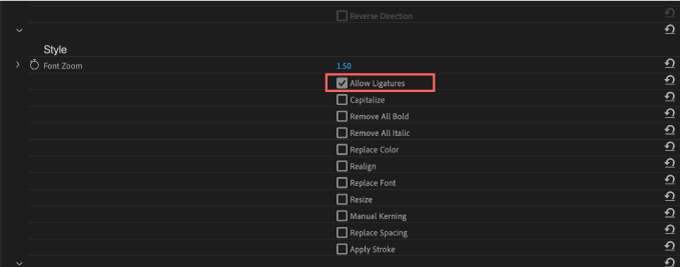
デフォルトでON(許可する)になっているので、特にOFFにする必要もないかと思いますd( ̄  ̄)
『合字』とは複数の文字を合成して一文字にしたもので抱き字、連字とも言われます。
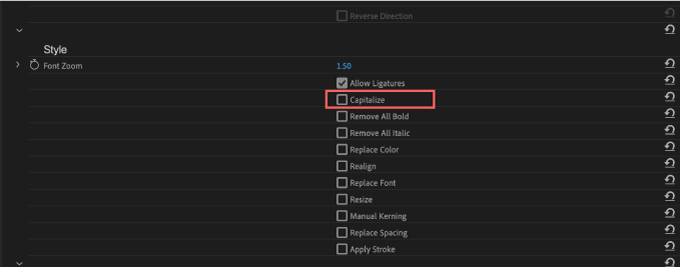
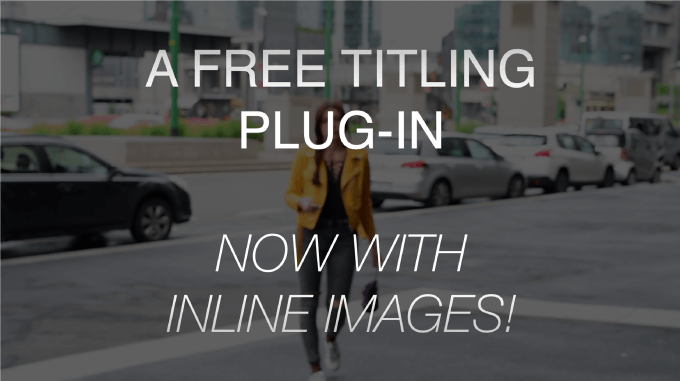
『Capitalize』を『ON』するとテキストを全て大文字に切り替えることができます。

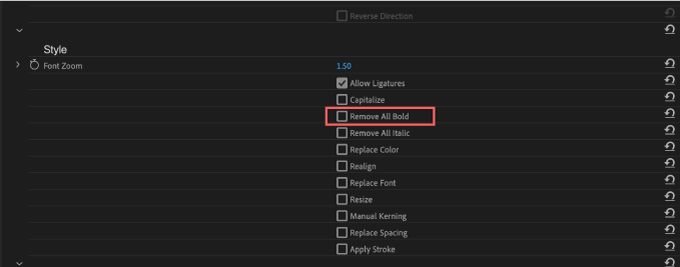
『Remove All Bold』をONにするとテキスト中に含まれる全ての太字を解除することができます。
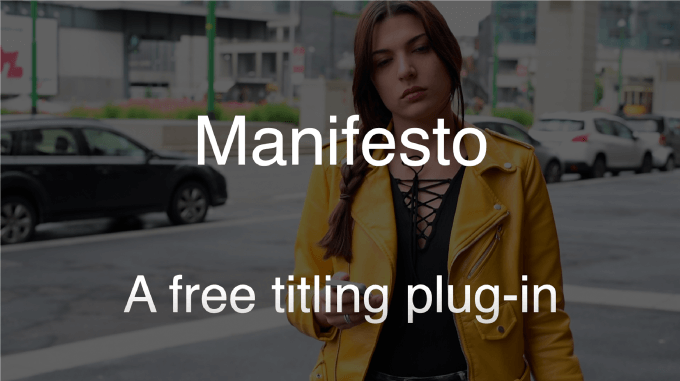
『Remove All Italic』をONにするとテキスト中に含まれる全てのイタリック書体(斜体文字)を解除することができます。


『Replace Color』をONにするとテキストのカラー(Text Color)とテキストの不透明度(Text Opacity)を調整できるようになります。

『Realign』ではテキストの位置をCenter(真ん中)、Right(右寄せ)、Left(左寄せ)、Justified(正当化)の4つから選択することができます。
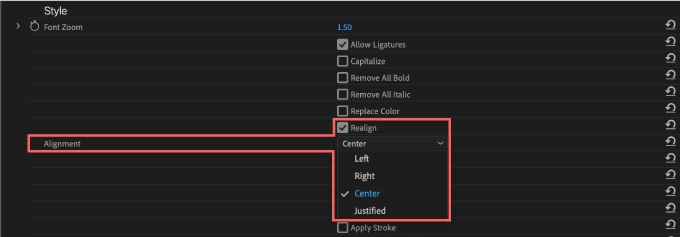


『Justified(正当化)』の使い方はイマイチよく分かりません…_(┐「ε:)_
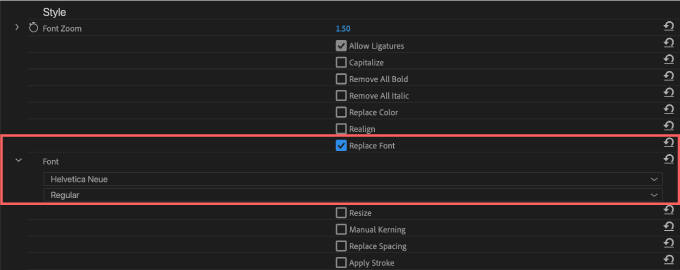
『Replace Font』をONにするとフォントを変更することができます。
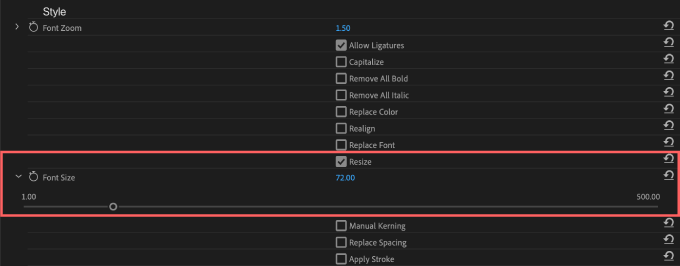
『Resize』ではフォントのサイズを調整することができます。
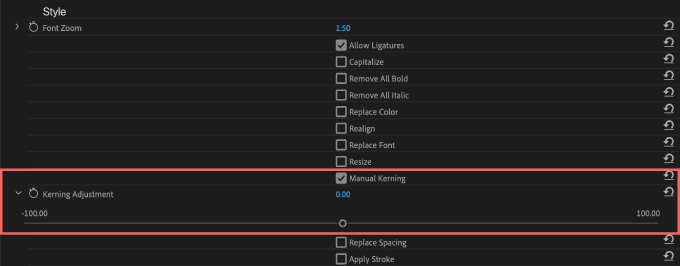
『Manual Kerning』をONにするとカーニング(文字間隔)を調整することができます。
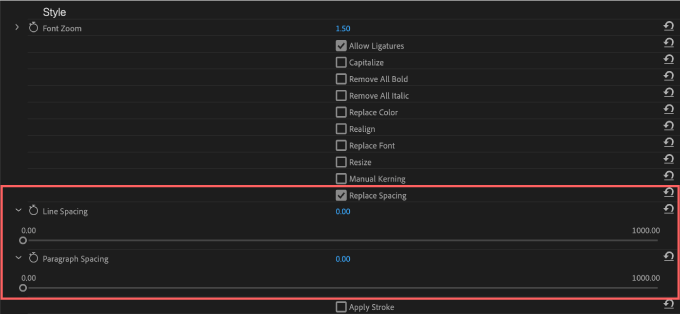
『Replace Spacing』をONにすると行間を調整することができます。
『Line Spacing』▶︎ 行間を拡大・縮小
『Paragraph Spacing』▶︎ 段落毎に行間を拡大・縮小
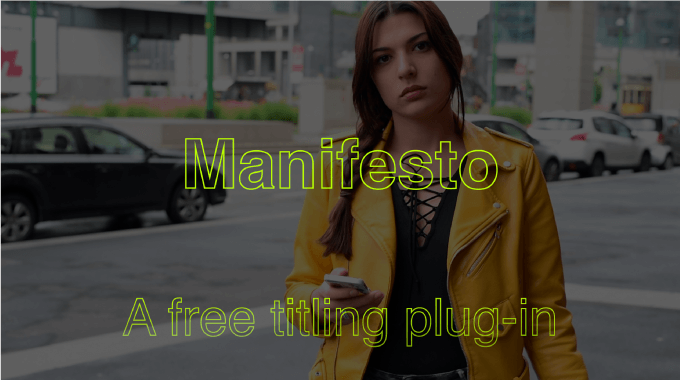
『Apply Stroke』をONにするとテキストにアウトライン(境界線)をつけることができます。
『Stroke Width』▶︎ アウトライン(境界線)の幅
『Stroke Color』▶︎ アウトライン(境界線)のカラー
『Stroke Opacity』▶︎ アウトライン(境界線)の不透明度
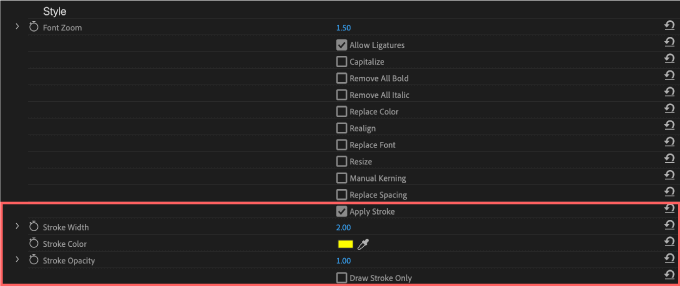
『Draw Stroke Only』をONにすると塗りがなくなりアウトライン(境界線)のみ表示されます。


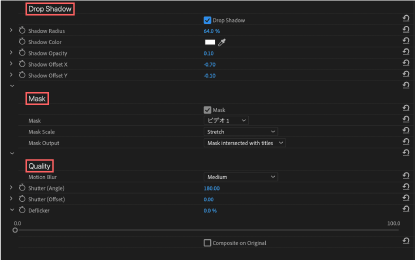
『Drop Shadow』
『Drop Shadow』ではテキストにドロップシャドウをつけることができます。
『Shadow Radius』▶︎ 影の広がりを調整
『Shadow Color』▶︎ 影の色を調整
『Shadow Opacity』▶︎ かげの不透明度を調整
『Shadow Offset X』▶︎ 影をX軸に移動
『Shadow Offset Y』▶︎ 影をY軸に移動

『Mask』
『Mask』ではロールやクロールするテキストに簡単にマスクをきることができます。
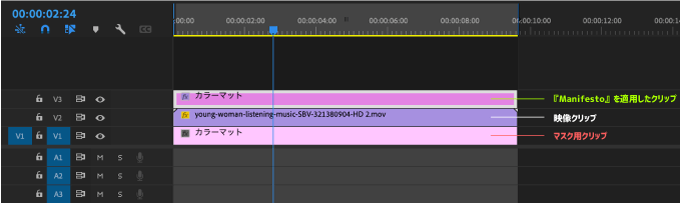
例えば、マスク用のクリップを用意(今回は赤のカラーマットを用意)して、ビデオ1のセクションに配置します。
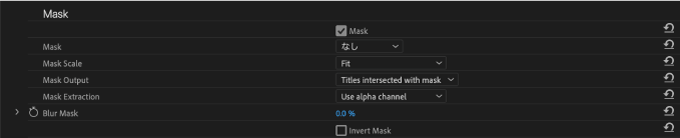
『Mask』の設定を以下のように設定します⬇︎⬇︎
『Mask』▶︎ ビデオ1
『Mask Scale』▶︎ Fit
『Mask Output』▶︎ Mask intersected titles

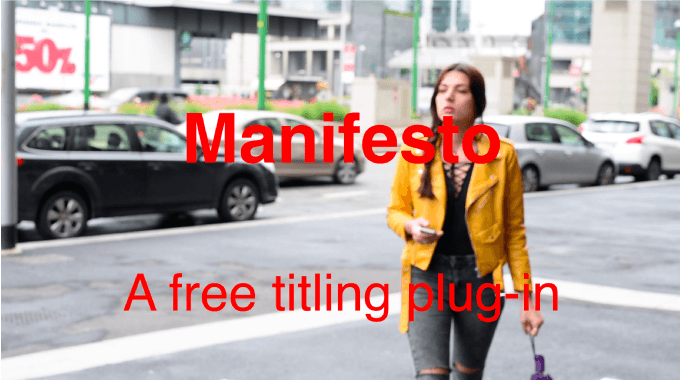
するとテキストにマスクがきられて、ビデオ1(ビデオセクション)に配置したクリップ(赤のカラーマット)がテキストに反映されます。
ビデオ1(ビデオセクション)に映像クリップを配置すると、その映像がテキストに反映されます。

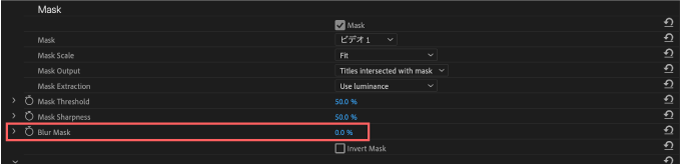
『Mask Extraction』の設定を『Titles intersected with mask』に設定すると

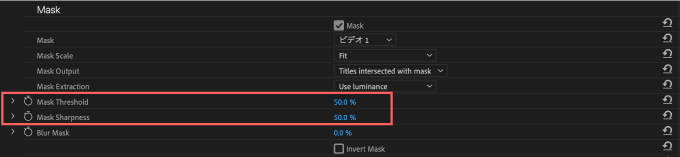
『Mask Extraction』設定でマスクを抽出する対象を『Use alpha channel』▶︎ アルファチャンネルを使用する、もしくは『Use luminance』▶︎ 輝度を使用するか選択することができます。

『Use luminance』では『Mask Threshold(しきい値)』と『Mask Sharpness(シャープネス)』を調整することができます。
『Blur Mask』はその名の通りマスククリップにブラーをかけることができます。
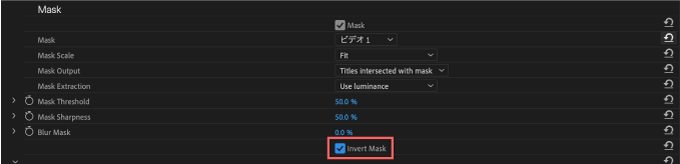
『Invert Mask』はマスクを反転させることができます。
『Quality』
『Motion Blur』はアニメーションの動きにブラーをつけてくれる機能になります。


『Motion Blur』をかける場合には『Low』『Medium』『High』の3段階でかけることができます。

素早いアニメーションの動きが滑らからに見えますが、ロールアニメーションをここまで早く動かすことはないので『Motion Blur』をつけたとしても『Low』くらいでいいかと思います。


『Motion Blur』を強くかければかけるほどレンダリングが遅くなってしまうので注意ですd( ̄  ̄;)
『Shutter(Angle)』では『Motion Blur』のかかり具合を調整することができます。
Shutter(Offset)では『Shutter(Angle)』でかかったブラーをさらにズラす(広げる)ことができます。

『Motion Blur』OFFの場合には『Shutter(Angle)』と『Shutter(Offset)』は表示されません。
あと、『Shutter(Angle)』の数値が0の場合はブラーが全くかかってない状態なので、『Shutter(Offset)』は機能しません。
『Deflicker』はロールアニメーションのちらつきを軽減する機能になります。

『Manifesto』を適用したいビデオクリップにエフェクトから『Manifesto Roll/Crawl』or『Manifesto Static』をドラッグ&ドロップで適用すると
ビデオクリップが真っ黒になって『Manifesto』のテキストのみ表示されます。
エフェクトコントロールパネル▶︎『Manifesto』の一番下にある『Composite on Original』にチェックを入れると『Manifesto』を適用したビデオクリップの映像が表示されます。

Composite on Original ON

Composite on Original ON
ただ『カラーマット』を作成して適用した方が『Composite on Original』をONする必要はないですし、クリップの長さを自由に変更できて、尺やタイミングなどプロパティの調整がしやすいです。
最後に
今回は『FxFactory』が提供している無料プラグイン『Manifesto』の機能や使い方を解説しました。
他にも『FxFactory』が提供している無料プラグインで複数ありますので、興味のある方は無料プラグインをまとめて紹介した記事をぜひ読んでみてください⬇︎⬇︎
*『FxFactory』の無料プラグイン『Pan and Zoom』の機能や使い方を徹底解説した記事はこちら⬇︎⬇︎
『Adobe Premiere Pro(プレミアプロ)』で使える無料素材や無料プラグインを紹介した記事をたくさん書いてます。
*『Adobe Premiere Pro』で使える無料テンプレートや無料ツールをまとめて紹介した記事はこちら⬇︎⬇︎

*『Adobe Premiere Pro』で使える無料・有料のプラグインやスクリプトをまとめて紹介した記事はこちら⬇️⬇️
以上、最後まで見ていただいてありがとうございました(=゚ω゚)ノ